
I never knew comics could be something that would interest me so late in life. As I collected them, I needed something to help me organize them and help search for the books I wanted to read.
Komga has been that powerhouse application allowing me to create collections for specific comic companies and completely organize my collection into something beautiful to behold!
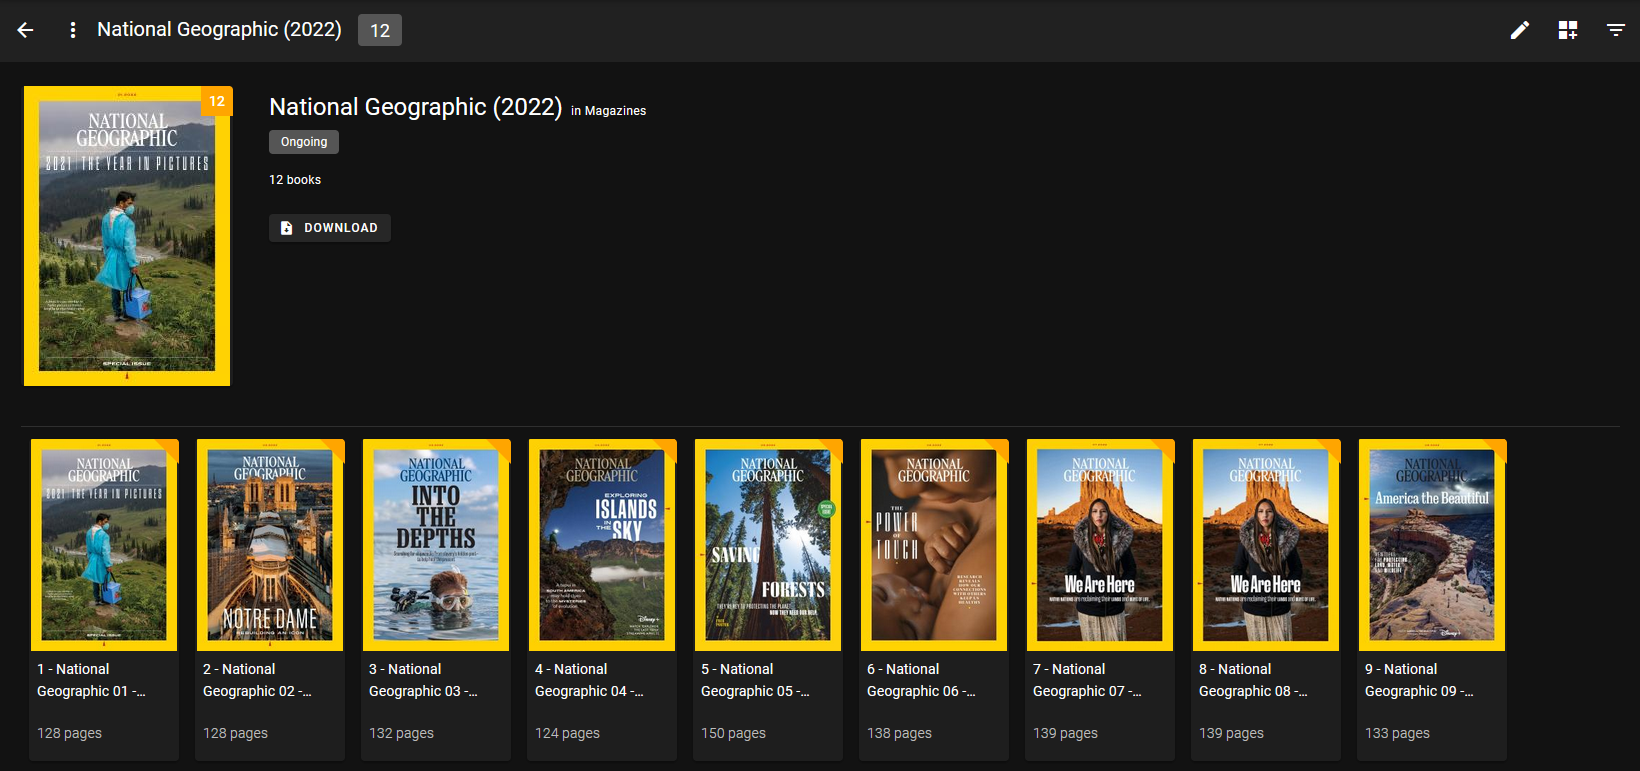
Komga is a free and open source comics/mangas server. You can even serve up magazines in PDF format!
cbl read listsI use this simple docker compose script to install Komga.
version: '3.3'
services:
komga:
image: gotson/komga
container_name: komga
volumes:
- /docker/komga/conf:/config
- /docker/komga/files:/data
ports:
- 8080:8080
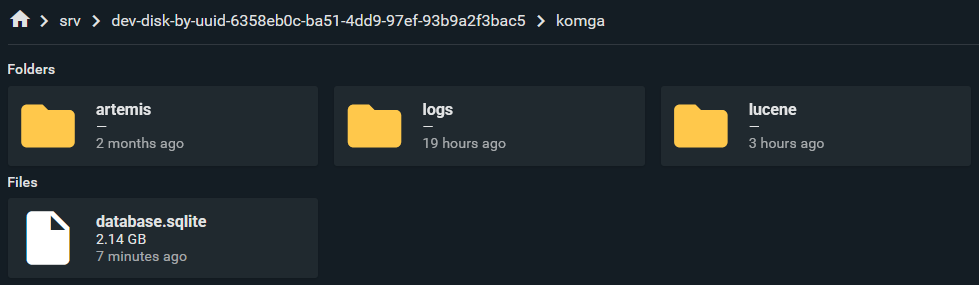
restart: unless-stoppedThe data directory will be where the comics will be scanned and added into Komga for consumption. Komga will create this file structure inside of the mapped config directory.
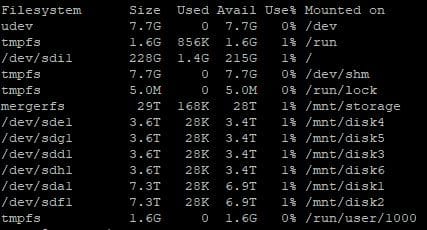
Komga uses SQLite as the database so I was quite concerned that it wouldn't scale well with thousands of comics. So far Komga has indexed over 81k books weighing in at 3.7TB and still performs very well much to my surprise!
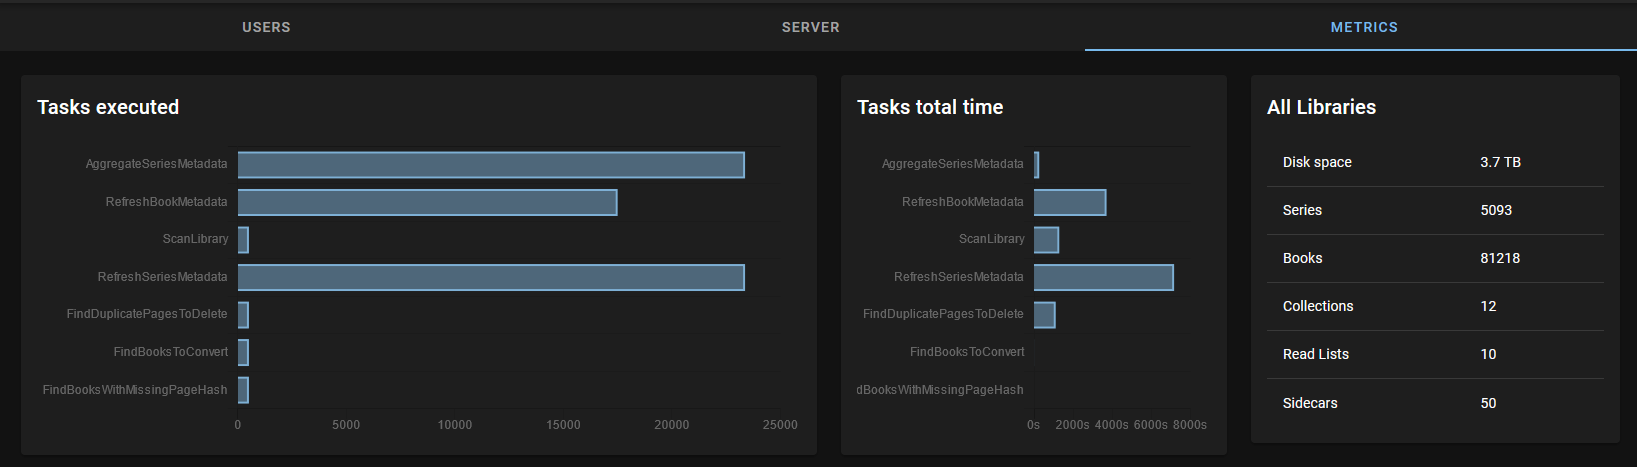
Komga has a very nice, detailed metrics page where you can view disk space, series count, book count, collection count, reading list count and sidecar count.
If you already have a huge collection of comics in the thousands, expect Komga to take time to scan them all in and display the metadata. It's best to add your comics manually a couple hundred at a time. Otherwise you may notice it will take over 24 hours to index thousands at once. It will still work, but you will need to be very patient and check the Komga container logs to make sure everything is working as it should.
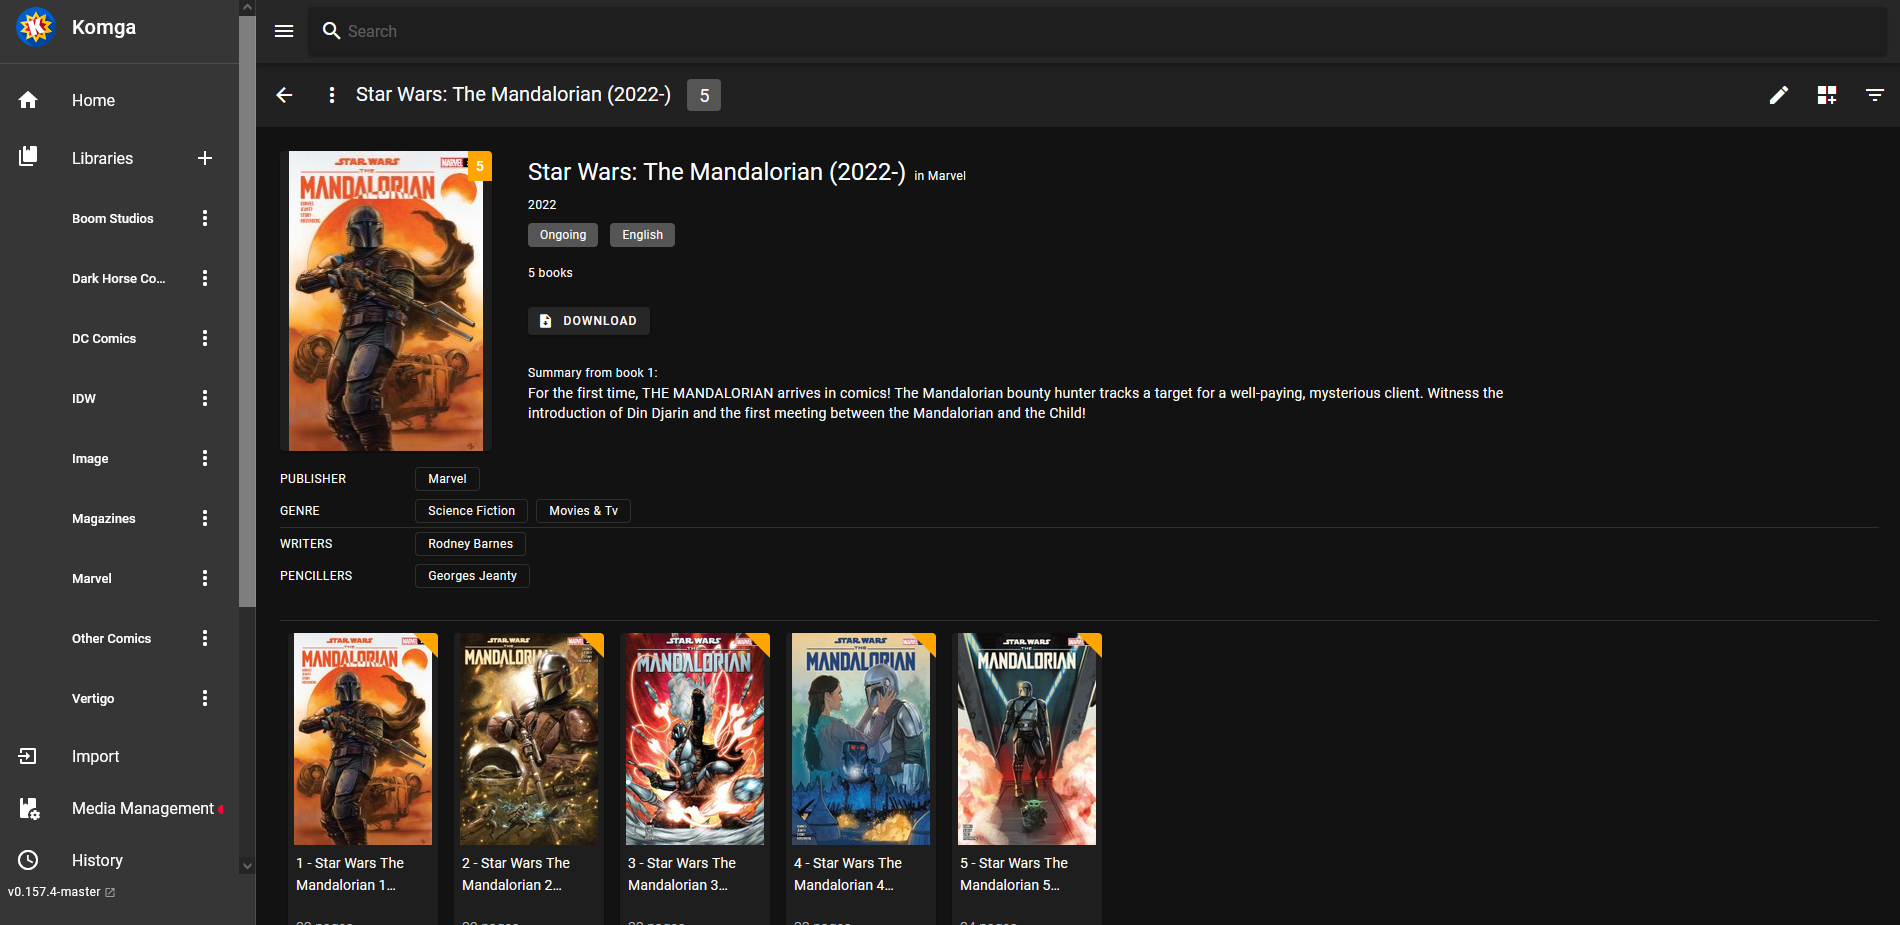
Komga is to comics as what Plex is to Movies and TV series. It will display your comic series with beautiful thumbnails and descriptions. It's important however that your files have metadata so Komga can store and display the information. Much like Movies in Plex.
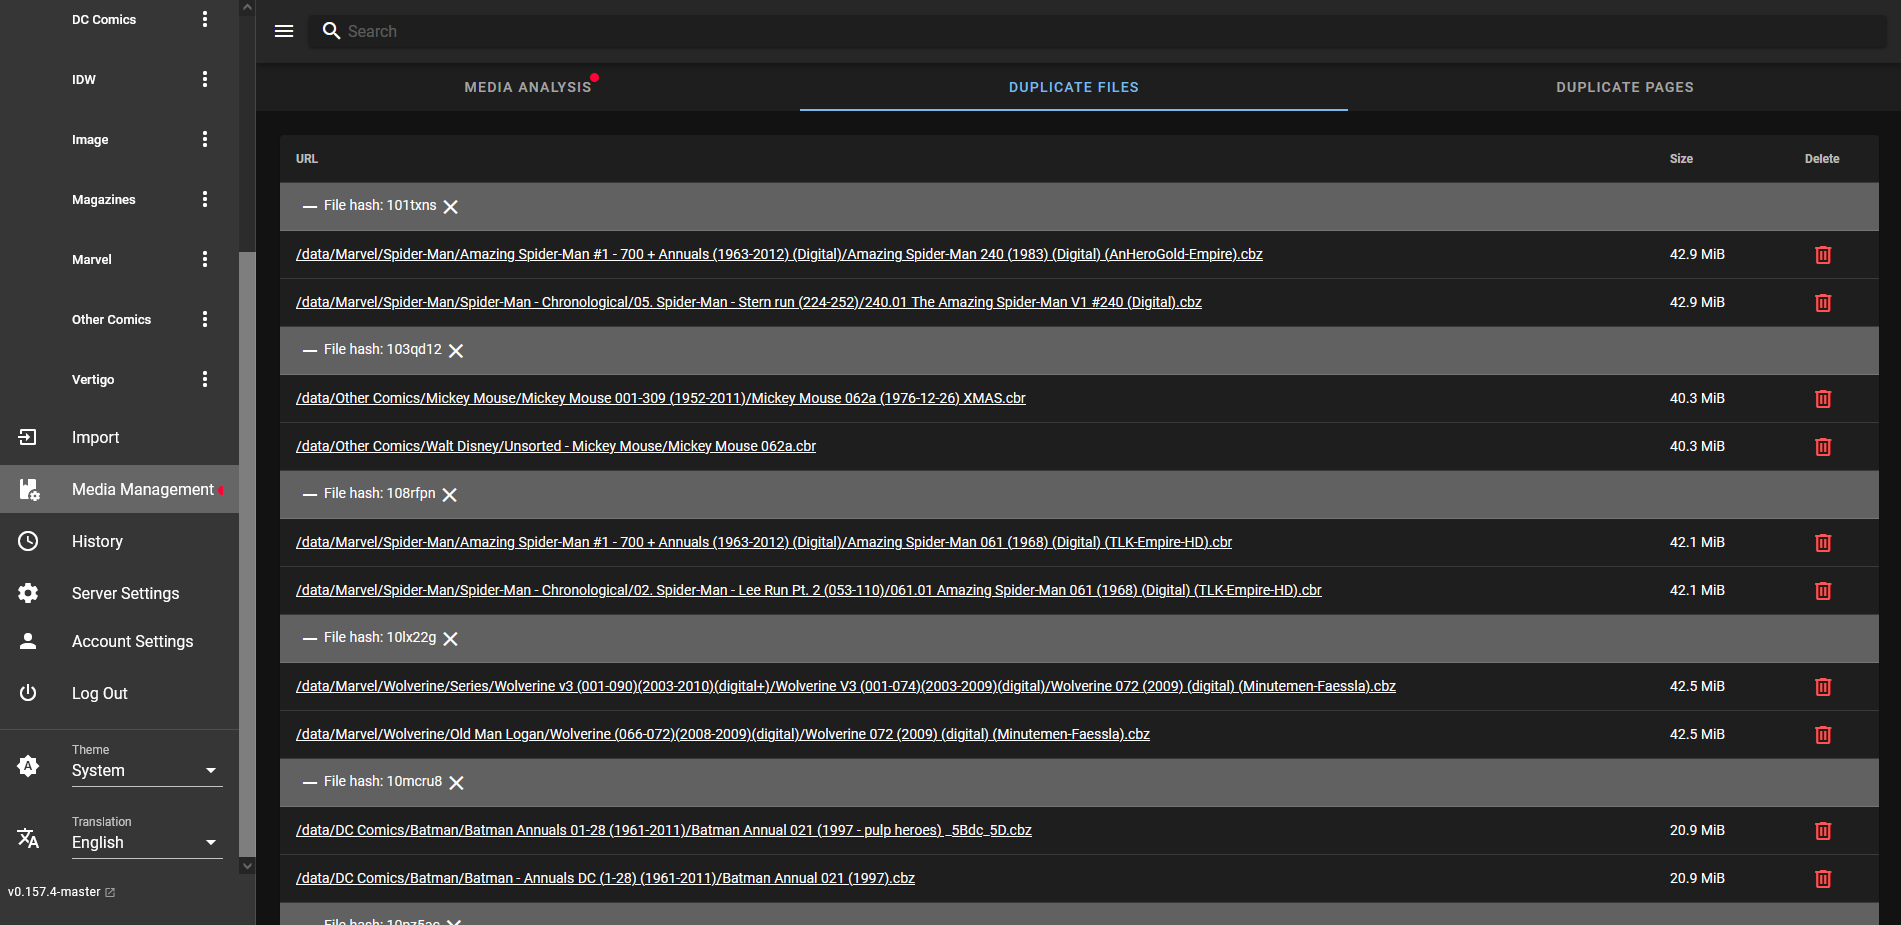
The duplicate file handler can be great to help you keep precious space open for more files. You can choose which file to delete right in the dashboard. Or keep them all!
Simply tap or click on the comic you want to read and it will open in a full screen browser window. Tap on the right side of the screen to turn the page or the left side to go back.

If you decide to stop reading at any point, Komga will automatically keep track of where you stopped reading so you can continue where you left off.

I found Komga to be a very good application to serve my comics. The mobile view is decent but the tablet view is something to behold. It truly looks amazing on a Samsung table and an iPad. The reading experience is just as if you are holding the book in your hand but more vivid colors in the art.
One thing I really want that Komga lacks is the ability to share books publicly without the need for a user account. Currently books can only be accessed by users and cannot be shared publicly. Other than that, I cannot complain!
If you find Komga interesting, be sure to try it out and give it a star on the Komga Github page!
";s:7:"attribs";a:0:{}s:8:"xml_base";s:0:"";s:17:"xml_base_explicit";b:0;s:8:"xml_lang";s:0:"";}}}}}i:1;a:6:{s:4:"data";s:0:"";s:7:"attribs";a:0:{}s:8:"xml_base";s:0:"";s:17:"xml_base_explicit";b:0;s:8:"xml_lang";s:0:"";s:5:"child";a:4:{s:0:"";a:6:{s:5:"title";a:1:{i:0;a:5:{s:4:"data";s:47:"Pinchflat - Simple Self-Hosted Youtube Archiver";s:7:"attribs";a:0:{}s:8:"xml_base";s:0:"";s:17:"xml_base_explicit";b:0;s:8:"xml_lang";s:0:"";}}s:11:"description";a:1:{i:0;a:5:{s:4:"data";s:177:"Pinchflat offers an uncomplicated approach to archiving YouTube content. It's designed for easy use and is self-hosted, ensuring simplicity and control over their stored videos.";s:7:"attribs";a:0:{}s:8:"xml_base";s:0:"";s:17:"xml_base_explicit";b:0;s:8:"xml_lang";s:0:"";}}s:4:"link";a:1:{i:0;a:5:{s:4:"data";s:28:"https://noted.lol/pinchflat/";s:7:"attribs";a:0:{}s:8:"xml_base";s:0:"";s:17:"xml_base_explicit";b:0;s:8:"xml_lang";s:0:"";}}s:4:"guid";a:1:{i:0;a:5:{s:4:"data";s:24:"660ac000fda5b9000188c9fd";s:7:"attribs";a:1:{s:0:"";a:1:{s:11:"isPermaLink";s:5:"false";}}s:8:"xml_base";s:0:"";s:17:"xml_base_explicit";b:0;s:8:"xml_lang";s:0:"";}}s:8:"category";a:1:{i:0;a:5:{s:4:"data";s:23:"Self Hosted Downloaders";s:7:"attribs";a:0:{}s:8:"xml_base";s:0:"";s:17:"xml_base_explicit";b:0;s:8:"xml_lang";s:0:"";}}s:7:"pubDate";a:1:{i:0;a:5:{s:4:"data";s:29:"Mon, 01 Apr 2024 15:22:10 GMT";s:7:"attribs";a:0:{}s:8:"xml_base";s:0:"";s:17:"xml_base_explicit";b:0;s:8:"xml_lang";s:0:"";}}}s:32:"http://purl.org/dc/elements/1.1/";a:1:{s:7:"creator";a:1:{i:0;a:5:{s:4:"data";s:6:"Jeremy";s:7:"attribs";a:0:{}s:8:"xml_base";s:0:"";s:17:"xml_base_explicit";b:0;s:8:"xml_lang";s:0:"";}}}s:29:"http://search.yahoo.com/mrss/";a:1:{s:7:"content";a:1:{i:0;a:5:{s:4:"data";s:0:"";s:7:"attribs";a:1:{s:0:"";a:2:{s:3:"url";s:81:"https://noted.lol/content/images/2024/04/self-hosted-pinchflat-main-noted.lol.jpg";s:6:"medium";s:5:"image";}}s:8:"xml_base";s:0:"";s:17:"xml_base_explicit";b:0;s:8:"xml_lang";s:0:"";}}}s:40:"http://purl.org/rss/1.0/modules/content/";a:1:{s:7:"encoded";a:1:{i:0;a:5:{s:4:"data";s:7612:"
There are lots of tools out there for saving videos from YouTube and other sites. Lately, I've been using Tube Archivist to download videos for my kids to watch later. It's been great for keeping an eye on what they're watching and making sure it's suitable for their age.
Tube Archivist is really handy, but I've been feeling like it's gotten too complicated for me lately. There are just so many features and options to navigate. So, I started looking for something more simple. That's when I stumbled upon this new alternative, Pinchflat! I was excited to give it a try and see if it's a better fit for what I need and boy was I glad I did!
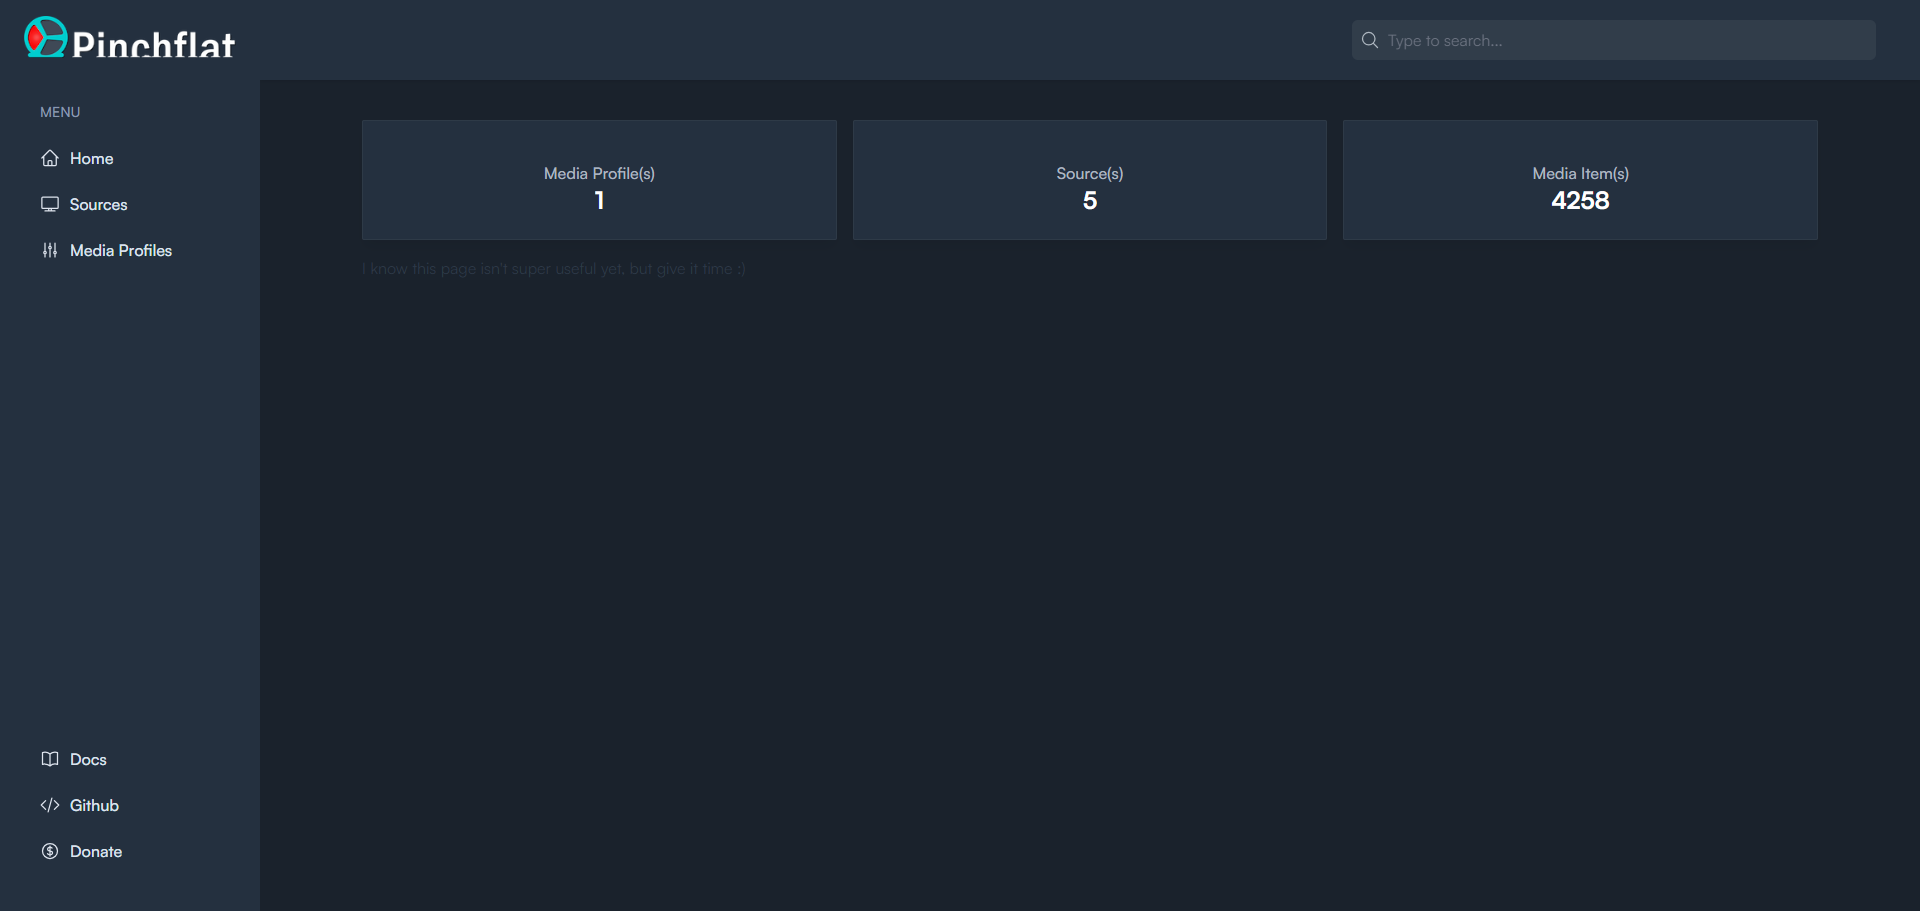
Pinchflat is an app you can host yourself that helps you download YouTube videos. It's made using yt-dlp and is meant to be really simple and easy to use. You basically tell it what kind of videos you want from YouTube channels or playlists, and it handles the downloading for you. Plus, it keeps checking for new videos regularly.
This app is perfect if you're into organizing your media for things like Plex, Jellyfin, or Kodi, or if you just want to make sure you always have your favorite videos saved.
But here's the thing: Pinchflat isn't great for grabbing one video here and there. It's built more for downloading a bunch of videos at once and keeping them all updated. Also, it doesn't play videos within the app itself. Instead, it saves them to your computer so you can watch them using a media center app like VLC, Emby, Jellyfin etc.
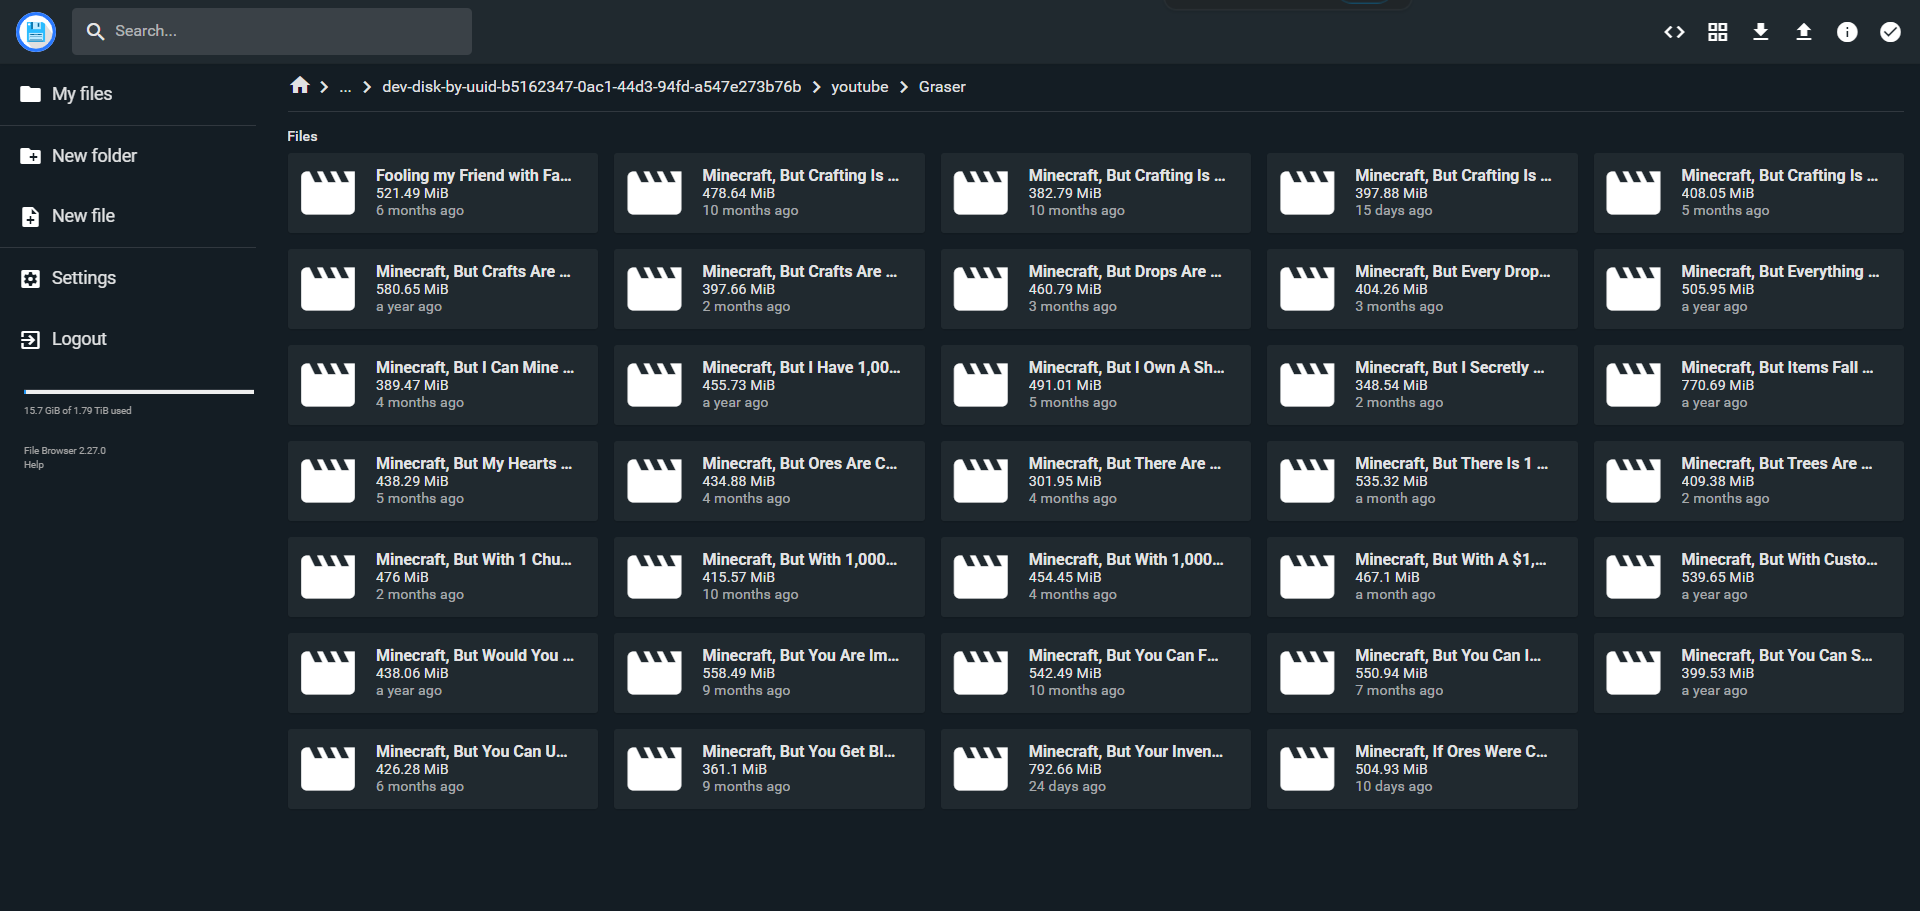
One thing I really like about Pinchflat is the ability to change how it saves your files.
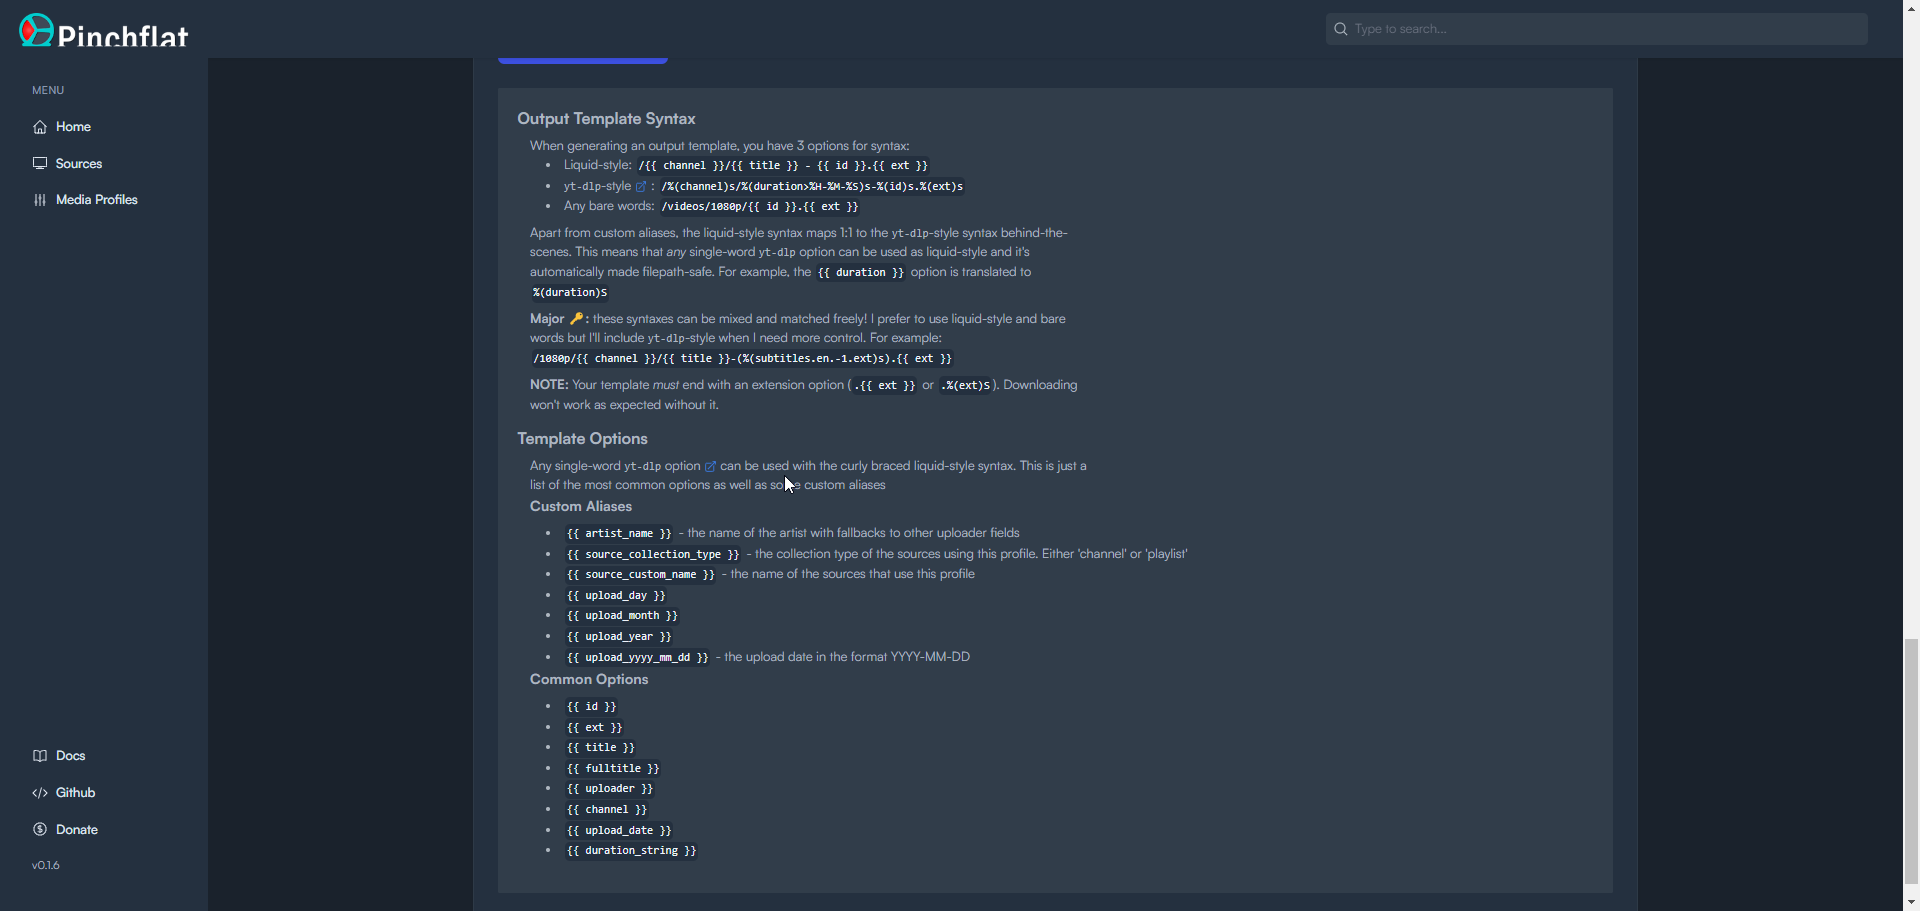
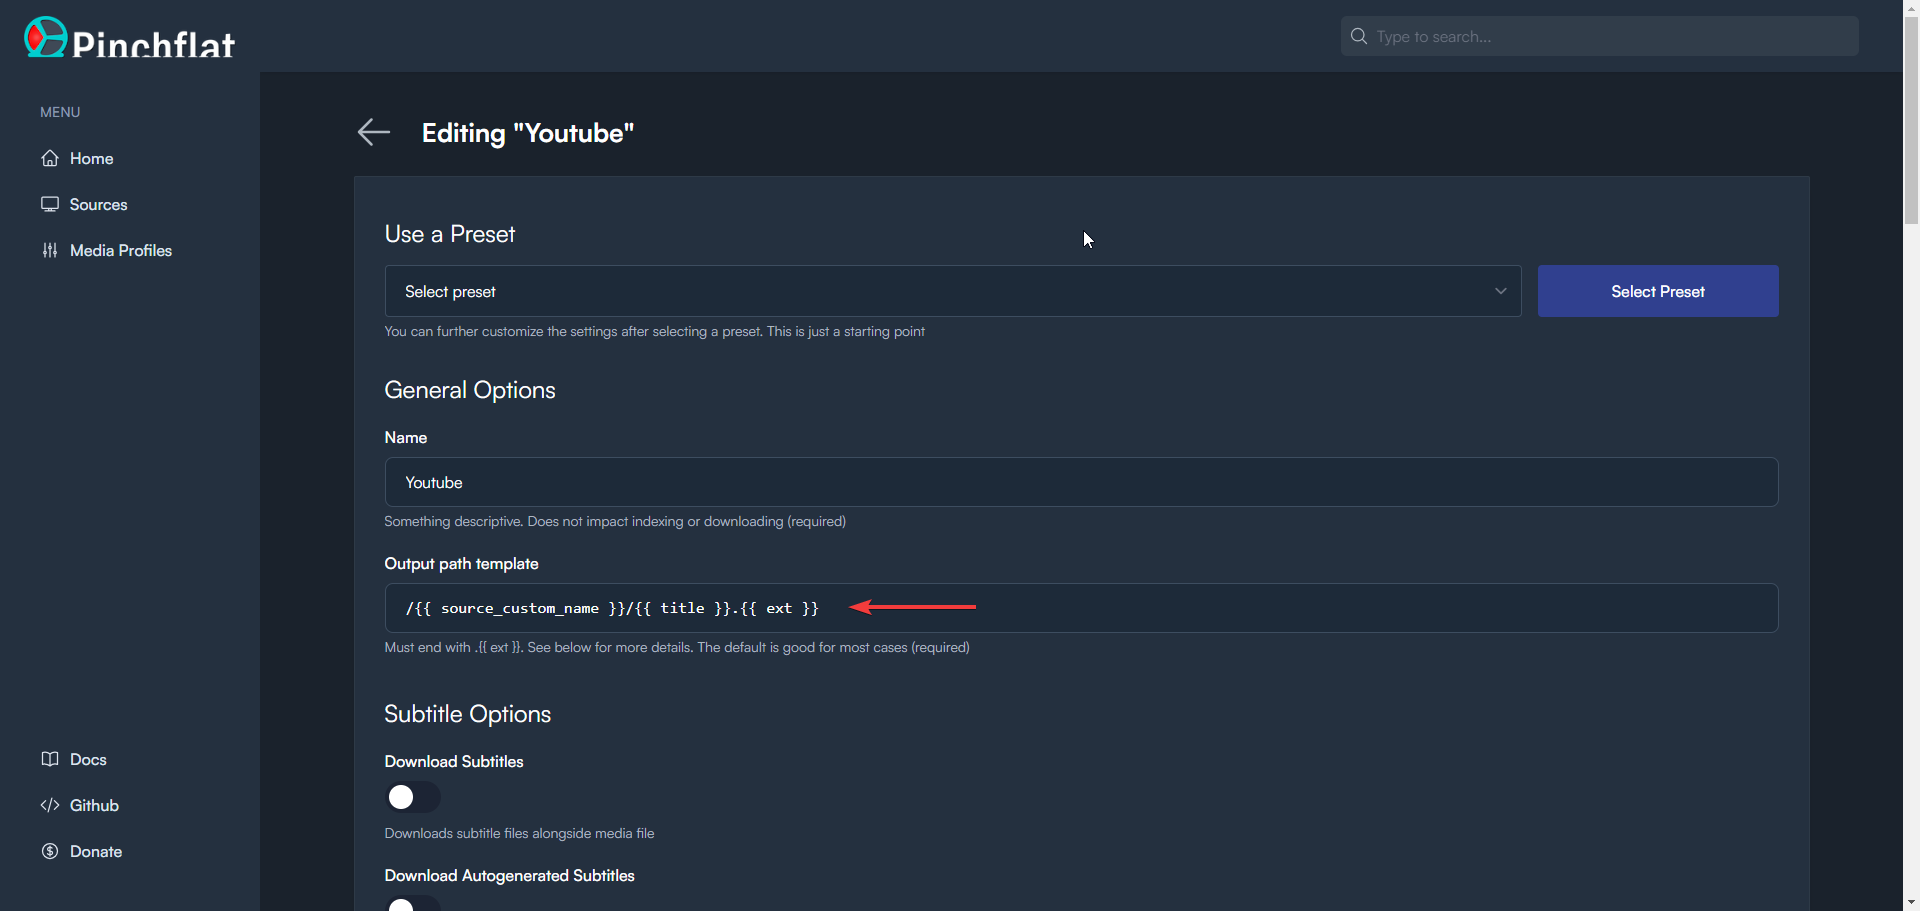
This adds a lot of customization options. It also does not mess with the filename unless you tell it to. By looking at the file name you can easily see what video it is. This is much better than random letters and numbers.
Pinchflat is incredibly easy to install and start using. You can get it up and running within seconds by deploying a simple Docker Compose stack through Portainer or locally on your Linux machine via terminal.
Pinchflat may not be ideal for those seeking to download individual videos sporadically. Additionally, it's important to note that Pinchflat stores downloaded videos on the local disk for playback using external media players. Overall, Pinchflat offers a convenient and efficient solution for managing and archiving YouTube content.
Give it a try for yourself and let us know what you think!
 kieraneglin
Today we continue the project for setting up and installing MergerFS and SnapRAID.
This is a 2 part series

Okay, now that we have MergerFS up and running, giving us one spot to point applications at to store our media, let's move on to making sure that if something does happen to one of those drives, we can recover.
Before we get deep into configuring SnapRAID, let's take a second to look at why I am using two disks instead of one. SnapRAID recommends the following drive configuration.
"As a rule of thumb you can stay with one parity disk (RAID5) with up to four data disks, and then using one parity disk for each group of seven data disks, like in the table:"

We need to create two new mount points for these drives. I do the same thing as the data drives but call the mounts parity instead of disk.
Rember RAID is not a backup solution but does help protect your files to a degree.
If you rebooted between Part 1 and now or even just getting around to this part after some time away, it is good to go ahead and check that everything is up to date by running the following commands.
sudo apt update
sudo apt upgrade -y
Once everything is happy there, we will be good to install SnapRAID. This is a simple command to install it, and then we will configure it.
sudo apt install snapraid -yThis doesn't take very long to run, and we are done. Not really. Now, we need to configure it.
If you remember, I have eight drives in this system, and we only used six so far. Well, it is time to put the other two drives to use.
sudo mkdir /mnt/parity{1,2}
sudo chown (username):(username) /mnt/parity*
Now that those are created, I recommend using new for this. I have even gone as far as buying bigger drives for parity and moving my old ones down to data to expand my capacity. It is also required that your parity drives be bigger or equal to the biggest data disk.
We have the mount points ready; let's get the drives ready. We will use the same commands as before to get a partition on them but will use a different file system.
The ext4 file system can not have a single file larger than 16TB. So, this is why I will use a file system that can support that for future-proofing and expandability.
sudo gdisk /dev/sd*
Command: n ↵
Partition Number: 1 ↵
First sector: ↵
Last sector: ↵
Hex Code: ↵
w
y
Now that the drives have a new partition let's get a file system on them. Again, this file system differs from the data drives because of the 16TB limitation. We first need to install XFS as it is not natively supported on Ubuntu or Debian.
sudo apt install xfsprogsNow that XFS is installed, we can create the filesystem on our parity drives.
sudo mkfs -t xfs /dev/sd*1Now that this is done for my drives, we need to edit the fstab file again so that they will mount on boot up. Below is what mine looks like now.
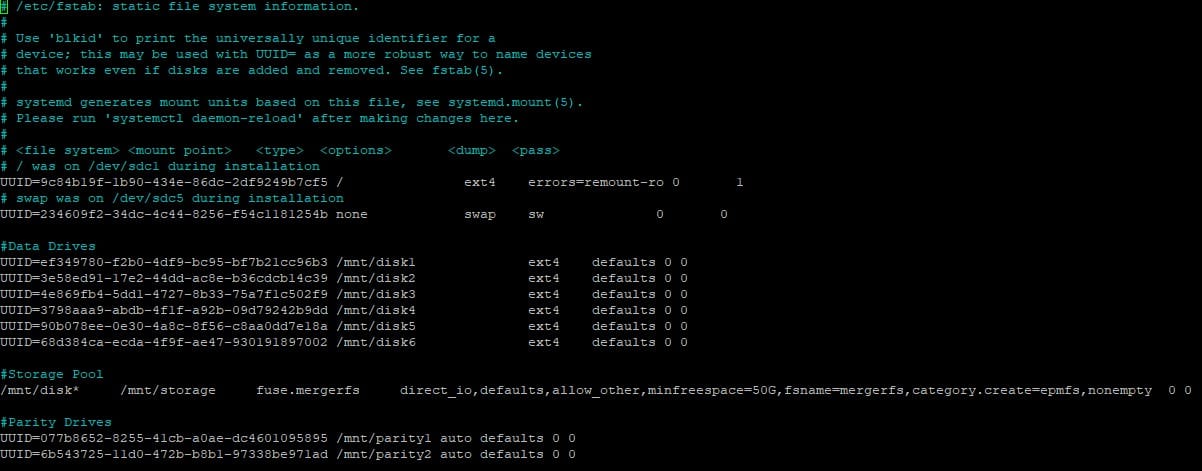
As you can see, we are doing nothing fancy with them with them in the fstab file. We can rerun the mount command or reboot; the choice is yours.
Well, the easy stuff is over. The next part isn't too hard either, but we want to be careful not to mess anything up. We will need to create a file /etc/snapraid.conf. I have posted my config from my server, but be sure to change it to match your configuration and drive counts.
# Example configuration for snapraid

# Defines the file to use as parity storage
# It must NOT be in a data disk
# Format: "parity FILE [,FILE] ..."
parity /mnt/parity1/snapraid.parity

# Defines the files to use as additional parity storage.
# If specified, they enable the multiple failures protection
# from two to six level of parity.
# To enable, uncomment one parity file for each level of extra
# protection required. Start from 2-parity, and follow in order.
# It must NOT be in a data disk
# Format: "X-parity FILE [,FILE] ..."
2-parity /mnt/parity2/snapraid.2-parity
#3-parity /mnt/diskr/snapraid.3-parity
#4-parity /mnt/disks/snapraid.4-parity
#5-parity /mnt/diskt/snapraid.5-parity
#6-parity /mnt/disku/snapraid.6-parity

# Defines the files to use as content list
# You can use multiple specification to store more copies
# You must have least one copy for each parity file plus one. Some more don't hurt
# They can be in the disks used for data, parity or boot,
# but each file must be in a different disk
# Format: "content FILE"
content /var/snapraid.content
content /mnt/disk1/snapraid.content
content /mnt/disk2/snapraid.content
content /mnt/disk3/snapraid.content
content /mnt/disk4/snapraid.content
content /mnt/disk5/snapraid.content
content /mnt/disk6/snapraid.content
content /mnt/parity1/snapraid.content
content /mnt/parity2/snapraid.content

# Defines the data disks to use
# The name and mount point association is relevant for parity, do not change it
# WARNING: Adding here your /home, /var or /tmp disks is NOT a good idea!
# SnapRAID is better suited for files that rarely changes!
# Format: "data DISK_NAME DISK_MOUNT_POINT"
data d1 /mnt/disk1/
data d2 /mnt/disk2/
data d3 /mnt/disk3/
data d4 /mnt/disk4/
data d5 /mnt/disk5/
data d6 /mnt/disk6/

# Excludes hidden files and directories (uncomment to enable).
#nohidden

# Defines files and directories to exclude
# Remember that all the paths are relative at the mount points
# Format: "exclude FILE"
# Format: "exclude DIR/"
# Format: "exclude /PATH/FILE"
# Format: "exclude /PATH/DIR/"
exclude *.unrecoverable
exclude /tmp/
exclude /lost+found/

# Defines the block size in kibi bytes (1024 bytes) (uncomment to enable).
# WARNING: Changing this value is for experts only!
# Default value is 256 -> 256 kibi bytes -> 262144 bytes
# Format: "blocksize SIZE_IN_KiB"
#blocksize 256

# Defines the hash size in bytes (uncomment to enable).
# WARNING: Changing this value is for experts only!
# Default value is 16 -> 128 bits
# Format: "hashsize SIZE_IN_BYTES"
#hashsize 16

# Automatically save the state when syncing after the specified amount
# of GB processed (uncomment to enable).
# This option is useful to avoid to restart from scratch long 'sync'
# commands interrupted by a machine crash.
# It also improves the recovering if a disk break during a 'sync'.
# Default value is 0, meaning disabled.
# Format: "autosave SIZE_IN_GB"
#autosave 500

# Defines the pooling directory where the virtual view of the disk
# array is created using the "pool" command (uncomment to enable).
# The files are not really copied here, but just linked using
# symbolic links.
# This directory must be outside the array.
# Format: "pool DIR"
#pool /pool

# Defines a custom smartctl command to obtain the SMART attributes
# for each disk. This may be required for RAID controllers and for
# some USB disk that cannot be autodetected.
# In the specified options, the "%s" string is replaced by the device name.
# Refers at the smartmontools documentation about the possible options:
# RAID -> https://www.smartmontools.org/wiki/Supported_RAID-Controllers
# USB -> https://www.smartmontools.org/wiki/Supported_USB-Devices
#smartctl d1 -d sat %s
#smartctl d2 -d usbjmicron %s
#smartctl parity -d areca,1/1 /dev/sg0
#smartctl 2-parity -d areca,2/1 /dev/sg0
After creating this file, we are done and only have one command left to run.
sudo snapraid syncIf this is a clean setup like mine, it doesn't take any time. This may take a while if you already have data on your drives. Grab some coffee or even join us on Discord.
Okay, so we have everything set up, and we can schedule a simple cron job to run the syn job anytime we want. Let's say you accidentally delete an entire folder with numerous files you don't want to lose and don't catch it before the next sync. If we just run that command, it won't care, and those files are lost. That is where this script comes in.
Let's download the script from GitHub and get it configured. We need two files: snapraid-runner.py and snapraid-runner.conf.example. You can download the latest release as a zip file or run the commands below. Make sure to put them somewhere you will remember. I store mine in a folder called scripts.
wget https://raw.githubusercontent.com/Chronial/snapraid-runner/master/snapraid-runner.conf.example
wget https://raw.githubusercontent.com/Chronial/snapraid-runner/master/snapraid-runner.py
With these downloaded, let's get them configured for our system and have peace of mind when the corn job runs. We can either rename or make a copy of the conf.example file. I am just going to rename mine to keep it simple.
We will want to change the executable variable to /usr/bin/snapraid and change the config path to /etc/config. You can change a few other things, such as the deletethreshold, email, and scrub.
We need to test that this works correctly and then create the cronjob. Below is the command to test if you are in the same directory as the script.
sudo python3 snapraid-runner.pyNow, let's build the cronjob to run nightly. You may need to type 1 for the nano editor if you can't access crontab.
sudo crontab -eOnce you are in the editor, add the configuration below to the bottom of the file. This will run SnarpRAID every day at 4 am according to the time on your server.
00 04 * * * sudo python3 /this/is/your/path/snapraid-runner.py -c /this/is/your/path/snapraid-runner.confWe will want to change the executable variable to /usr/bin/snapraid and change the config path to /etc/config.
Well, that is it. If you followed along, you now have a drive pool the size of all the drives you added, and you are configured to make sure that if you lose a drive, you can rebuild. Remember, this is not a backup and does not follow the 3-2-1 rule. This is merely making sure that in the event a drive fails, you can rebuild without losing anything. Don't forget to subscribe and join us on Discord. Until next time, have fun, and don't forget to explore and learn. If you haven't already. Until next time have fun and don't forget to explore and learn.
";s:7:"attribs";a:0:{}s:8:"xml_base";s:0:"";s:17:"xml_base_explicit";b:0;s:8:"xml_lang";s:0:"";}}}}}i:3;a:6:{s:4:"data";s:0:"";s:7:"attribs";a:0:{}s:8:"xml_base";s:0:"";s:17:"xml_base_explicit";b:0;s:8:"xml_lang";s:0:"";s:5:"child";a:4:{s:0:"";a:6:{s:5:"title";a:1:{i:0;a:5:{s:4:"data";s:48:"Setup and Install MergerFS and SnapRAID (Part 1)";s:7:"attribs";a:0:{}s:8:"xml_base";s:0:"";s:17:"xml_base_explicit";b:0;s:8:"xml_lang";s:0:"";}}s:11:"description";a:1:{i:0;a:5:{s:4:"data";s:106:"In this part, we configure and set up MergerFS. Stayed tuned as part 2 will be right on the heels of this.";s:7:"attribs";a:0:{}s:8:"xml_base";s:0:"";s:17:"xml_base_explicit";b:0;s:8:"xml_lang";s:0:"";}}s:4:"link";a:1:{i:0;a:5:{s:4:"data";s:48:"https://noted.lol/mergerfs-and-snapraid-setup-1/";s:7:"attribs";a:0:{}s:8:"xml_base";s:0:"";s:17:"xml_base_explicit";b:0;s:8:"xml_lang";s:0:"";}}s:4:"guid";a:1:{i:0;a:5:{s:4:"data";s:24:"64df95f90903330001702fcf";s:7:"attribs";a:1:{s:0:"";a:1:{s:11:"isPermaLink";s:5:"false";}}s:8:"xml_base";s:0:"";s:17:"xml_base_explicit";b:0;s:8:"xml_lang";s:0:"";}}s:8:"category";a:2:{i:0;a:5:{s:4:"data";s:6:"How To";s:7:"attribs";a:0:{}s:8:"xml_base";s:0:"";s:17:"xml_base_explicit";b:0;s:8:"xml_lang";s:0:"";}i:1;a:5:{s:4:"data";s:15:"Homelab Queries";s:7:"attribs";a:0:{}s:8:"xml_base";s:0:"";s:17:"xml_base_explicit";b:0;s:8:"xml_lang";s:0:"";}}s:7:"pubDate";a:1:{i:0;a:5:{s:4:"data";s:29:"Mon, 19 Feb 2024 14:46:54 GMT";s:7:"attribs";a:0:{}s:8:"xml_base";s:0:"";s:17:"xml_base_explicit";b:0;s:8:"xml_lang";s:0:"";}}}s:32:"http://purl.org/dc/elements/1.1/";a:1:{s:7:"creator";a:1:{i:0;a:5:{s:4:"data";s:11:"Mediacowboy";s:7:"attribs";a:0:{}s:8:"xml_base";s:0:"";s:17:"xml_base_explicit";b:0;s:8:"xml_lang";s:0:"";}}}s:29:"http://search.yahoo.com/mrss/";a:1:{s:7:"content";a:1:{i:0;a:5:{s:4:"data";s:0:"";s:7:"attribs";a:1:{s:0:"";a:2:{s:3:"url";s:76:"https://noted.lol/content/images/2024/02/mergerfs-and-snapraid-noted.lol.jpg";s:6:"medium";s:5:"image";}}s:8:"xml_base";s:0:"";s:17:"xml_base_explicit";b:0;s:8:"xml_lang";s:0:"";}}}s:40:"http://purl.org/rss/1.0/modules/content/";a:1:{s:7:"encoded";a:1:{i:0;a:5:{s:4:"data";s:9449:"If you read the original post about MergerFS and SnapRAID, I am sure you've been wondering how to set it up. So, let's dig in and get you a data pool created that we will protect against a drive failing with SnapRaid. Then configure SnapRaid to "magically" back your drives up in the background so you can worry or even tinker with some of the other cool apps that have been reviewed on Noted.
This is a 2 part series.
Surprisingly, both MergerFS and SnapRaid are in the Ubuntu and Debian repositories, making the installation the easiest part of this whole thing.
When installing anything new on Ubuntu or Debian, run the following commands.
sudo apt update
sudo apt upgrade -y
Once everything is happy there, we will be good to install MergerFS. This is a simple command to install it, and then we will configure it.
sudo apt install mergerfs -yThis doesn't take very long to run, and we are done. Not really. Now, we need to configure it.
Alright, so let's get to configuring and setting up a pool; I have a couple of different-sized drives we will use. This server has four 4TB drives and four 8TB drives. We will ignore two of the 8TB drives for now.
NAME   MAJ:MIN RM   SIZE RO TYPE MOUNTPOINTS
sda      8:0    0   7.3T  0 disk
sdb      8:16   0   7.3T  0 disk
sdc      8:32   0   7.3T  0 disk
sdd      8:48   0   7.3T  0 disk
sde      8:64   0   3.6T  0 disk
sdf      8:80   0   3.6T  0 disk
sdg      8:96   0   3.6T  0 disk
sdh      8:112  0 232.9G  0 disk
├─sdh1   8:113  0 231.9G  0 part /
├─sdh2   8:114  0     1K  0 part
└─sdh5   8:117  0   976M  0 part [SWAP]
sdi      8:128  0 465.8G  0 disk
sdj      8:144  0   3.6T  0 disk
We first need to create directories to mount these drives and the storage folder to use for the pool. I like to use the /mnt location and create the directors as disk1, disk2, etc.
sudo mkdir /mnt/disk{1..6}
sudo mkdir /mnt/storage
sudo chown (username):(username) /mnt/disk*
sudo chown (username):(username) /mnt/storage
This will create six directories and then give the user access to them. Be sure to change (username) to your user.
As we can see from all my drives, they are empty with no partition tables. I like to use ext4 for my data, but you are welcome to use whatever file system you like. I will share how I do this below. If you have drives that already have data on them, you only need to modify your fstab file like below.
sudo gdisk /dev/sd*
Command: n ↵
Partition Number: 1 ↵
First sector: ↵
Last sector: ↵
Hex Code: ↵
w
y
Creating Partition Table
sudo mkfs -t ext4 /dev/sd*1
Creating FS on Partition Table
You will want to do this for all the disks you plan to use for MergerFS. Before anyone complains that ext4 doesn't support bigger drives, it does. The problem we will have is that ext4 doesn't support large files. For this server, we could get away with configuring the drives we plan to use for SnapRAID the same way, but I will match my new build for this and use a different file system for those.
Now that all our disks have partitions and filesystems, we want to modify the fstab file to auto-mount this drive on boot and make the pool. This is where the magic happens.
sudo nano /etc/fstab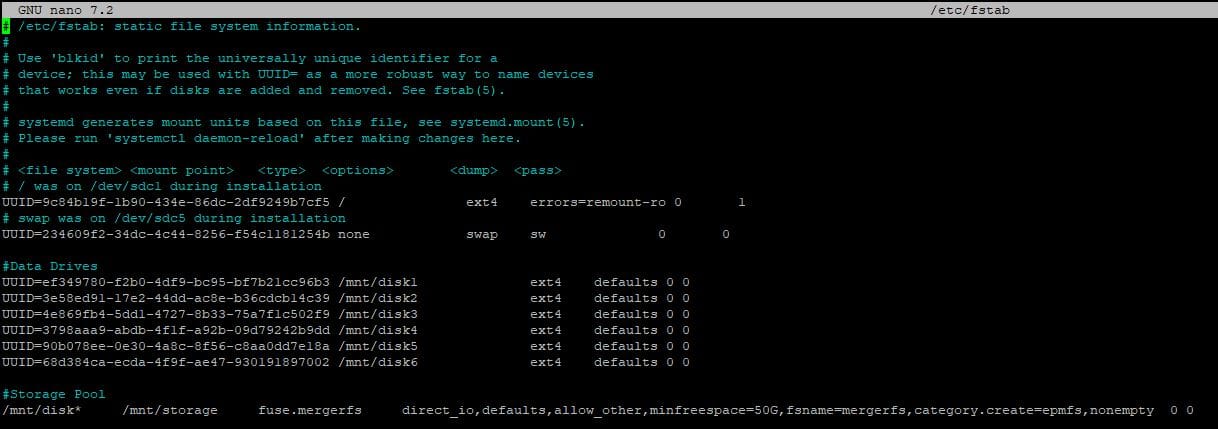
This is what mine looks like after adding my drives. Again, before anyone complains, I like to use the partition UUID; this has allowed me to copy this config from system to system and never have to mess with remapping my drives.
What's that last line, you ask? Well, that is the magic. We are telling the system to fuse all the drives together as one using MergerFS. Remember how I said I like to do disk1, etc? I can tell MergerFS that any drive with the "disk" in the front is yours to create the pool. After you have modified your fstab to match mine, don't forget to change the UUID to match your drive's; you can run the commands below.
sudo mount -a
sudo df -h
Now you should be able to see the disks are mounted to the directories we created and that we now have a new mount showing mergers with the combined capacity of all our drives.
So, let's break down the last line before we move on. What we are telling the pool to do is the following.
Please take the time to go to the MergerFS GitHub to see what the different policies are and find what is right for you. I like the epmfs because it doesn't keep my media in one folder all on one drive. Allowing me to lose a drive without losing everything.
This guide turned out a bit lengthy, but I wanted to make sure I provided lots of info and clear instructions. To keep going with setting up SnapRAID, head over to Part 2. And if you want to chat with more folks or maybe even share your own insights, feel free to join our Discord community. Cheers!
";s:7:"attribs";a:0:{}s:8:"xml_base";s:0:"";s:17:"xml_base_explicit";b:0;s:8:"xml_lang";s:0:"";}}}}}i:4;a:6:{s:4:"data";s:0:"";s:7:"attribs";a:0:{}s:8:"xml_base";s:0:"";s:17:"xml_base_explicit";b:0;s:8:"xml_lang";s:0:"";s:5:"child";a:4:{s:0:"";a:6:{s:5:"title";a:1:{i:0;a:5:{s:4:"data";s:54:"TinyPilot Voyager 2a - Palm Size KVM Over IP Made Easy";s:7:"attribs";a:0:{}s:8:"xml_base";s:0:"";s:17:"xml_base_explicit";b:0;s:8:"xml_lang";s:0:"";}}s:11:"description";a:1:{i:0;a:5:{s:4:"data";s:120:"Let's talk about the TinyPilot Voyager 2a which is an amazing product to make having headless servers easier to manage. ";s:7:"attribs";a:0:{}s:8:"xml_base";s:0:"";s:17:"xml_base_explicit";b:0;s:8:"xml_lang";s:0:"";}}s:4:"link";a:1:{i:0;a:5:{s:4:"data";s:41:"https://noted.lol/tinypilot-voyager-2a-2/";s:7:"attribs";a:0:{}s:8:"xml_base";s:0:"";s:17:"xml_base_explicit";b:0;s:8:"xml_lang";s:0:"";}}s:4:"guid";a:1:{i:0;a:5:{s:4:"data";s:24:"6530796fcbdb5700013cfb1e";s:7:"attribs";a:1:{s:0:"";a:1:{s:11:"isPermaLink";s:5:"false";}}s:8:"xml_base";s:0:"";s:17:"xml_base_explicit";b:0;s:8:"xml_lang";s:0:"";}}s:8:"category";a:2:{i:0;a:5:{s:4:"data";s:17:"Product Spotlight";s:7:"attribs";a:0:{}s:8:"xml_base";s:0:"";s:17:"xml_base_explicit";b:0;s:8:"xml_lang";s:0:"";}i:1;a:5:{s:4:"data";s:8:"Home Lab";s:7:"attribs";a:0:{}s:8:"xml_base";s:0:"";s:17:"xml_base_explicit";b:0;s:8:"xml_lang";s:0:"";}}s:7:"pubDate";a:1:{i:0;a:5:{s:4:"data";s:29:"Tue, 02 Jan 2024 14:54:24 GMT";s:7:"attribs";a:0:{}s:8:"xml_base";s:0:"";s:17:"xml_base_explicit";b:0;s:8:"xml_lang";s:0:"";}}}s:32:"http://purl.org/dc/elements/1.1/";a:1:{s:7:"creator";a:1:{i:0;a:5:{s:4:"data";s:11:"Mediacowboy";s:7:"attribs";a:0:{}s:8:"xml_base";s:0:"";s:17:"xml_base_explicit";b:0;s:8:"xml_lang";s:0:"";}}}s:29:"http://search.yahoo.com/mrss/";a:1:{s:7:"content";a:1:{i:0;a:5:{s:4:"data";s:0:"";s:7:"attribs";a:1:{s:0:"";a:2:{s:3:"url";s:80:"https://noted.lol/content/images/2024/01/tinypilot-voyager-2a-noted.lol-main.jpg";s:6:"medium";s:5:"image";}}s:8:"xml_base";s:0:"";s:17:"xml_base_explicit";b:0;s:8:"xml_lang";s:0:"";}}}s:40:"http://purl.org/rss/1.0/modules/content/";a:1:{s:7:"encoded";a:1:{i:0;a:5:{s:4:"data";s:8238:"This product was sent to us for review. If you want to pick one up for yourself - TinyPilot

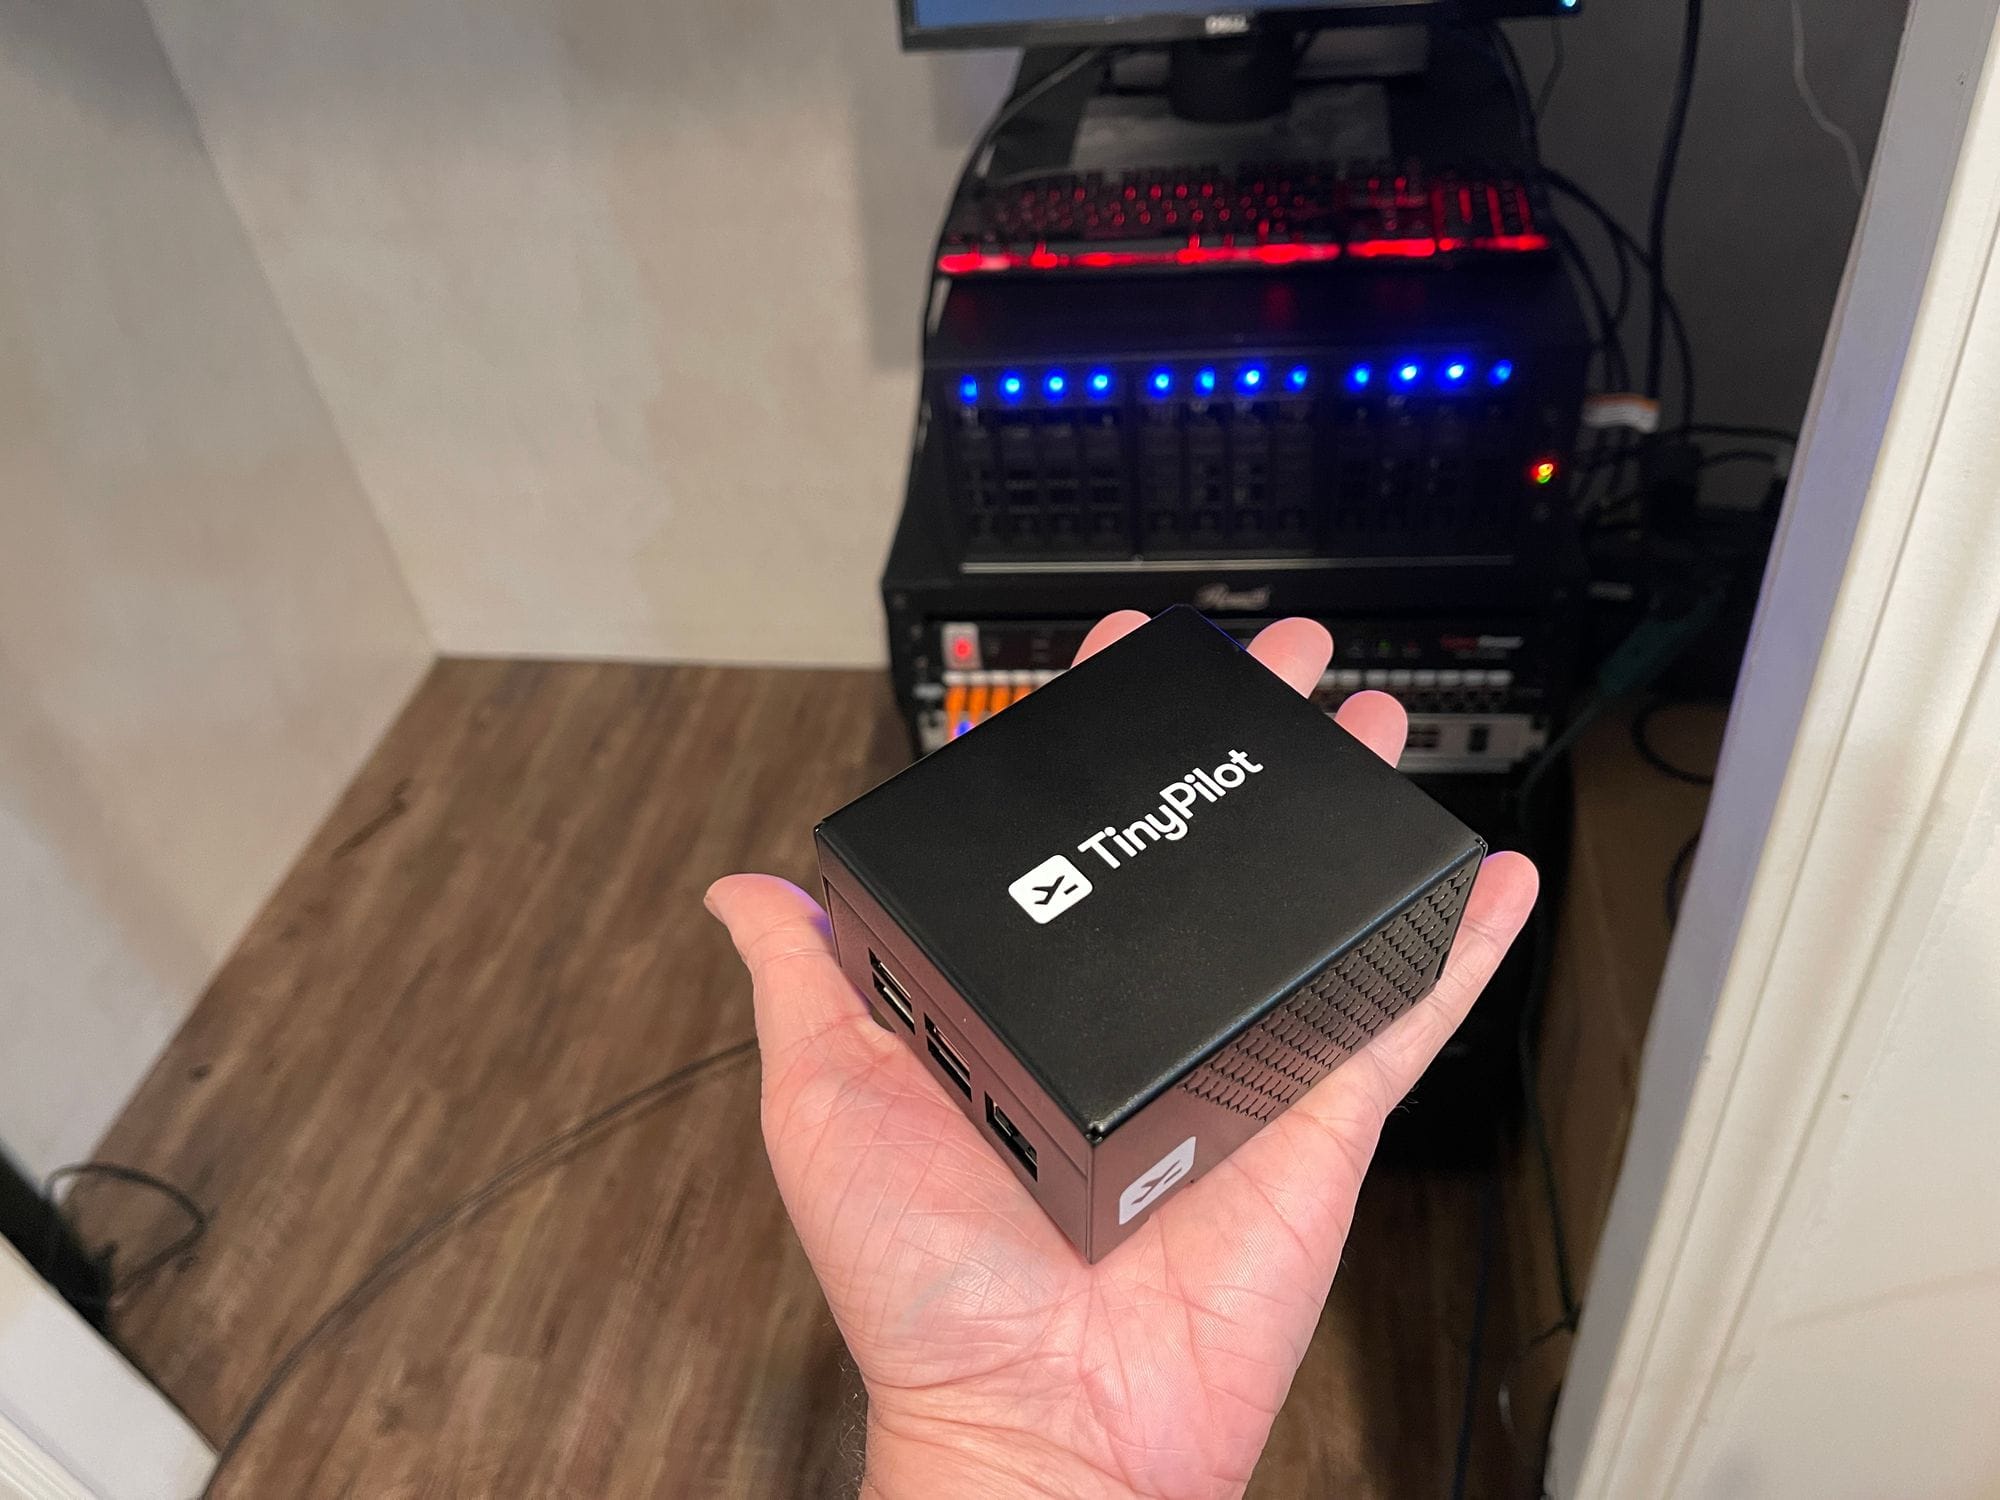
After testing the TinyPilot Voyager 2a PoE model for several weeks here is what I have experienced and what I think of it.
Let's first talk design, this is a well-thought-out product and feels very polished and like it belongs in a data center and not sitting on my desk connected to my home lab. The case is a black anodized metal with all the ports labeled in white. It is compact enough that I haven't even noticed it sitting right next to my Intel NUCs.
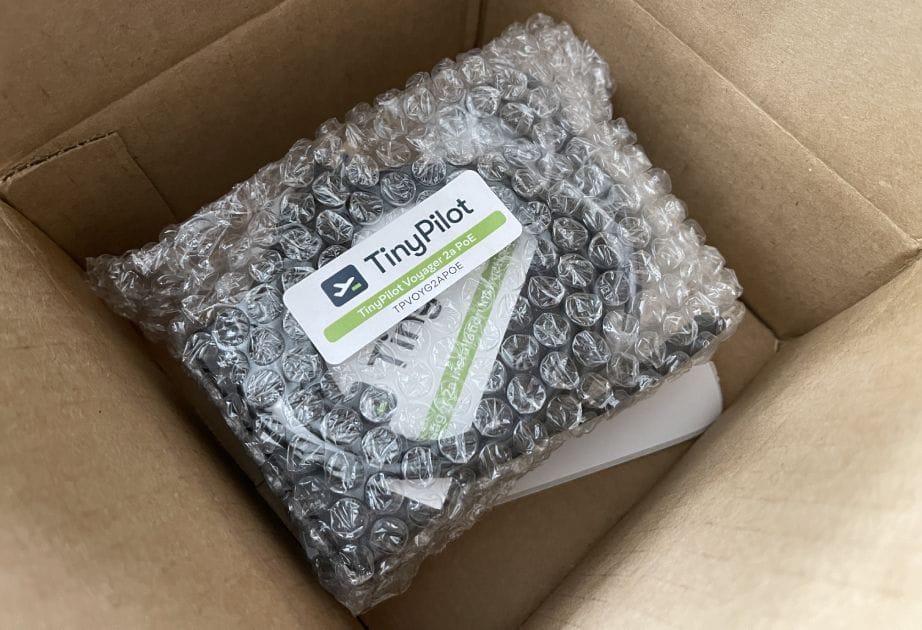
Getting this device up and running was an even bigger surprise. It shipped with everything needed to connect to one of my computers. Once all that was done I simply plugged it into my PoE switch and I was off to the races.
Once logged into the web interface I was in heaven. The layout and design are just simple. There is not a lot of extra stuff just for the sack of adding stuff. With the expectation of a few tasks, there is no reason to need to leave the web interface. We are presented with 4 menu options System, Actions, View, and Help.
Under the System, we have the following options.
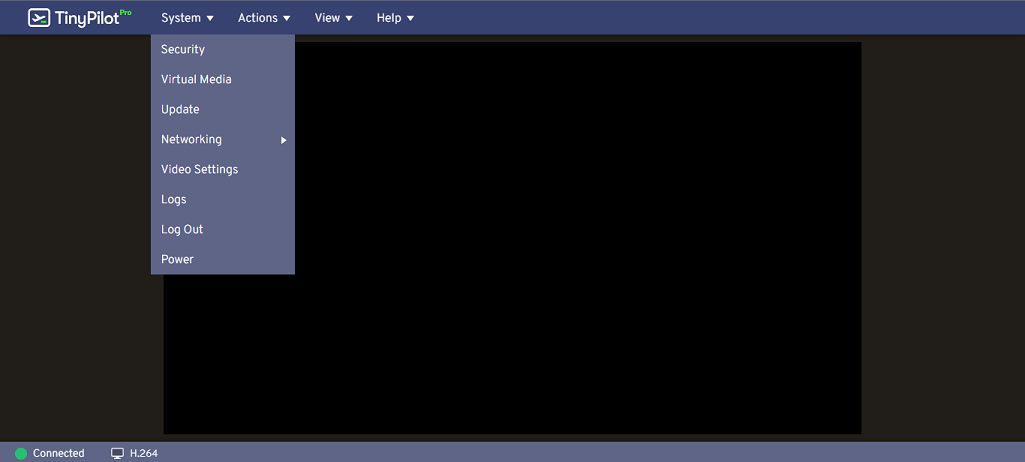
Security, which enables you to set a username and password, add multiple users, enable SSH access directly to the system (this is disabled by default), and an option to require encrypted connections (disabled by default). Virtual Media, which would be used to have disk images or other files loaded on the TinyPilot to share through the connection. Update, which is used to check for new updates. Network, where you can change the hostname and get instructions on how to set a static IP. Video, where you can adjust between streaming with MJPEG or H.264. Then there is a spot to look at logs, log out, and power.
Under Actions, we have the following options.
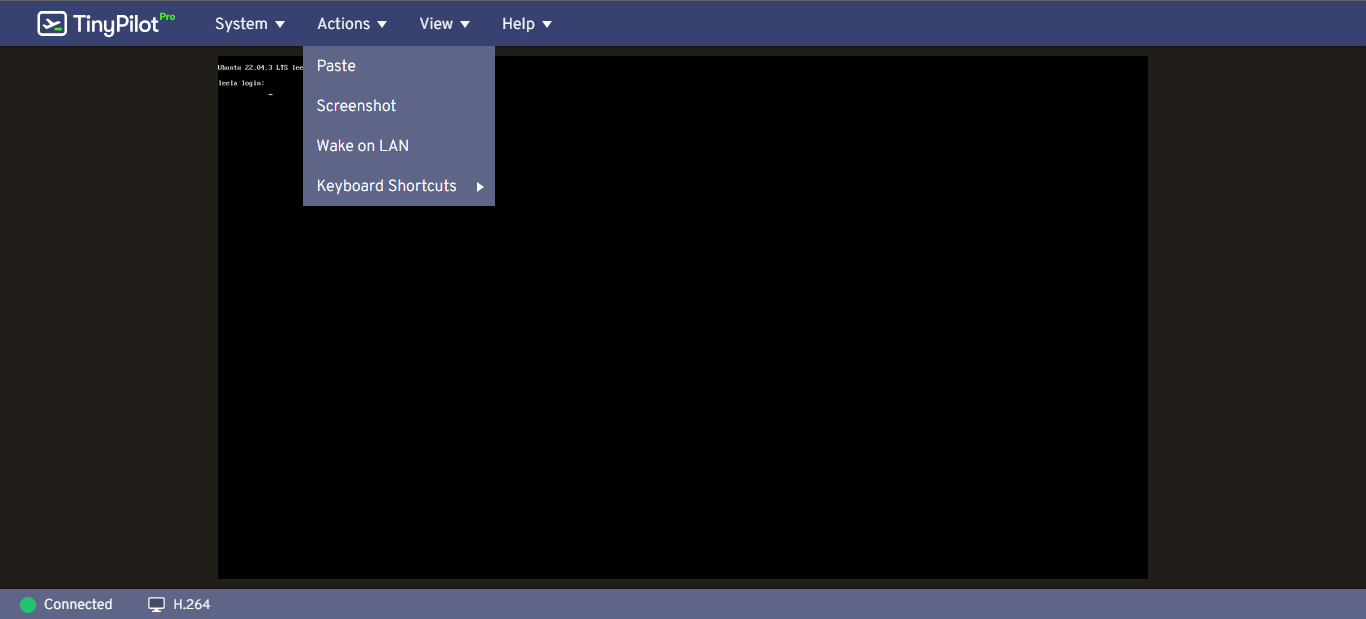
Paste, Screenshot, Wake on LAN, and keyboard shortcuts. Keyboard shortcuts currently only have the option to send Ctrl-Alt-Del to the connected system.
Under View, we have the following options.
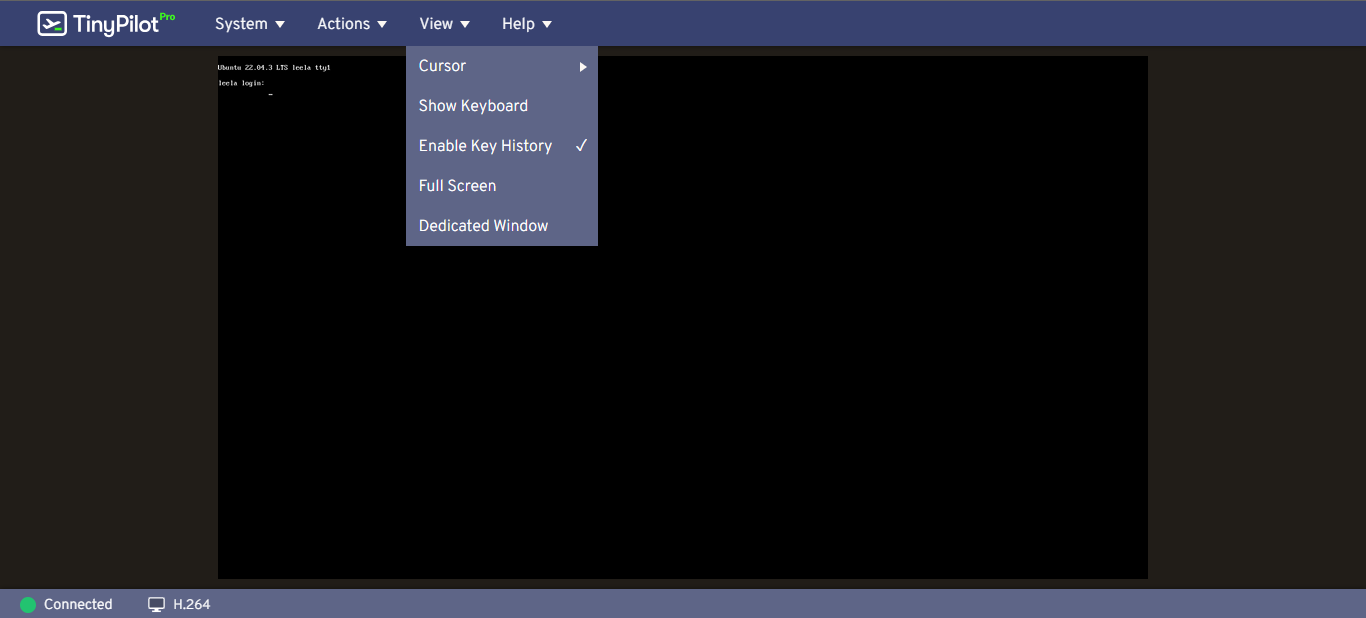
Cursor, which gives you different options to show. As I have my box connected to a headless server I do not have any cursor on the system. Next, you have the option to have an on-screen keyboard, enable key history, full screen, and a dedicated window.
Under Help, we have the following options.
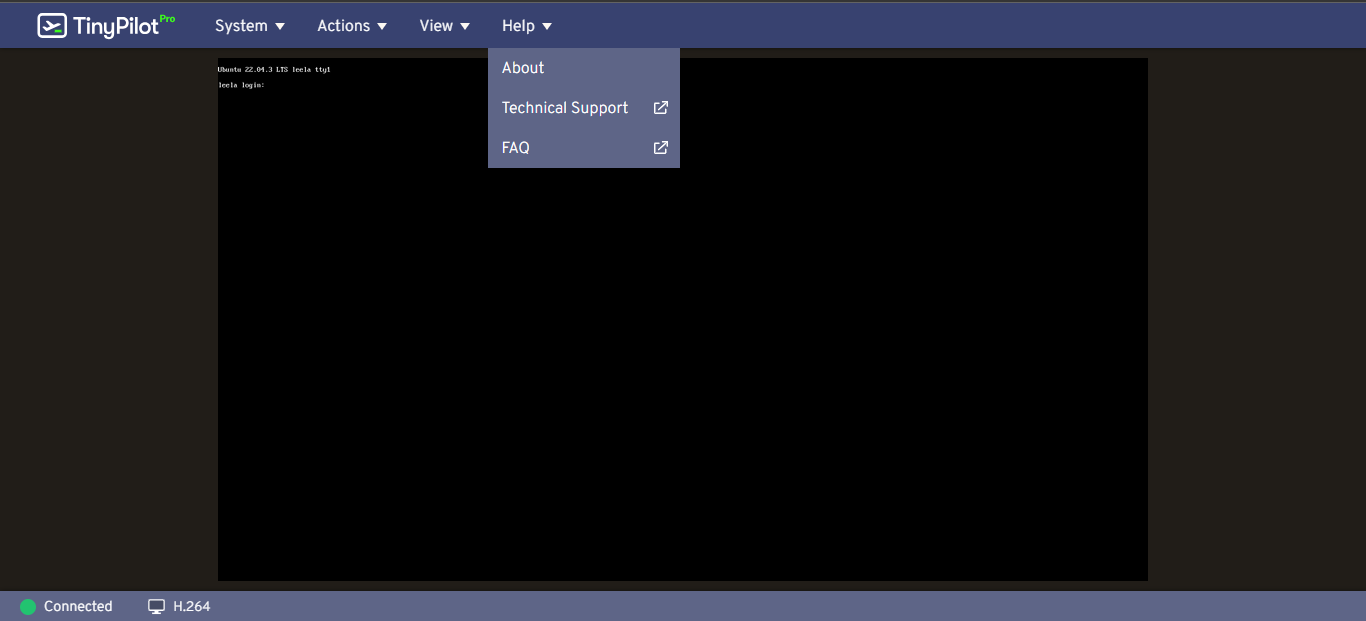
About, which lists information of version, website link, license link, and a link to the privacy policy. It also has a list of thanks to people and software that has made this possible. Next, we have two options which take you to either the technical support or the FAQ section of the website.
My only complaint is you can't adjust the screen resolution that the TinyPilot is displaying. This was discovered when I was working in the CLI and I was unable to read text at the very bottom of the screen while editing stuff with Nano. This may be due to a video setting on the host and not the Tiny Pilot but I haven't looked into it.
While waiting for this device to arrive in the mail I was looking on the GitHub, technical support section, and just generally researching the product when I stumbled across this nugget. Which has a link to GitHub where it links to additional expandability and uses one TinyPilot with an external KVM. This allows you to have one TinyPilot connected to multiple systems and well I just had to. I ordered a 4 port KVM from the list(this) and some additional HDMI cables(these) and waited.
After moving the data cable and the HDMI cable to the correct ports on the External KVM and routing the HDMI cables and USB cables to the servers to my pleasant surprise everything worked. I am now able to see all my NUCS from my desktop computer while they boot up.
I would recommend this to anyone wanting to have remote access to their headless servers should you need to see what is going on during boot or in my case while the system is not booting up correctly and make a fix. It is so much easier having everything plugged into this device versus pulling out a mouse, keyboard, and monitor anytime I need to modify the system directly on the host.
";s:7:"attribs";a:0:{}s:8:"xml_base";s:0:"";s:17:"xml_base_explicit";b:0;s:8:"xml_lang";s:0:"";}}}}}i:5;a:6:{s:4:"data";s:0:"";s:7:"attribs";a:0:{}s:8:"xml_base";s:0:"";s:17:"xml_base_explicit";b:0;s:8:"xml_lang";s:0:"";s:5:"child";a:4:{s:0:"";a:6:{s:5:"title";a:1:{i:0;a:5:{s:4:"data";s:45:"Snapp - Yet Another Self-Hosted Url Shortener";s:7:"attribs";a:0:{}s:8:"xml_base";s:0:"";s:17:"xml_base_explicit";b:0;s:8:"xml_lang";s:0:"";}}s:11:"description";a:1:{i:0;a:5:{s:4:"data";s:69:"Snapp empowers you to effortlessly create and manage shortened links.";s:7:"attribs";a:0:{}s:8:"xml_base";s:0:"";s:17:"xml_base_explicit";b:0;s:8:"xml_lang";s:0:"";}}s:4:"link";a:1:{i:0;a:5:{s:4:"data";s:24:"https://noted.lol/snapp/";s:7:"attribs";a:0:{}s:8:"xml_base";s:0:"";s:17:"xml_base_explicit";b:0;s:8:"xml_lang";s:0:"";}}s:4:"guid";a:1:{i:0;a:5:{s:4:"data";s:24:"657200f4a3f8660001d7d53f";s:7:"attribs";a:1:{s:0:"";a:1:{s:11:"isPermaLink";s:5:"false";}}s:8:"xml_base";s:0:"";s:17:"xml_base_explicit";b:0;s:8:"xml_lang";s:0:"";}}s:8:"category";a:1:{i:0;a:5:{s:4:"data";s:26:"Self Hosted URL Shorteners";s:7:"attribs";a:0:{}s:8:"xml_base";s:0:"";s:17:"xml_base_explicit";b:0;s:8:"xml_lang";s:0:"";}}s:7:"pubDate";a:1:{i:0;a:5:{s:4:"data";s:29:"Thu, 07 Dec 2023 18:19:32 GMT";s:7:"attribs";a:0:{}s:8:"xml_base";s:0:"";s:17:"xml_base_explicit";b:0;s:8:"xml_lang";s:0:"";}}}s:32:"http://purl.org/dc/elements/1.1/";a:1:{s:7:"creator";a:1:{i:0;a:5:{s:4:"data";s:6:"Jeremy";s:7:"attribs";a:0:{}s:8:"xml_base";s:0:"";s:17:"xml_base_explicit";b:0;s:8:"xml_lang";s:0:"";}}}s:29:"http://search.yahoo.com/mrss/";a:1:{s:7:"content";a:1:{i:0;a:5:{s:4:"data";s:0:"";s:7:"attribs";a:1:{s:0:"";a:2:{s:3:"url";s:91:"https://noted.lol/content/images/2023/12/snapp-self-hosted-url-shortener-main-noted.lol.jpg";s:6:"medium";s:5:"image";}}s:8:"xml_base";s:0:"";s:17:"xml_base_explicit";b:0;s:8:"xml_lang";s:0:"";}}}s:40:"http://purl.org/rss/1.0/modules/content/";a:1:{s:7:"encoded";a:1:{i:0;a:5:{s:4:"data";s:4238:"
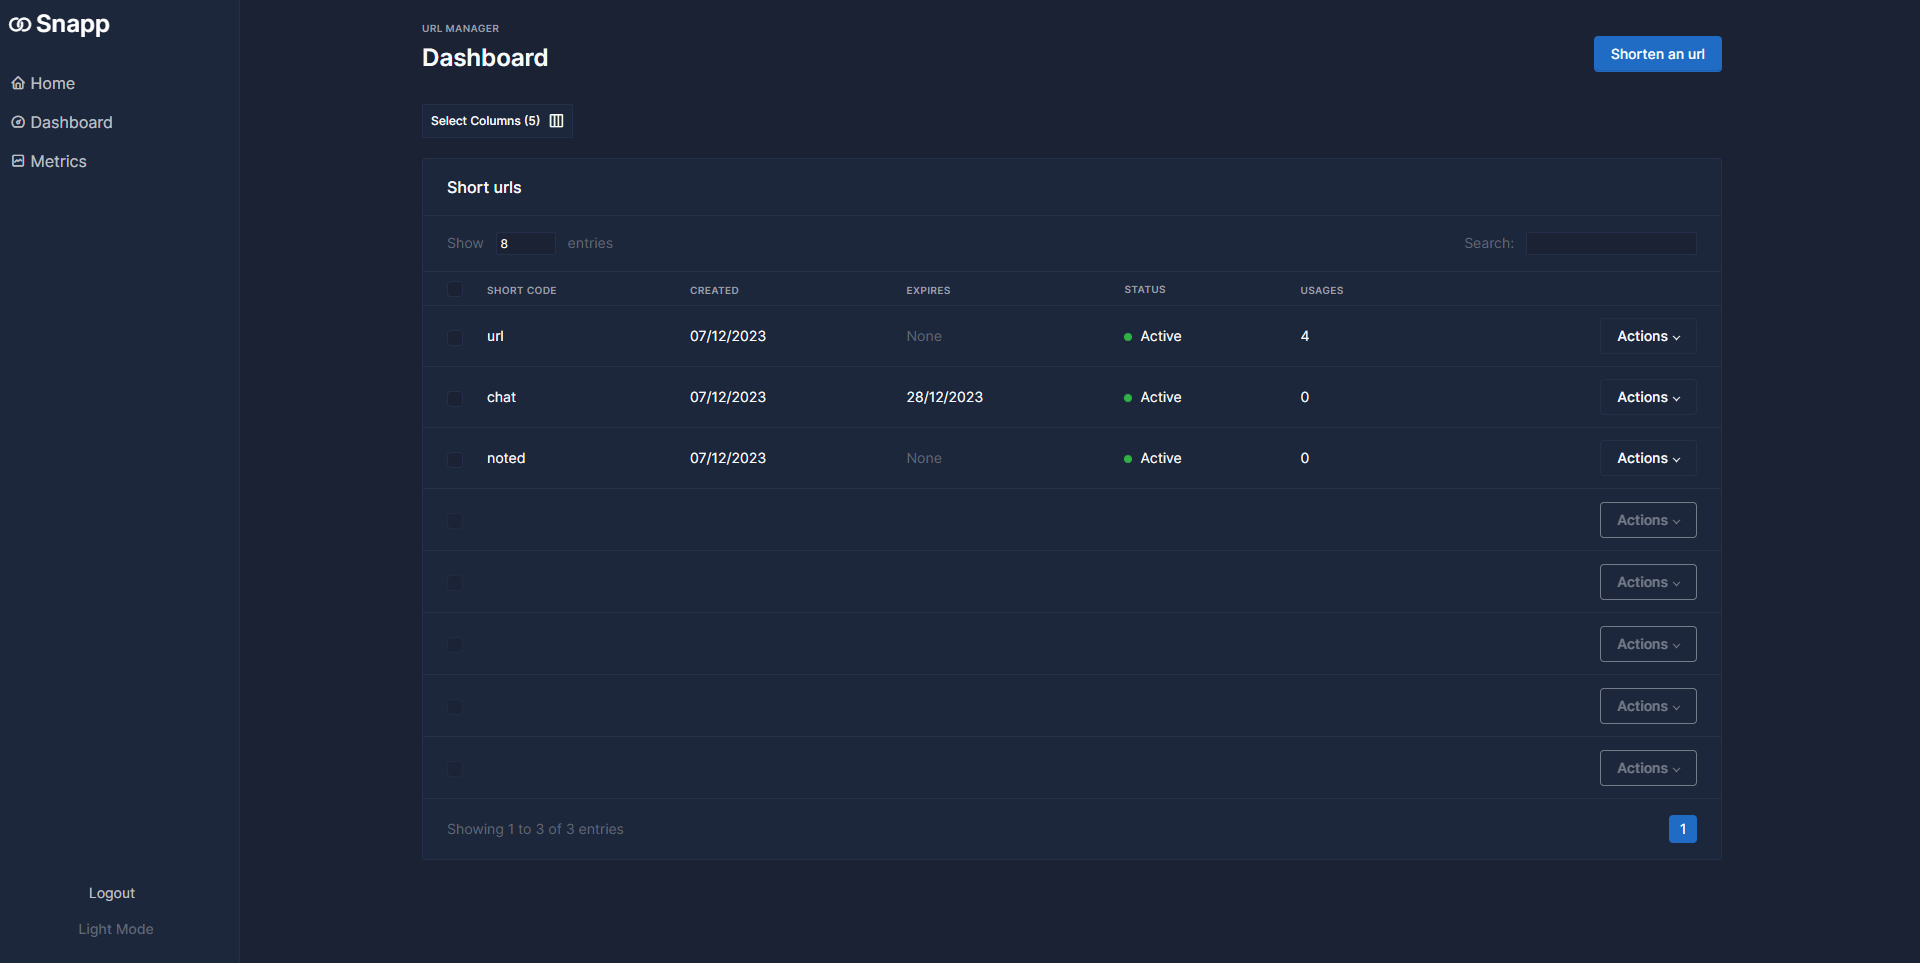
Introducing Snapp, a reliable self-hosted URL shortener, crafted to simplify your online journey.
Snapp is your self-hostable URL shortening service. Effortlessly shorten links, and with Snapp's self-hosting capability, you have complete control. Create concise, shareable links on your terms with Snapp's user-friendly platform.
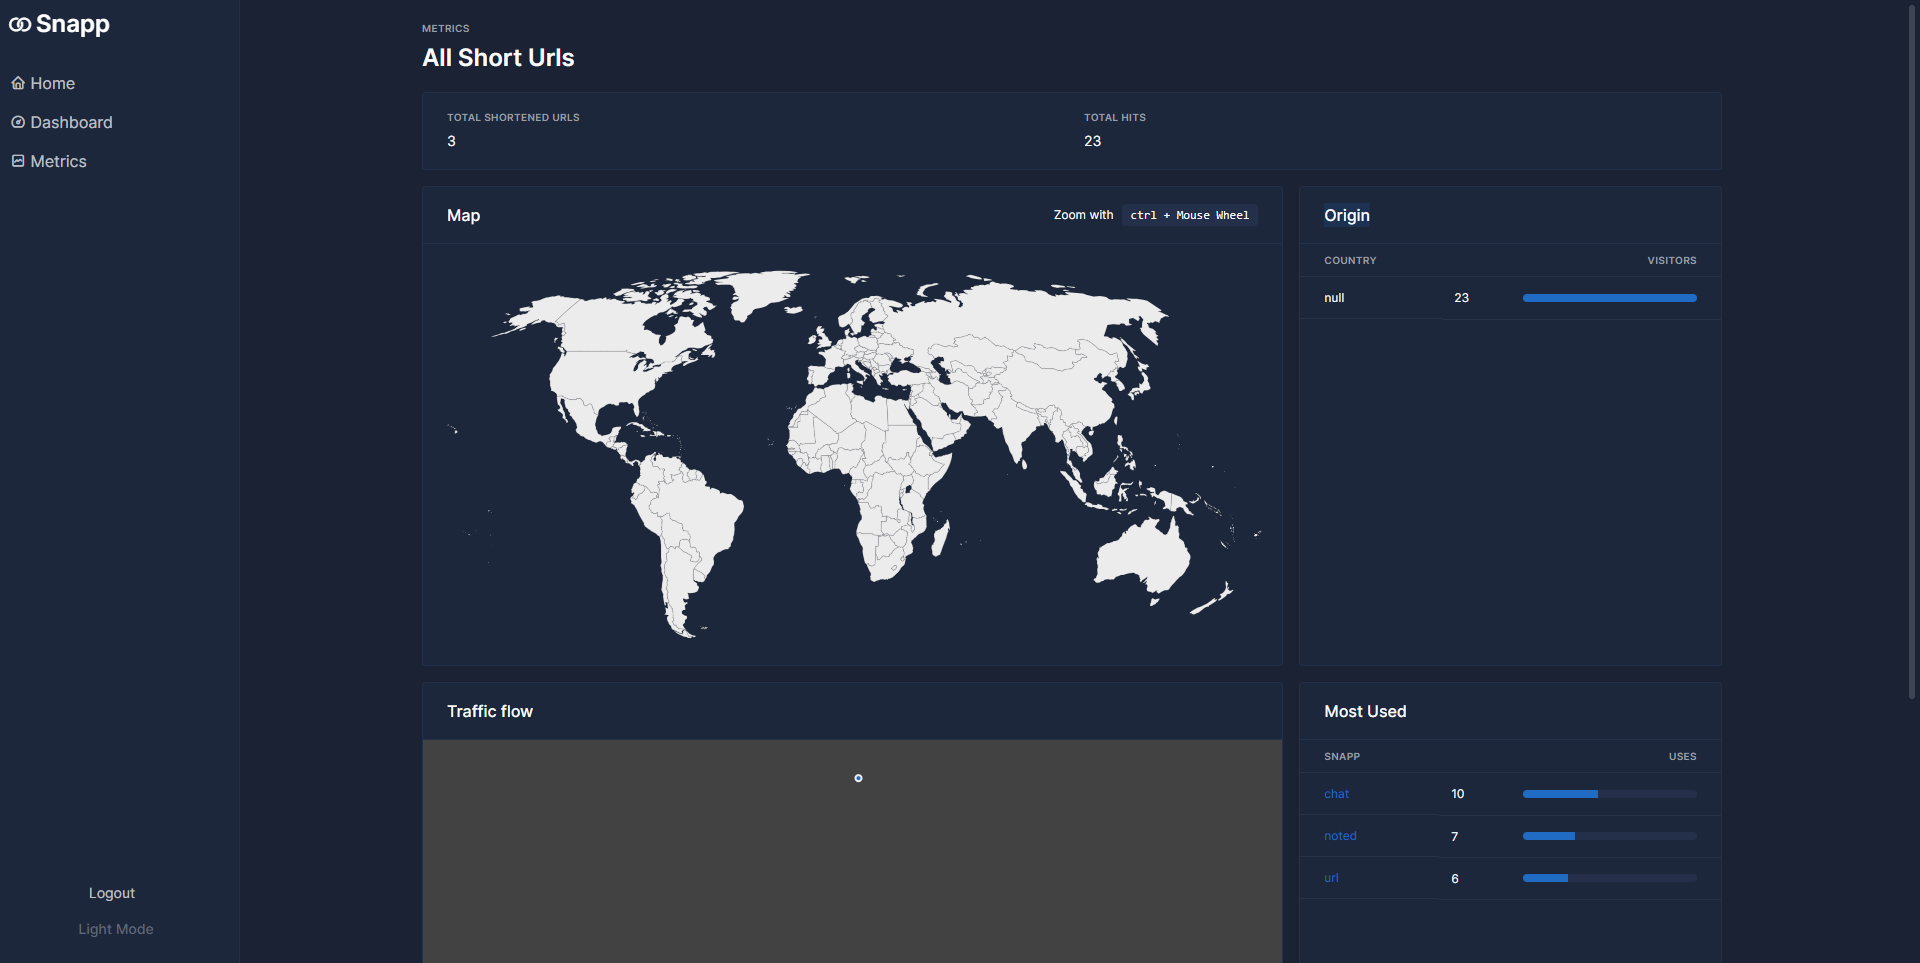
Snapp was created with an emphasis on privacy and control. With Snapp, you get to personalize your link endings, monitor how many times your links are clicked, and for an extra layer of security, you can set expiration dates on your links.
Snapp started as a way for the developer to learn Svelte, Svelte5 Runes, and Tabler, which form the core of Snapp's functionality.
Snapp's easy installation using Docker allows you to get it up and running in seconds on your homelab or cloud host.
Use the following Docker run command to install Snapp on your system.
docker run \
-e ORIGIN=https://example.com \
-e PUBLIC_URL=https://example.com \
-p 3000:3000 \
uraniadev/snapp:latestSnapp relies on Lucia Auth and necessitates hosting under a Secure HTTPS Protocol. For self-hosting without HTTPS, remember to set NODE_ENV=development to enable Lucia to manage sessions.
docker run \
-p 8000:3000 \
-e ORIGIN=http://refurbished:8000 \
-e PUBLIC_URL=http://refurbished:8000 \
-e NODE_ENV=development \
uraniadev/snapp:latest
To get started, simply update the origin and public URL to your domain or local IP, and then access it through your web browser. You'll need to create an initial account to log in and start using the app.
Snapp is user-friendly and functions smoothly right away. I encountered a minor hiccup where the initial URL page didn't generate the custom short code on the first try. Instead, it gave it a random one so I had to edit the link and save it once more for it to work. Aside from that, it operates effectively, and I suggest you try it out! If you like using Snapp, don't forget to visit the Snapp GitHub repository and show your support with a star!
";s:7:"attribs";a:0:{}s:8:"xml_base";s:0:"";s:17:"xml_base_explicit";b:0;s:8:"xml_lang";s:0:"";}}}}}i:6;a:6:{s:4:"data";s:0:"";s:7:"attribs";a:0:{}s:8:"xml_base";s:0:"";s:17:"xml_base_explicit";b:0;s:8:"xml_lang";s:0:"";s:5:"child";a:4:{s:0:"";a:6:{s:5:"title";a:1:{i:0;a:5:{s:4:"data";s:55:"Self Hosting 101 - Oops we have to learn what we break!";s:7:"attribs";a:0:{}s:8:"xml_base";s:0:"";s:17:"xml_base_explicit";b:0;s:8:"xml_lang";s:0:"";}}s:11:"description";a:1:{i:0;a:5:{s:4:"data";s:87:"From homelab to cloud hosted VPS. Self-hosting has many meanings! Which one is for you?";s:7:"attribs";a:0:{}s:8:"xml_base";s:0:"";s:17:"xml_base_explicit";b:0;s:8:"xml_lang";s:0:"";}}s:4:"link";a:1:{i:0;a:5:{s:4:"data";s:35:"https://noted.lol/self-hosting-101/";s:7:"attribs";a:0:{}s:8:"xml_base";s:0:"";s:17:"xml_base_explicit";b:0;s:8:"xml_lang";s:0:"";}}s:4:"guid";a:1:{i:0;a:5:{s:4:"data";s:24:"653e98fccbdb5700013cfd9c";s:7:"attribs";a:1:{s:0:"";a:1:{s:11:"isPermaLink";s:5:"false";}}s:8:"xml_base";s:0:"";s:17:"xml_base_explicit";b:0;s:8:"xml_lang";s:0:"";}}s:8:"category";a:2:{i:0;a:5:{s:4:"data";s:8:"Home Lab";s:7:"attribs";a:0:{}s:8:"xml_base";s:0:"";s:17:"xml_base_explicit";b:0;s:8:"xml_lang";s:0:"";}i:1;a:5:{s:4:"data";s:12:"Self Hosting";s:7:"attribs";a:0:{}s:8:"xml_base";s:0:"";s:17:"xml_base_explicit";b:0;s:8:"xml_lang";s:0:"";}}s:7:"pubDate";a:1:{i:0;a:5:{s:4:"data";s:29:"Mon, 27 Nov 2023 15:02:46 GMT";s:7:"attribs";a:0:{}s:8:"xml_base";s:0:"";s:17:"xml_base_explicit";b:0;s:8:"xml_lang";s:0:"";}}}s:32:"http://purl.org/dc/elements/1.1/";a:1:{s:7:"creator";a:1:{i:0;a:5:{s:4:"data";s:7:"Flavius";s:7:"attribs";a:0:{}s:8:"xml_base";s:0:"";s:17:"xml_base_explicit";b:0;s:8:"xml_lang";s:0:"";}}}s:29:"http://search.yahoo.com/mrss/";a:1:{s:7:"content";a:1:{i:0;a:5:{s:4:"data";s:0:"";s:7:"attribs";a:1:{s:0:"";a:2:{s:3:"url";s:96:"https://noted.lol/content/images/2023/11/homelab-or-cloud-hosting-self-hosting-101-noted.lol.jpg";s:6:"medium";s:5:"image";}}s:8:"xml_base";s:0:"";s:17:"xml_base_explicit";b:0;s:8:"xml_lang";s:0:"";}}}s:40:"http://purl.org/rss/1.0/modules/content/";a:1:{s:7:"encoded";a:1:{i:0;a:5:{s:4:"data";s:7899:"
To me, self hosting means spinning up and maintaining most of a piece of software on your own. This could be on your own computer, server, in a home lab, or even in the cloud on a VPS. The reason I believe this is you aren't relying on someone else to spin up and maintain your setup. You might be relying on a VPS to be maintained by a company but anything you install on it would be reliant on you to maintain. Theoretically, you still learn the same way a home lab would present to you, aside from hardware issues or some other ways.
That being said, what I wouldn't consider so much as self hosting, is stuff like Dropbox, or completely online setup things, like the ghost blog from Ghost, or a Wordpress site from Wordpress. Technically, even my ghost blog that is hosted on Pika Pods. I don't have to go in and manage it, it is a completely managed service and therefore am I really managing it myself?

A good purpose for self hosting is to learn. You can do this with almost any method, whether you host on your main computer, build a server or use a mini pc, completely build out a whole rack in your house, or even rent a Virtual Private Server in the cloud. At this point, the setup is at your fingertips and in order to learn how to set up applications properly, you have to run through and do it yourself.
This lets you learn different things. When problems arise you have to fix them. If something fails to spin up, you have to troubleshoot. If for some reason you forget to do backups and something breaks enough you have to reinstall? You learn the reason that backups might should be a priority, tested, and maintained just as much as the rest of your homelab.

Sometimes as a programmer, game developer, and website developer. I have the need to self host and maintain a local version of an application or website in order to do testing. I could set this up on a vps, or different ways in the cloud. I chose to use my own hardware instead. It is local, if something breaks I can fix it easy, it doesn't need to leave my local network and be part of the world. If I screw up and make the wrong configurations and let people in, it is only accessible though the network I allow and therefore safer to mess around and test and learn, which is key. Safe to learn, doesn't cost much to do so. If I had hosted the test environment online I'd have to open it up to various different things and configure extra ways for only me to use whereas locally hosting makes it so I don't really have to deal with that right now while still in development stage.
As a homelabber, I can test variations of server configs to check how stuff will perform if I wanted to put it on the cloud. I have a giant proxmox server with over 100 gigs of ram and 24 cores. I can split this up however I want as a test environment and test 'theoretical' performance of an application before presenting it to a cloud hosted VPS or other type of server.
So you may ask now, what kind of things can you self host? In my homelab I self host my applications for testing, pi-hole for tracker blocking, RSS reader for aggregating a lot of articles I might want to read in one place so I don't have to go snooping for them. I also have a couple Synology Nas for managing my data and backups, along with sometimes watching TV and listening to music. I know it isn't open source but I really like the Synology suite for what it offers. Someday I may switch over to Jellyfin and Truenas as my TV , backup and file management, but for now? Bleh! Noted is chalked full of apps you can self host, just have a browse around and see.
Back a while I had some shoddy local wireless broadband internet. Something 12 Mbps down, 5 Mbps up, though realistically half the down and a quarter of the up maybe. I knew this because I had set up Internet-Pi, something to track speed tests, ping tests, and other things to sort of watch how my internet is acting over time. Turns out, my old ISP over booked their antennas and couldn't handle the throughput anymore alongside having their antennas plastered on water towers and other places next to stuff like an ATT antenna and it was a nightmare to see. I kept being told that the issue was on my end and that they had nothing wrong but.. my Internet-Pi setup showed me otherwise!

Like I mentioned earlier, self-hosting isn't limited to just homelabs or hosting at home. If you're setting up and managing a system with its applications, and running those applications on that system, it counts as self-hosting. This is because you're doing it yourself, not a company. Not everyone can set up a full home lab, so it doesn't matter if you use your own computer, a Raspberry Pi, a large enterprise server, or a cloud-based VPS. Welcome to the world of self-hosting, where the learning is intense and exhilarating. And when things go wrong, which they often do, we get to learn from our mistakes and fix them!
Do you prefer to host from a homelab or the cloud, and why?
";s:7:"attribs";a:0:{}s:8:"xml_base";s:0:"";s:17:"xml_base_explicit";b:0;s:8:"xml_lang";s:0:"";}}}}}i:7;a:6:{s:4:"data";s:0:"";s:7:"attribs";a:0:{}s:8:"xml_base";s:0:"";s:17:"xml_base_explicit";b:0;s:8:"xml_lang";s:0:"";s:5:"child";a:4:{s:0:"";a:6:{s:5:"title";a:1:{i:0;a:5:{s:4:"data";s:54:"Dockge - A Docker Manager for Self-Hosting Enthusiasts";s:7:"attribs";a:0:{}s:8:"xml_base";s:0:"";s:17:"xml_base_explicit";b:0;s:8:"xml_lang";s:0:"";}}s:11:"description";a:1:{i:0;a:5:{s:4:"data";s:61:"Finally, A Docker manager tailored to the homelab enthusiast!";s:7:"attribs";a:0:{}s:8:"xml_base";s:0:"";s:17:"xml_base_explicit";b:0;s:8:"xml_lang";s:0:"";}}s:4:"link";a:1:{i:0;a:5:{s:4:"data";s:25:"https://noted.lol/dockge/";s:7:"attribs";a:0:{}s:8:"xml_base";s:0:"";s:17:"xml_base_explicit";b:0;s:8:"xml_lang";s:0:"";}}s:4:"guid";a:1:{i:0;a:5:{s:4:"data";s:24:"65620f5237a1c90001b0a0c2";s:7:"attribs";a:1:{s:0:"";a:1:{s:11:"isPermaLink";s:5:"false";}}s:8:"xml_base";s:0:"";s:17:"xml_base_explicit";b:0;s:8:"xml_lang";s:0:"";}}s:8:"category";a:1:{i:0;a:5:{s:4:"data";s:12:"Self Hosting";s:7:"attribs";a:0:{}s:8:"xml_base";s:0:"";s:17:"xml_base_explicit";b:0;s:8:"xml_lang";s:0:"";}}s:7:"pubDate";a:1:{i:0;a:5:{s:4:"data";s:29:"Sat, 25 Nov 2023 16:24:15 GMT";s:7:"attribs";a:0:{}s:8:"xml_base";s:0:"";s:17:"xml_base_explicit";b:0;s:8:"xml_lang";s:0:"";}}}s:32:"http://purl.org/dc/elements/1.1/";a:1:{s:7:"creator";a:1:{i:0;a:5:{s:4:"data";s:6:"Jeremy";s:7:"attribs";a:0:{}s:8:"xml_base";s:0:"";s:17:"xml_base_explicit";b:0;s:8:"xml_lang";s:0:"";}}}s:29:"http://search.yahoo.com/mrss/";a:1:{s:7:"content";a:1:{i:0;a:5:{s:4:"data";s:0:"";s:7:"attribs";a:1:{s:0:"";a:2:{s:3:"url";s:73:"https://noted.lol/content/images/2023/11/self-hosted-dockge-noted.lol.jpg";s:6:"medium";s:5:"image";}}s:8:"xml_base";s:0:"";s:17:"xml_base_explicit";b:0;s:8:"xml_lang";s:0:"";}}}s:40:"http://purl.org/rss/1.0/modules/content/";a:1:{s:7:"encoded";a:1:{i:0;a:5:{s:4:"data";s:9846:"
I've been using Portainer for approximately five years now, and it has proven to be a valuable tool for Docker container management. However, as time has passed, Portainer has increasingly catered to the needs of businesses, making it less user-friendly for self-hosting and home lab enthusiasts. As this transition unfolds, we're witnessing the emergence of new solutions, and Dockge is a notable newcomer in this space.
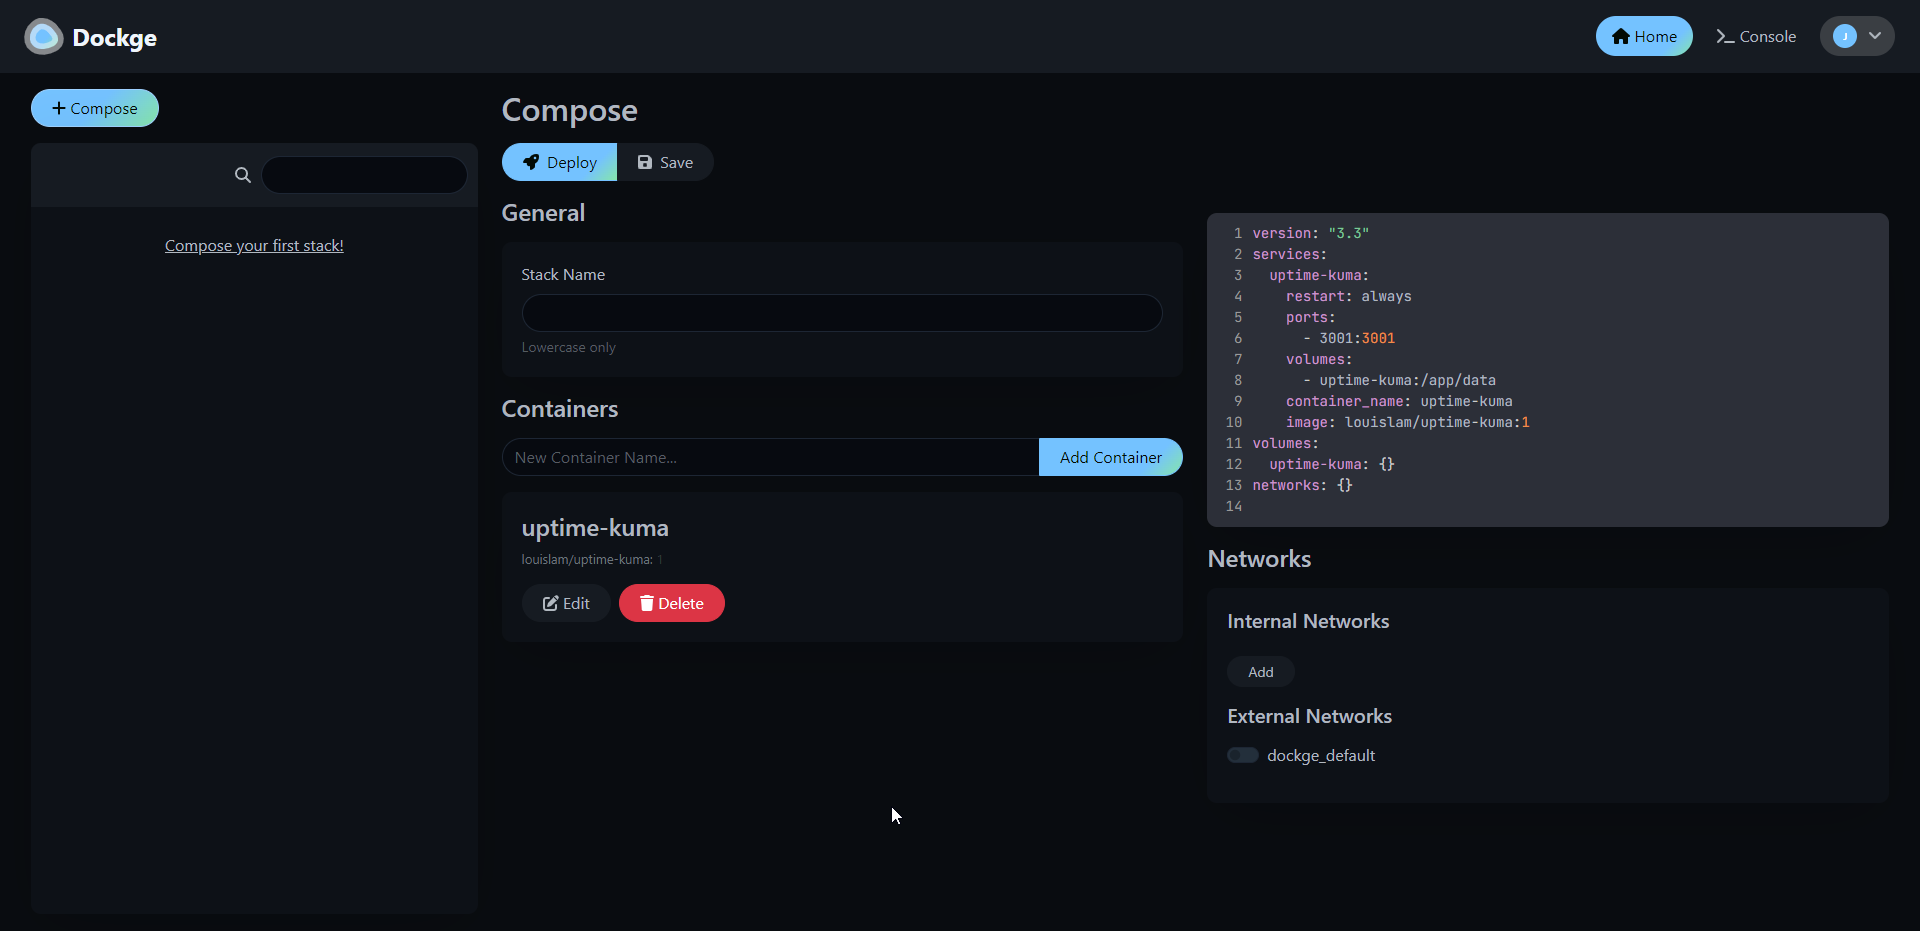
Dockge is a fancy, easy-to-use and reactive self-hosted docker compose.yaml stack-oriented manager.
Dockge, developed by the creator of the widely acclaimed Uptime Kuma, offers a streamlined user experience where everything you require is conveniently available on a single page, easily viewable at a glance. When you create a new container, you'll find logs, a YAML editor, a terminal, and container controls all within arm's reach. There's no need to open multiple tabs to check your logs or manage your containers. Dockge consolidates all essential functions into a single interface ensuring a seamless Docker management experience.
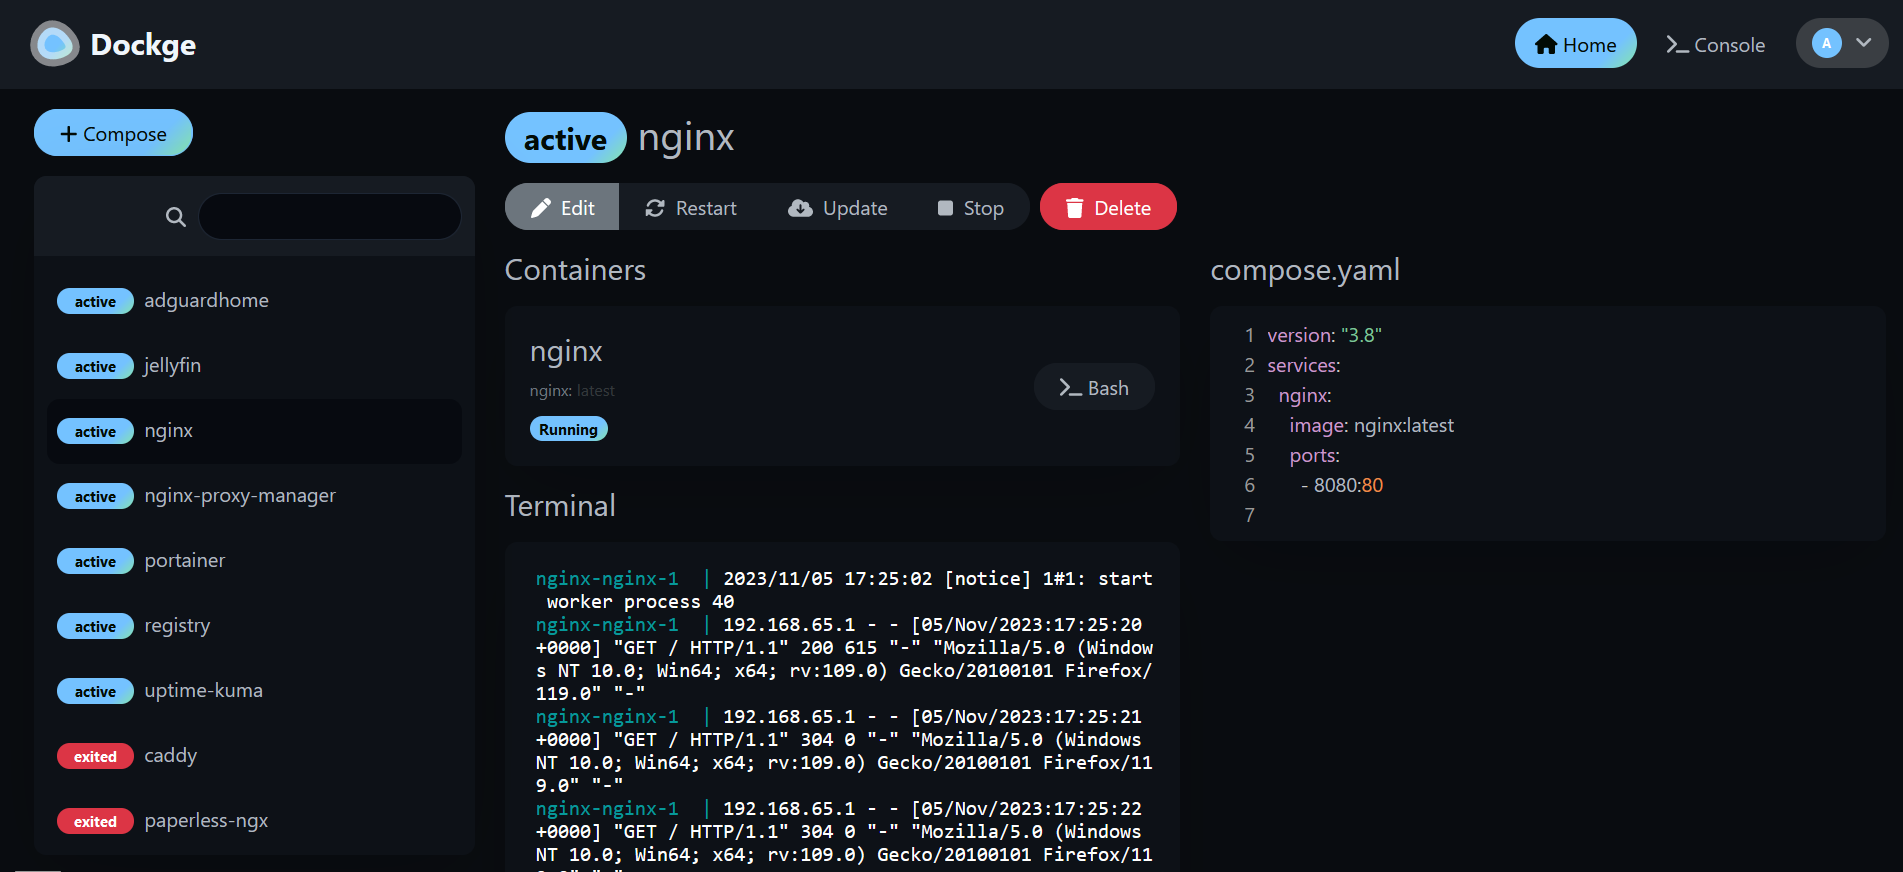
Dockge is a versatile tool that simplifies Docker management, particularly when dealing with Docker Compose.yaml stacks. It empowers you to effortlessly perform tasks like creating, editing, starting, stopping, restarting, and deleting Docker containers and services—all conveniently defined within your Compose.yaml files. Dockge features an interactive Compose.yaml editor for hassle-free configuration and offers real-time interaction with your containers and services through its web terminal.
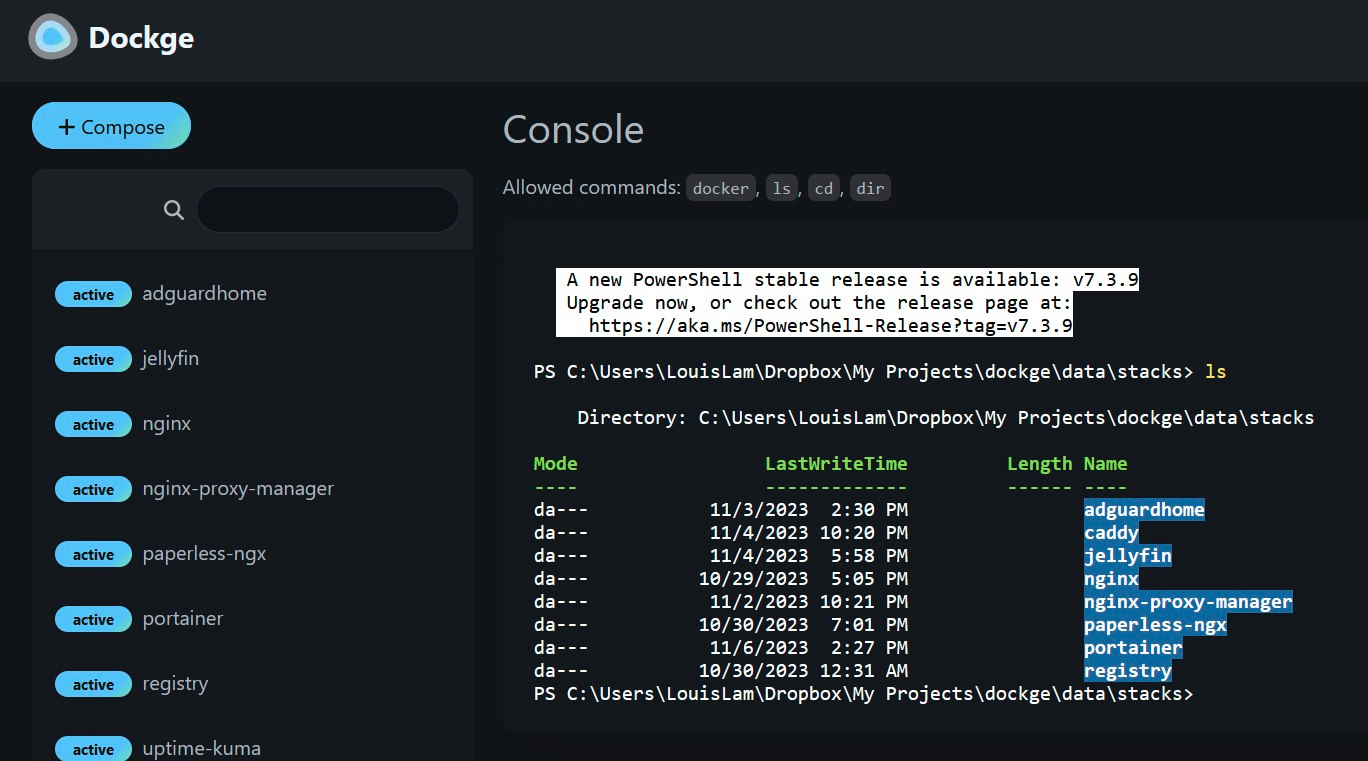
You can monitor progress in real time, whether it's image pulls or other container operations. Its user interface not only gets the job done but also boasts a stylish design, making it a pleasure to use. If you appreciate Uptime Kuma's sleek UI/UX, you'll likely find Dockge's interface equally appealing. Additionally, Dockge simplifies the process of translating complex "docker run" commands into Compose.yaml configurations, maintaining a file-based structure that securely stores your Compose files on your drive. You can easily access and manage them using standard Docker Compose commands, ensuring you remain in control of your configuration files.
One thing I really love about Dockge as mentioned earlier, is its nifty feature that lets you easily convert Docker run commands into Compose configurations. It might sound small, but it's incredibly handy and makes this tool even more fun to use.

Installing Dockge is easy. Here are the steps they lay out on their Github page.
# Create a directory that stores your stacks and stores dockge's compose.yaml
mkdir -p /opt/stacks /opt/dockge
cd /opt/dockge

# Download the compose.yaml
curl https://raw.githubusercontent.com/louislam/dockge/master/compose.yaml --output compose.yaml

# Start the Server
docker compose up -d

# If you are using docker-compose V1 or Podman
# docker-compose up -d
That's all there is to it!
I've been using Dockge for a couple of weeks now, and it's become my top choice for managing Docker. It's easy to use, and I have to admit, I'm pleased to have moved away from the "Upgrade to Portainer business" nags.
If you like the project and want to learn more, be sure to check out the Dockge Github repo and give the project a star!
";s:7:"attribs";a:0:{}s:8:"xml_base";s:0:"";s:17:"xml_base_explicit";b:0;s:8:"xml_lang";s:0:"";}}}}}i:8;a:6:{s:4:"data";s:0:"";s:7:"attribs";a:0:{}s:8:"xml_base";s:0:"";s:17:"xml_base_explicit";b:0;s:8:"xml_lang";s:0:"";s:5:"child";a:4:{s:0:"";a:6:{s:5:"title";a:1:{i:0;a:5:{s:4:"data";s:60:"Awwesome - An Enhanced user interface for Awesome Selfhosted";s:7:"attribs";a:0:{}s:8:"xml_base";s:0:"";s:17:"xml_base_explicit";b:0;s:8:"xml_lang";s:0:"";}}s:11:"description";a:1:{i:0;a:5:{s:4:"data";s:111:"Here's a fun idea for browsing the Awesome Self-Hosted GitHub repository – you can actually host it yourself!";s:7:"attribs";a:0:{}s:8:"xml_base";s:0:"";s:17:"xml_base_explicit";b:0;s:8:"xml_lang";s:0:"";}}s:4:"link";a:1:{i:0;a:5:{s:4:"data";s:27:"https://noted.lol/awwesome/";s:7:"attribs";a:0:{}s:8:"xml_base";s:0:"";s:17:"xml_base_explicit";b:0;s:8:"xml_lang";s:0:"";}}s:4:"guid";a:1:{i:0;a:5:{s:4:"data";s:24:"6529761a17738600010f927e";s:7:"attribs";a:1:{s:0:"";a:1:{s:11:"isPermaLink";s:5:"false";}}s:8:"xml_base";s:0:"";s:17:"xml_base_explicit";b:0;s:8:"xml_lang";s:0:"";}}s:8:"category";a:1:{i:0;a:5:{s:4:"data";s:21:"Self Hosted Web Tools";s:7:"attribs";a:0:{}s:8:"xml_base";s:0:"";s:17:"xml_base_explicit";b:0;s:8:"xml_lang";s:0:"";}}s:7:"pubDate";a:1:{i:0;a:5:{s:4:"data";s:29:"Sat, 18 Nov 2023 15:05:07 GMT";s:7:"attribs";a:0:{}s:8:"xml_base";s:0:"";s:17:"xml_base_explicit";b:0;s:8:"xml_lang";s:0:"";}}}s:32:"http://purl.org/dc/elements/1.1/";a:1:{s:7:"creator";a:1:{i:0;a:5:{s:4:"data";s:6:"Jeremy";s:7:"attribs";a:0:{}s:8:"xml_base";s:0:"";s:17:"xml_base_explicit";b:0;s:8:"xml_lang";s:0:"";}}}s:29:"http://search.yahoo.com/mrss/";a:1:{s:7:"content";a:1:{i:0;a:5:{s:4:"data";s:0:"";s:7:"attribs";a:1:{s:0:"";a:2:{s:3:"url";s:85:"https://noted.lol/content/images/2023/10/self-hosted-resources-featured-noted.lol.jpg";s:6:"medium";s:5:"image";}}s:8:"xml_base";s:0:"";s:17:"xml_base_explicit";b:0;s:8:"xml_lang";s:0:"";}}}s:40:"http://purl.org/rss/1.0/modules/content/";a:1:{s:7:"encoded";a:1:{i:0;a:5:{s:4:"data";s:4363:"
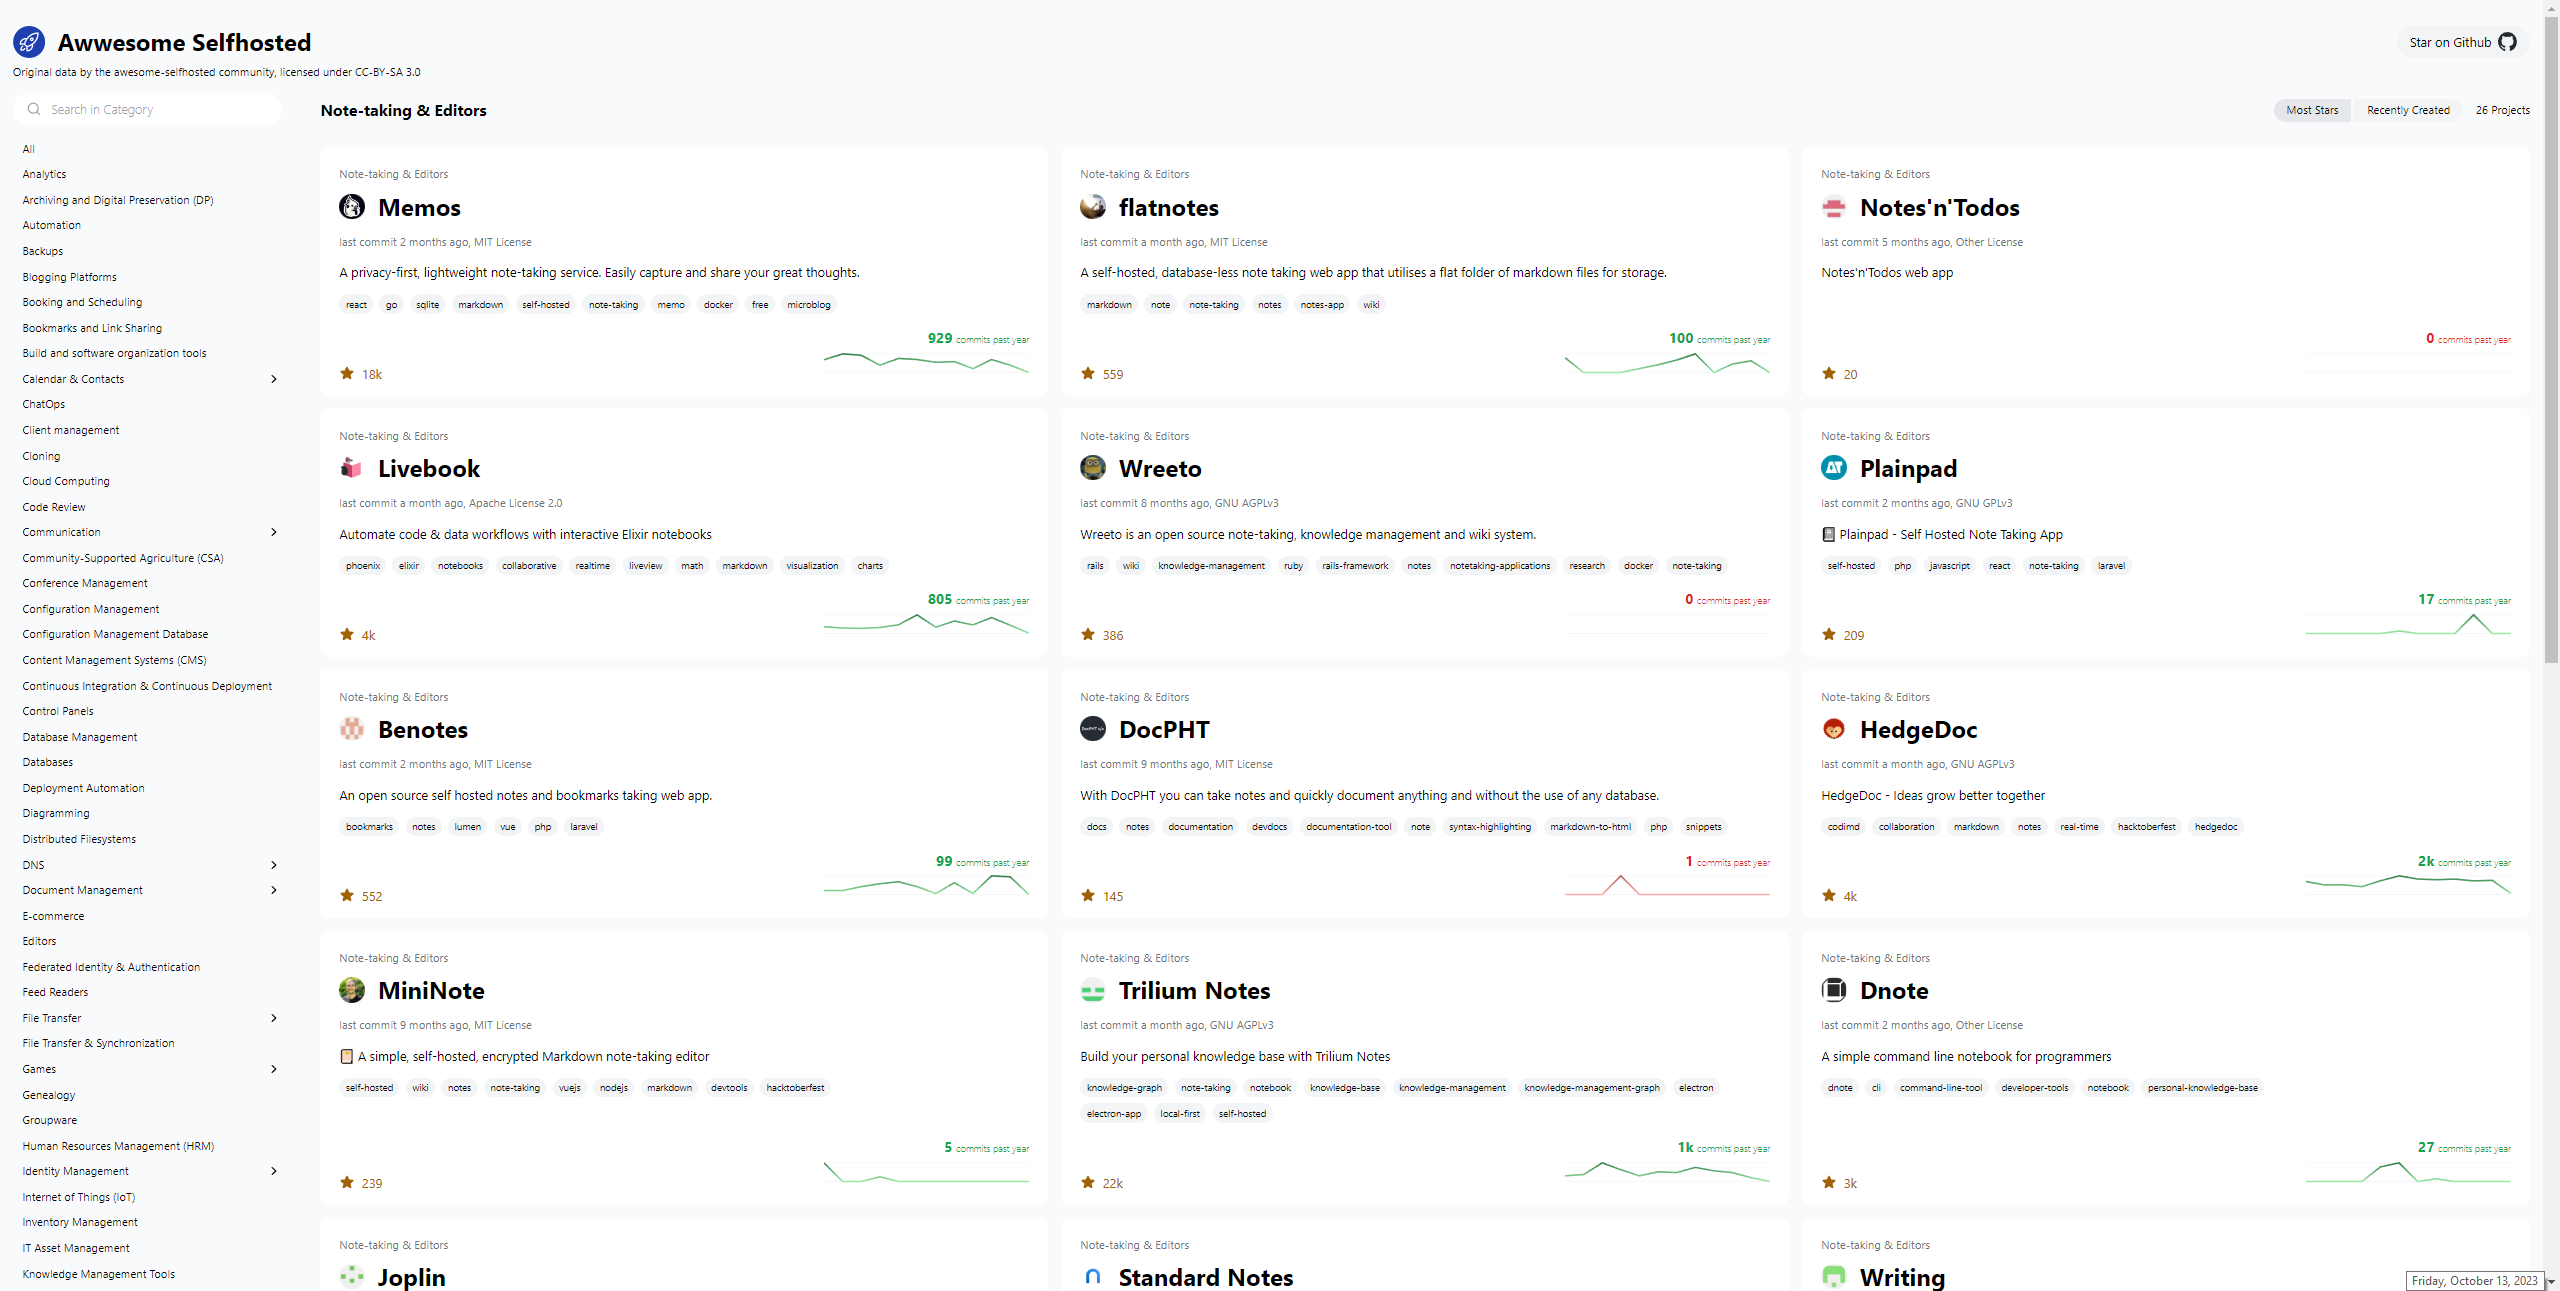
I'm constantly searching for new self-hosted projects to test out and write about. One of my top recommended resources is the Awesome Self-Hosted GitHub repository. It's a fantastic resource with a vast collection of self-hosted apps neatly organized by category. However, it's important to keep in mind that while it covers a lot, it can't list every self-hosted project out there, and that's perfectly understandable.
Awwesome is an enhanced web interface that makes browsing the self-hosted apps listed on Awesome Self-Hosted a little easier with more details about the project repo.
In this project, Svelte and Tailwind are the key technologies being utilized for its development. These technologies have been chosen for their efficiency and flexibility, allowing the project to deliver a seamless user experience while maintaining a visually appealing design.
The project's main source of data comes from the Awesome Selfhosted repository. This repository is a valuable resource for discovering self-hosted software applications and services across a wide range of categories. By crawling this repository, the project ensures that it remains up-to-date with the latest self-hosted solutions available in the open-source community.
However, the project doesn't stop there. It goes a step further by harnessing the power of GitHub's GraphQL API. This API enables the project to access a wealth of information related to each self-hosted project, such as its stars, forks, issues, and contributors. By fetching this additional data, the project enriches its database with valuable insights, making it a more comprehensive resource for users looking to explore and evaluate self-hosted software options.
Awwesome can also be self-hosted using Docker. Here's the Compose.
version: '3'
services:
  ofelia:
    image: mcuadros/ofelia:latest
    container_name: ofelia
    depends_on:
      - source
    command: daemon --docker
    volumes:
      - /var/run/docker.sock:/var/run/docker.sock:ro
    labels:
      ofelia.job-run.awwesome.schedule: "@daily"
      ofelia.job-run.awwesome.container: "awwesome"
  source:
    image: mkitzmann/awwesome
    container_name: awwesome
    working_dir: /usr/src/app
    environment:
      TOKEN_GITHUB: ${TOKEN_GITHUB}
    command: sh -c "npm run build && rm -r html/* && cp -r dist/* html && exit"
    volumes:
      - shared_volume:/usr/src/app/html
  web:
    image: nginx
    container_name: nginx
    ports:
      - "8080:80"
    volumes:
      - shared_volume:/usr/share/nginx/html:ro
volumes:
  shared_volume:
Just plop in a Github Access Token and you're good to go.
I couldn't help but notice that the "Recently Created" page on GitHub sometimes doesn't get it right, showing projects that have been around for a while ahead of newer ones. It's not without its quirks, but it's definitely a fun place to explore and discover more self-hosted ideas. And all credit goes to the Awesome Selfhosted repository!
";s:7:"attribs";a:0:{}s:8:"xml_base";s:0:"";s:17:"xml_base_explicit";b:0;s:8:"xml_lang";s:0:"";}}}}}i:9;a:6:{s:4:"data";s:0:"";s:7:"attribs";a:0:{}s:8:"xml_base";s:0:"";s:17:"xml_base_explicit";b:0;s:8:"xml_lang";s:0:"";s:5:"child";a:4:{s:0:"";a:6:{s:5:"title";a:1:{i:0;a:5:{s:4:"data";s:25:"wg-easy - VPN Made Simple";s:7:"attribs";a:0:{}s:8:"xml_base";s:0:"";s:17:"xml_base_explicit";b:0;s:8:"xml_lang";s:0:"";}}s:11:"description";a:1:{i:0;a:5:{s:4:"data";s:162:"Setting up a VPN has never been easier. Let's get you setup with WireGuard using wg-easy so you can be confident that your data is protected from outside threats.";s:7:"attribs";a:0:{}s:8:"xml_base";s:0:"";s:17:"xml_base_explicit";b:0;s:8:"xml_lang";s:0:"";}}s:4:"link";a:1:{i:0;a:5:{s:4:"data";s:42:"https://noted.lol/wg-easy-vpn-made-simple/";s:7:"attribs";a:0:{}s:8:"xml_base";s:0:"";s:17:"xml_base_explicit";b:0;s:8:"xml_lang";s:0:"";}}s:4:"guid";a:1:{i:0;a:5:{s:4:"data";s:24:"64df95f90903330001702fa2";s:7:"attribs";a:1:{s:0:"";a:1:{s:11:"isPermaLink";s:5:"false";}}s:8:"xml_base";s:0:"";s:17:"xml_base_explicit";b:0;s:8:"xml_lang";s:0:"";}}s:8:"category";a:3:{i:0;a:5:{s:4:"data";s:15:"Self Hosted VPN";s:7:"attribs";a:0:{}s:8:"xml_base";s:0:"";s:17:"xml_base_explicit";b:0;s:8:"xml_lang";s:0:"";}i:1;a:5:{s:4:"data";s:12:"Self Hosting";s:7:"attribs";a:0:{}s:8:"xml_base";s:0:"";s:17:"xml_base_explicit";b:0;s:8:"xml_lang";s:0:"";}i:2;a:5:{s:4:"data";s:8:"Home Lab";s:7:"attribs";a:0:{}s:8:"xml_base";s:0:"";s:17:"xml_base_explicit";b:0;s:8:"xml_lang";s:0:"";}}s:7:"pubDate";a:1:{i:0;a:5:{s:4:"data";s:29:"Fri, 20 Oct 2023 15:36:00 GMT";s:7:"attribs";a:0:{}s:8:"xml_base";s:0:"";s:17:"xml_base_explicit";b:0;s:8:"xml_lang";s:0:"";}}}s:32:"http://purl.org/dc/elements/1.1/";a:1:{s:7:"creator";a:1:{i:0;a:5:{s:4:"data";s:5:"Amrou";s:7:"attribs";a:0:{}s:8:"xml_base";s:0:"";s:17:"xml_base_explicit";b:0;s:8:"xml_lang";s:0:"";}}}s:29:"http://search.yahoo.com/mrss/";a:1:{s:7:"content";a:1:{i:0;a:5:{s:4:"data";s:0:"";s:7:"attribs";a:1:{s:0:"";a:2:{s:3:"url";s:88:"https://noted.lol/content/images/2023/03/self-hosted-wg-easy-wireguard-vpn-noted.lol.jpg";s:6:"medium";s:5:"image";}}s:8:"xml_base";s:0:"";s:17:"xml_base_explicit";b:0;s:8:"xml_lang";s:0:"";}}}s:40:"http://purl.org/rss/1.0/modules/content/";a:1:{s:7:"encoded";a:1:{i:0;a:5:{s:4:"data";s:4764:"
"wg-easy" is a Docker image that provides a simple way to set up and manage WireGuard VPN connections.
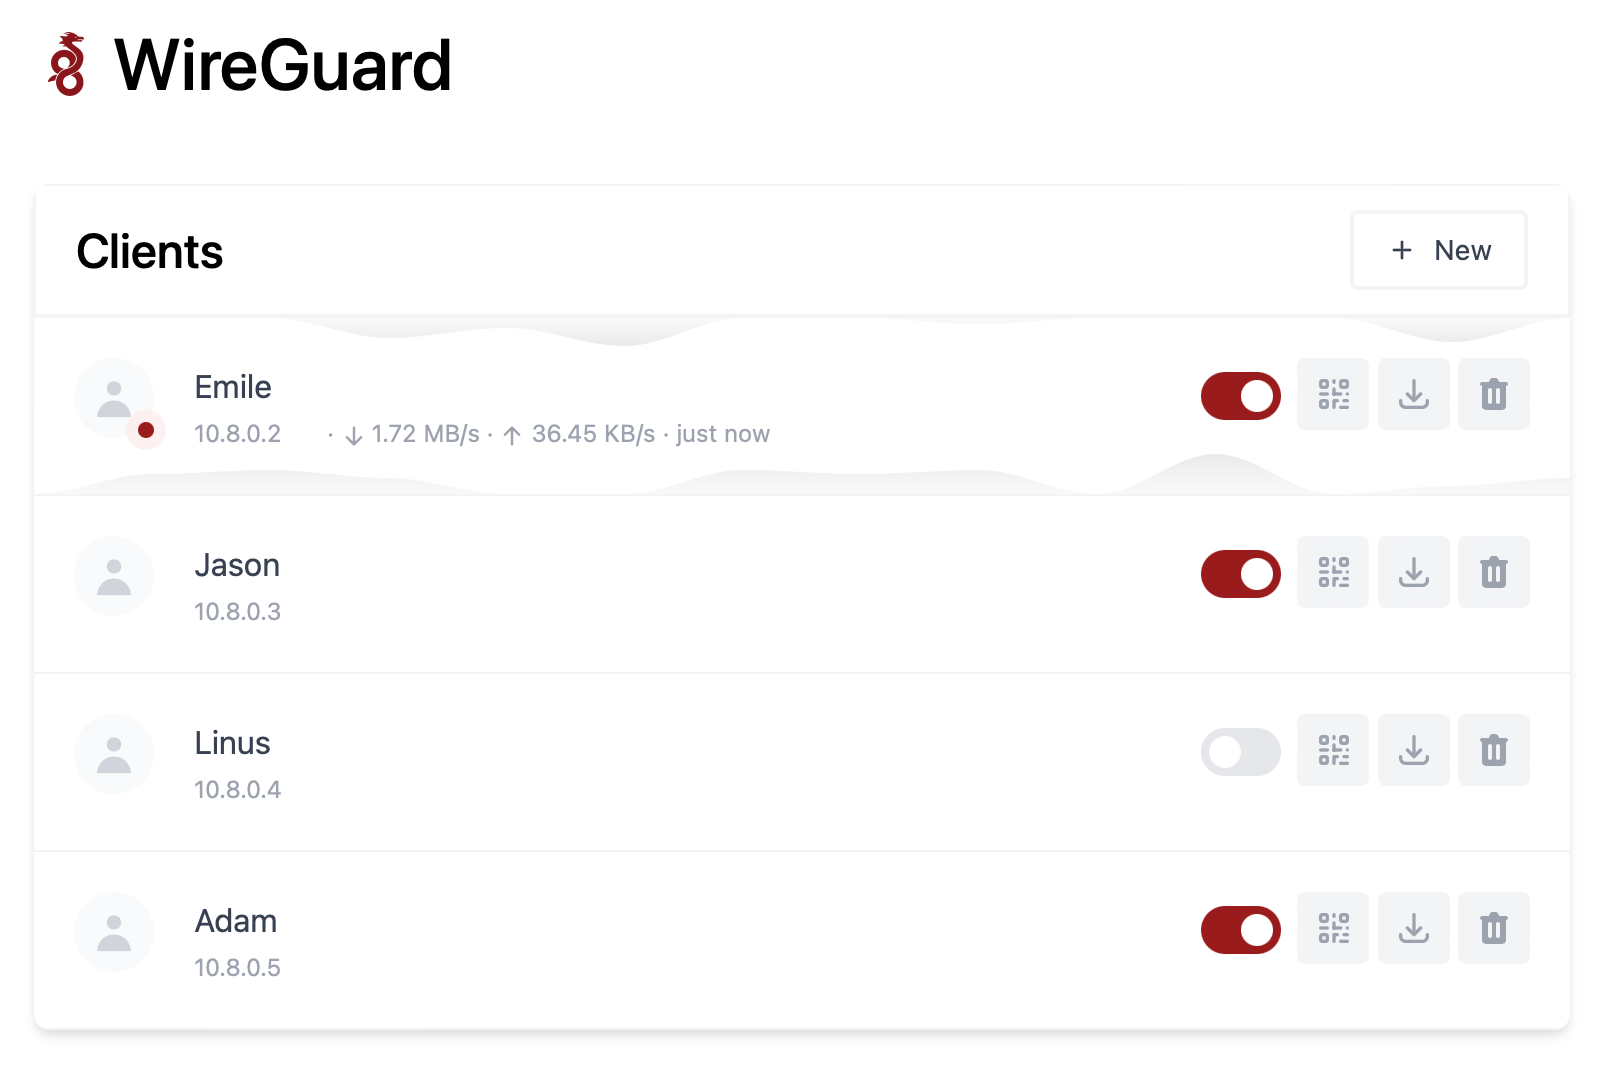
Wireguard is VPN protocol that's faster, more secure, and easier to use than traditional VPN solutions. It allows users to create secure, point-to-point connections over the internet and is often used to protect network traffic and access resources that are on your home network without the need to open ports!
The "wg-easy" Docker image is designed to simplify the process of setting up and managing WireGuard connections by providing a pre-configured environment that includes all the necessary components, such as the WireGuard kernel module, the wg-tools package, and a web-based interface for managing VPN connections.
To use the "wg-easy" Docker image, you will need to have Docker installed on your system and then pull the image from a Docker registry.
Once you have the image, you can run it as a container and start configuring your VPN connections using the provided web interface or command-line tools.
docker run -d \
  --name=wg-easy \
  -e WG_HOST=YOUR_SERVER_IP \
  -e PASSWORD=YOUR_ADMIN_PASSWORD \
  -v ~/.wg-easy:/etc/wireguard \
  -p 51820:51820/udp \
  -p 51821:51821/tcp \
  --cap-add=NET_ADMIN \
  --cap-add=SYS_MODULE \
  --sysctl="net.ipv4.conf.all.src_valid_mark=1" \
  --sysctl="net.ipv4.ip_forward=1" \
  --restart unless-stopped \
  weejewel/wg-easy
You need to modify the command and adapt it :
YOUR_SERVER_IP = WAN IP or Dynamic DNS YOUR_ADMIN_PASSWORD = Password for Web UI version: "3.8"
services:
wg-easy:
environment:
# ⚠️ Required:
# Change this to your host's public address
- WG_HOST=
# Optional:
- PASSWORD= [ADMIN PASSWORD]
# - WG_PORT=51820
# - WG_DEFAULT_ADDRESS= 10.8.0.x
# - WG_DEFAULT_DNS=
# - WG_MTU=1420
- WG_ALLOWED_IPS= [SUBNET]/[MASK]
# - WG_PRE_UP=echo "Pre Up" > /etc/wireguard/pre-up.txt
# - WG_POST_UP=echo "Post Up" > /etc/wireguard/post-up.txt
# - WG_PRE_DOWN=echo "Pre Down" > /etc/wireguard/pre-down.txt
# - WG_POST_DOWN=echo "Post Down" > /etc/wireguard/post-down.txt
image: weejewel/wg-easy
container_name: wg-easy
volumes:
- /storage/path/ofyour/choice:/etc/wireguard
ports:
- "51820:51820/udp"
- "51821:51821/tcp"
restart: unless-stopped
cap_add:
- NET_ADMIN
- SYS_MODULE
sysctls:
- net.ipv4.ip_forward=1
- net.ipv4.conf.all.src_valid_mark=1You need to define the :
PASSWORD : Admin web UI passwordWG_ALLOWED_IPS : your home subnet, this will allow your VPN clients to reach your lan (ex : 192.168.1.0/24]Github Link.
Remember you need to open 51820/UDP on your firewall for the magic to happen.
Self-hosting WG-easy can provide several benefits, including increased control, privacy, and security. By hosting your own VPN server using WG-easy, you can have complete control over your network and data, as well as the ability to customize the server to meet your specific needs. Self-hosting can offer increased privacy, as you are not relying on third-party VPN providers to protect your data. By using WG-easy's strong encryption and security protocols, you can be confident that your data is protected from outside threats.
";s:7:"attribs";a:0:{}s:8:"xml_base";s:0:"";s:17:"xml_base_explicit";b:0;s:8:"xml_lang";s:0:"";}}}}}i:10;a:6:{s:4:"data";s:0:"";s:7:"attribs";a:0:{}s:8:"xml_base";s:0:"";s:17:"xml_base_explicit";b:0;s:8:"xml_lang";s:0:"";s:5:"child";a:4:{s:0:"";a:6:{s:5:"title";a:1:{i:0;a:5:{s:4:"data";s:59:"Continue - An Open-Source AI Software Development Assistant";s:7:"attribs";a:0:{}s:8:"xml_base";s:0:"";s:17:"xml_base_explicit";b:0;s:8:"xml_lang";s:0:"";}}s:11:"description";a:1:{i:0;a:5:{s:4:"data";s:138:"The open-source autopilot for software development that brings the ChatGPT magic to your favorite coding tools like VS Code and JetBrains.";s:7:"attribs";a:0:{}s:8:"xml_base";s:0:"";s:17:"xml_base_explicit";b:0;s:8:"xml_lang";s:0:"";}}s:4:"link";a:1:{i:0;a:5:{s:4:"data";s:27:"https://noted.lol/continue/";s:7:"attribs";a:0:{}s:8:"xml_base";s:0:"";s:17:"xml_base_explicit";b:0;s:8:"xml_lang";s:0:"";}}s:4:"guid";a:1:{i:0;a:5:{s:4:"data";s:24:"6529332617738600010f91f7";s:7:"attribs";a:1:{s:0:"";a:1:{s:11:"isPermaLink";s:5:"false";}}s:8:"xml_base";s:0:"";s:17:"xml_base_explicit";b:0;s:8:"xml_lang";s:0:"";}}s:8:"category";a:1:{i:0;a:5:{s:4:"data";s:8:"AI Tools";s:7:"attribs";a:0:{}s:8:"xml_base";s:0:"";s:17:"xml_base_explicit";b:0;s:8:"xml_lang";s:0:"";}}s:7:"pubDate";a:1:{i:0;a:5:{s:4:"data";s:29:"Fri, 13 Oct 2023 13:25:46 GMT";s:7:"attribs";a:0:{}s:8:"xml_base";s:0:"";s:17:"xml_base_explicit";b:0;s:8:"xml_lang";s:0:"";}}}s:32:"http://purl.org/dc/elements/1.1/";a:1:{s:7:"creator";a:1:{i:0;a:5:{s:4:"data";s:6:"Cedric";s:7:"attribs";a:0:{}s:8:"xml_base";s:0:"";s:17:"xml_base_explicit";b:0;s:8:"xml_lang";s:0:"";}}}s:29:"http://search.yahoo.com/mrss/";a:1:{s:7:"content";a:1:{i:0;a:5:{s:4:"data";s:0:"";s:7:"attribs";a:1:{s:0:"";a:2:{s:3:"url";s:97:"https://noted.lol/content/images/2023/10/continue-coding-chat-ai-assistant-featured-noted.lol.jpg";s:6:"medium";s:5:"image";}}s:8:"xml_base";s:0:"";s:17:"xml_base_explicit";b:0;s:8:"xml_lang";s:0:"";}}}s:40:"http://purl.org/rss/1.0/modules/content/";a:1:{s:7:"encoded";a:1:{i:0;a:5:{s:4:"data";s:9986:"
Many developers have started using ChatGPT in their coding, but the process can be cumbersome due to the need for copying, pasting, and editing to make generated responses fit into their code. Continue streamlines this by allowing LLMs to work seamlessly within your IDE as you complete your coding tasks.
Continue is an open-source tool for software development. It's an extension for integrated development environments (IDEs) like VS Code and JetBrains, and it brings the capabilities of ChatGPT right into your coding environment.
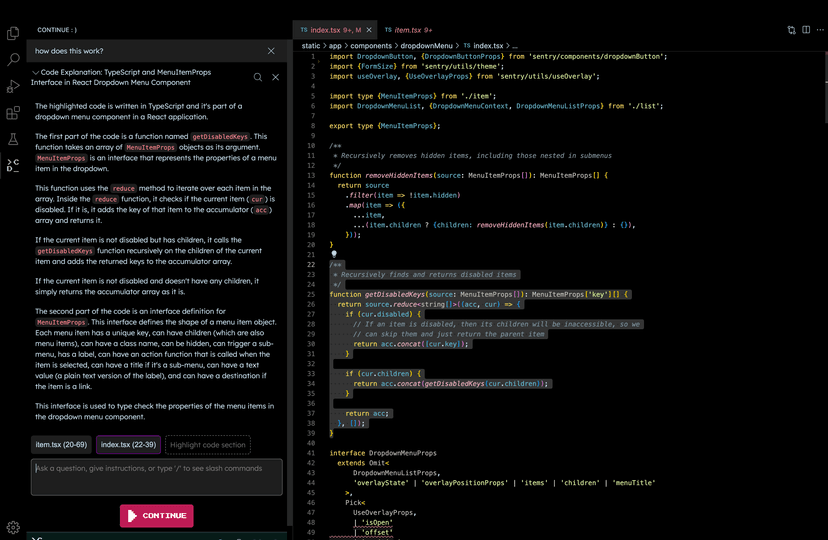
With Continue, you have control over when you want to use Large Language Models (LLMs) such as GPT-4 and Code Llama as a helpful assistant. Just select your code, provide instructions in natural language, and use commands like /edit to guide the LLM.
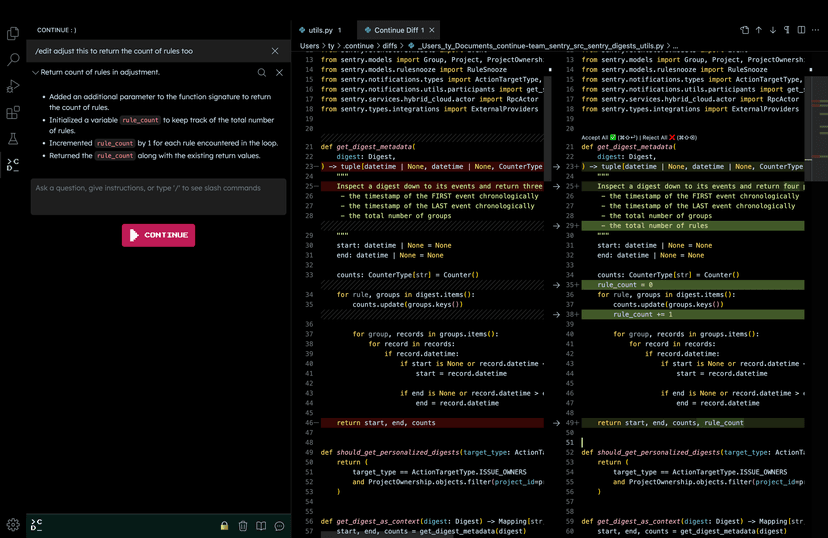
The effectiveness of Continue depends on the specific LLM you're using for edits and explanations. Keep in mind that LLMs can sometimes generate information that isn't accurate, like inventing a library or using syntax that doesn't exist. If you ever encounter something that doesn't seem right or functional, it's a good idea to cross-check it with a quick Google search to avoid any potential pitfalls. Read more here on how to use Continue in your workflow.
Continue operates in a structured manner, breaking down its actions into units called "steps." What's neat is that these steps can be stacked and combined to handle more complex tasks, making it quite flexible for your coding needs. Each step gets access to the Software Development Kit (SDK), which empowers you to incorporate Large Language Models (LLMs) into your workflow. Whether you need to edit a file or call upon a model, the SDK has your back.
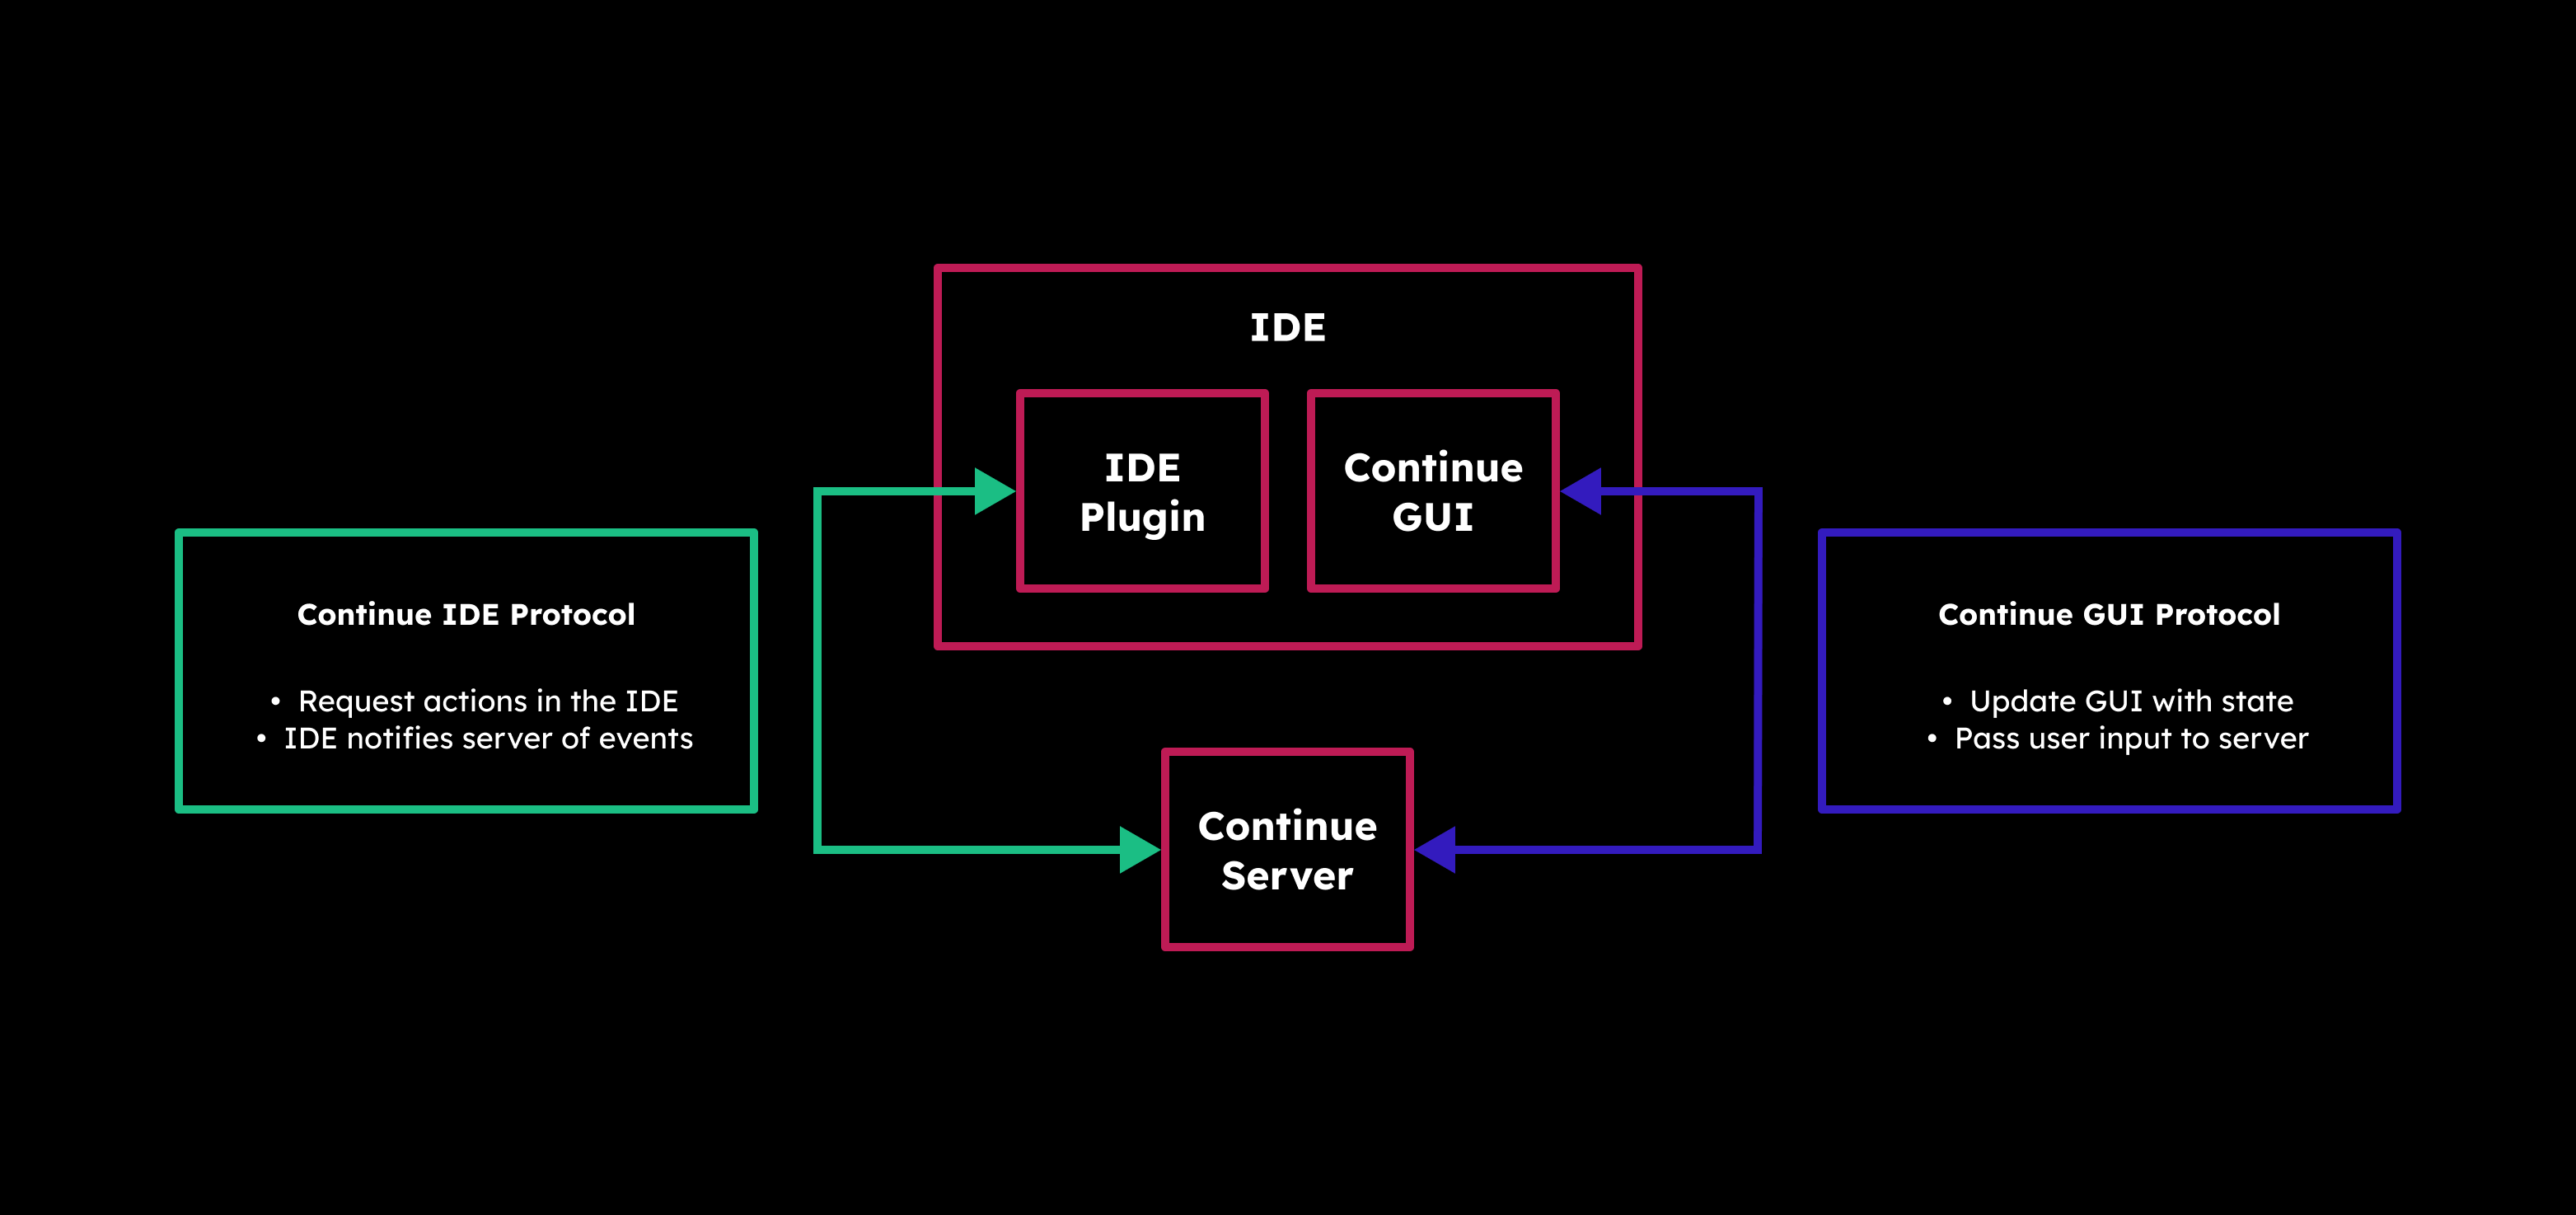
Under the hood, Continue has a Server (which can be run manually) that acts as the bridge between your IDE and the graphical user interface (GUI). It's the brains behind determining what steps should come next. And speaking of the GUI, it's where the magic happens. Here, you can thoroughly review every automated step, offering you the freedom to undo or redo any of them, ensuring your code's journey stays in your control.
Continue seamlessly integrates with popular IDEs to enhance your coding experience. You have two great options to choose from:
First up is VS Code, where Continue is available as an extension. You can easily add it to your VS Code setup to unlock its powerful features. Just head over to the Visual Studio Marketplace, find Continue, and install it with a few clicks.
If you prefer JetBrains IDEs like Intellij, PyCharm, or WebStorm, you're in luck too. Continue offers a plugin for JetBrains, providing you with a helping hand for your coding projects. To get started, just visit the JetBrains Marketplace, locate Continue, and follow the installation process.
In my experience using Continue with VS Code, it's been a really helpful tool for my coding projects. It makes things easier by creating code, making refactoring simpler, and giving me new ideas when I need them. The best part is how well it works inside VS Code, making my work smoother and letting me focus on the creative part of coding while it handles the technical stuff.
For more information about Continue, vist the following links.
Continue Github: https://github.com/continuedev/continue
Continue website and docs: https://continue.dev
Continue on Discord: https://discord.gg/vapESyrFmJ
";s:7:"attribs";a:0:{}s:8:"xml_base";s:0:"";s:17:"xml_base_explicit";b:0;s:8:"xml_lang";s:0:"";}}}}}i:11;a:6:{s:4:"data";s:0:"";s:7:"attribs";a:0:{}s:8:"xml_base";s:0:"";s:17:"xml_base_explicit";b:0;s:8:"xml_lang";s:0:"";s:5:"child";a:4:{s:0:"";a:6:{s:5:"title";a:1:{i:0;a:5:{s:4:"data";s:72:"Ollama - Self-Hosted AI Chat with Llama 2, Code Llama and More in Docker";s:7:"attribs";a:0:{}s:8:"xml_base";s:0:"";s:17:"xml_base_explicit";b:0;s:8:"xml_lang";s:0:"";}}s:11:"description";a:1:{i:0;a:5:{s:4:"data";s:73:"Self-hosted Llama 2 through the power of Ollama in Docker. Let's dive in!";s:7:"attribs";a:0:{}s:8:"xml_base";s:0:"";s:17:"xml_base_explicit";b:0;s:8:"xml_lang";s:0:"";}}s:4:"link";a:1:{i:0;a:5:{s:4:"data";s:25:"https://noted.lol/ollama/";s:7:"attribs";a:0:{}s:8:"xml_base";s:0:"";s:17:"xml_base_explicit";b:0;s:8:"xml_lang";s:0:"";}}s:4:"guid";a:1:{i:0;a:5:{s:4:"data";s:24:"6527f9670da4d600017c276b";s:7:"attribs";a:1:{s:0:"";a:1:{s:11:"isPermaLink";s:5:"false";}}s:8:"xml_base";s:0:"";s:17:"xml_base_explicit";b:0;s:8:"xml_lang";s:0:"";}}s:8:"category";a:1:{i:0;a:5:{s:4:"data";s:20:"Self Hosted AI Tools";s:7:"attribs";a:0:{}s:8:"xml_base";s:0:"";s:17:"xml_base_explicit";b:0;s:8:"xml_lang";s:0:"";}}s:7:"pubDate";a:1:{i:0;a:5:{s:4:"data";s:29:"Thu, 12 Oct 2023 15:57:42 GMT";s:7:"attribs";a:0:{}s:8:"xml_base";s:0:"";s:17:"xml_base_explicit";b:0;s:8:"xml_lang";s:0:"";}}}s:32:"http://purl.org/dc/elements/1.1/";a:1:{s:7:"creator";a:1:{i:0;a:5:{s:4:"data";s:6:"Cedric";s:7:"attribs";a:0:{}s:8:"xml_base";s:0:"";s:17:"xml_base_explicit";b:0;s:8:"xml_lang";s:0:"";}}}s:29:"http://search.yahoo.com/mrss/";a:1:{s:7:"content";a:1:{i:0;a:5:{s:4:"data";s:0:"";s:7:"attribs";a:1:{s:0:"";a:2:{s:3:"url";s:88:"https://noted.lol/content/images/2023/10/ollama-self-hosted-ai-chat-docker-noted.lol.jpg";s:6:"medium";s:5:"image";}}s:8:"xml_base";s:0:"";s:17:"xml_base_explicit";b:0;s:8:"xml_lang";s:0:"";}}}s:40:"http://purl.org/rss/1.0/modules/content/";a:1:{s:7:"encoded";a:1:{i:0;a:5:{s:4:"data";s:20617:"
Hey everyone! I'm back with an exciting tool that lets you run Llama 2, Code Llama, and more directly in your terminal using a simple Docker command. Say hello to Ollama, the AI chat program that makes interacting with LLMs as easy as spinning up a docker container.
Ollama is a command-line chatbot that makes it simple to use large language models almost anywhere, and now it's even easier with a Docker image.
Ollama offers a range of open-source models you can find at ollama.ai/library. Check out these examples of models you can download:
| Model | Parameters | Size | Download |
|---|---|---|---|
| Mistral | 7B | 4.1GB | ollama run mistral |
| Llama 2 | 7B | 3.8GB | ollama run llama2 |
| Code Llama | 7B | 3.8GB | ollama run codellama |
| Llama 2 Uncensored | 7B | 3.8GB | ollama run llama2-uncensored |
| Llama 2 13B | 13B | 7.3GB | ollama run llama2:13b |
| Llama 2 70B | 70B | 39GB | ollama run llama2:70b |
| Orca Mini | 3B | 1.9GB | ollama run orca-mini |
| Vicuna | 7B | 3.8GB | ollama run vicuna |
Please remember: To run the 3B models, make sure you have a minimum of 8 GB of RAM. For the 7B models, you'll need 16 GB, and for the 13B models, you should have 32 GB.

Ollama can take advantage of GPU acceleration in Docker containers designed for Nvidia GPUs. I didn't use the GPU option for testing, and it ran smoothly!
Just ensure you have a computer with Linux and Docker installed. Then, use the following command to download the Ollama image to your computer.
docker run -d -v ollama:/root/.ollama -p 11434:11434 --name ollama ollama/ollamaDon't forget, this is running on your CPU, not the GPU. If you're looking for that extra oomph with GPU support, check out the Ollama blog post for Docker image that supports Nvidia GPU.
docker exec -it ollama ollama run llama2This will download the Llama 2 model to your system. If you use the "ollama run" command and the model isn't already downloaded, it will perform a download. To get the model without running it, simply use "ollama pull llama2."

Once the model is downloaded you can initiate the chat sequence and begin your conversation. You can exit or start a new chat by pressing Ctrl+D. If you exit, you will have to re run the command above to initiate the chat again.
Ok, so performance is completely dependant on the hardware and resources your system has. I ran llama2's 7B version on an LXC container with 15GB of ram and 4 CPU cores. Here is the response speed I was getting.

I was blown away at how fast the responses where out of an LXC container...
Going below 3 CPU cores made it almost unusable, resulting in frequent freezes. Keep in mind, this was just for testing purposes. AI chatbots always work better on dedicated systems or bare metal.
I'd like to point out that Ollama offers desktop apps for both MacOS and Linux, and it seems they're working on a Windows version as well, though I haven't personally tried the desktop versions, having focused on the Docker version as it seems more suited for self-hosting.
I have to admit, I'm genuinely impressed with how Ollama performs in this testing environment. It's so user friendly that I can see myself using it more often. Downloading models is simple and well documented on the Ollama website.
Even though a command-line tool like this might not offer the same convenience and flashy features as a web interface, there's a certain satisfaction in whipping up a chatbot quickly right in your terminal. There's a sense of accomplishment when you see it in action.
If you're new to AI chatbots and LLMs and eager to dive into the topic, don't hesitate to browse through my other articles right here for a deeper understanding. I'll be covering a lot more about the topic here on Noted so stay tuned. 😊
This was a basic example of how to setup Ollama using Docker. There is a lot I didn't cover, like customizing your own models, prompts and even the Rest API. To read more about these Ollama features, visit the following links:
Ollama website: https://ollama.ai
Ollama Github: https://github.com/jmorganca/ollama
Ollama Discord: https://discord.com/invite/ollama
";s:7:"attribs";a:0:{}s:8:"xml_base";s:0:"";s:17:"xml_base_explicit";b:0;s:8:"xml_lang";s:0:"";}}}}}i:12;a:6:{s:4:"data";s:0:"";s:7:"attribs";a:0:{}s:8:"xml_base";s:0:"";s:17:"xml_base_explicit";b:0;s:8:"xml_lang";s:0:"";s:5:"child";a:4:{s:0:"";a:6:{s:5:"title";a:1:{i:0;a:5:{s:4:"data";s:41:"Self-Hosted Blogging Made Easy with Ghost";s:7:"attribs";a:0:{}s:8:"xml_base";s:0:"";s:17:"xml_base_explicit";b:0;s:8:"xml_lang";s:0:"";}}s:11:"description";a:1:{i:0;a:5:{s:4:"data";s:117:"Discover Ghost, your self-hosted blogging companion, for effortless creativity and control over your online presence.";s:7:"attribs";a:0:{}s:8:"xml_base";s:0:"";s:17:"xml_base_explicit";b:0;s:8:"xml_lang";s:0:"";}}s:4:"link";a:1:{i:0;a:5:{s:4:"data";s:28:"https://noted.lol/ghost-cms/";s:7:"attribs";a:0:{}s:8:"xml_base";s:0:"";s:17:"xml_base_explicit";b:0;s:8:"xml_lang";s:0:"";}}s:4:"guid";a:1:{i:0;a:5:{s:4:"data";s:24:"6525cdfa0da4d600017c23c6";s:7:"attribs";a:1:{s:0:"";a:1:{s:11:"isPermaLink";s:5:"false";}}s:8:"xml_base";s:0:"";s:17:"xml_base_explicit";b:0;s:8:"xml_lang";s:0:"";}}s:8:"category";a:1:{i:0;a:5:{s:4:"data";s:25:"Self Hosted CMS Platforms";s:7:"attribs";a:0:{}s:8:"xml_base";s:0:"";s:17:"xml_base_explicit";b:0;s:8:"xml_lang";s:0:"";}}s:7:"pubDate";a:1:{i:0;a:5:{s:4:"data";s:29:"Thu, 12 Oct 2023 13:44:50 GMT";s:7:"attribs";a:0:{}s:8:"xml_base";s:0:"";s:17:"xml_base_explicit";b:0;s:8:"xml_lang";s:0:"";}}}s:32:"http://purl.org/dc/elements/1.1/";a:1:{s:7:"creator";a:1:{i:0;a:5:{s:4:"data";s:6:"Jeremy";s:7:"attribs";a:0:{}s:8:"xml_base";s:0:"";s:17:"xml_base_explicit";b:0;s:8:"xml_lang";s:0:"";}}}s:29:"http://search.yahoo.com/mrss/";a:1:{s:7:"content";a:1:{i:0;a:5:{s:4:"data";s:0:"";s:7:"attribs";a:1:{s:0:"";a:2:{s:3:"url";s:81:"https://noted.lol/content/images/2023/10/ghost-self-hosted-featured-noted.lol.jpg";s:6:"medium";s:5:"image";}}s:8:"xml_base";s:0:"";s:17:"xml_base_explicit";b:0;s:8:"xml_lang";s:0:"";}}}s:40:"http://purl.org/rss/1.0/modules/content/";a:1:{s:7:"encoded";a:1:{i:0;a:5:{s:4:"data";s:12286:"
Tired of struggling with complex blogging platforms that distract you from your writing? Meet Ghost, a streamlined solution that allows you to concentrate on your content. With the option for self-hosting, speed, and reliability, Ghost might be just what you're looking for.
Ghost CMS, or Ghost, is a well-known open-source content management system launched in 2013. It's designed for creating and managing blogs and publications with a focus on simplicity and speedy content creation. Ghost can be self-hosted, giving you control over your website's hosting environment.

Do you remember the days when Blogger and Tumblr were the main choices for creating a blog? Well, it's understandable if you don't, but blogging today relies on the time you can spare. With technology always advancing, our patience with older tech diminishes. We often shift to the newest and best options. In my opinion that is Ghost!

You will need a host machine with Docker and Docker Compose installed for this example. If you need assistance, see our guide Install Docker and Portainer on Debian for Self-Hosting.
Below is an example of how Ghost can be self-hosted using Docker Compose.
version: '3'
services:
  ghost-server:
    image: ghost
    cap_add:
      - CAP_SYS_NICE
    security_opt:
      - seccomp:unconfined
    restart: always
    ports:
      - 2368:2368
    depends_on:
      - ghost-db
    environment:
      url: https://your-domain.com
      database__client: mysql
      database__connection__host: ghost-db
      database__connection__user: root
      database__connection__password: V3ryS3cretP@ss
      database__connection__database: ghost
    volumes:
      - /docker/ghost/content:/var/lib/ghost/content

  ghost-db:
    image: mysql:8
    security_opt:
    - seccomp:unconfined
    restart: always
    command: --default-authentication-plugin=mysql_native_password
    environment:
      MYSQL_ROOT_PASSWORD: V3ryS3cretP@ss
    volumes:
      - /docker/ghost/mysql:/var/lib/mysql
You should change the URL to your domain name and the database password to something more secure. We have a more detailed guide on installing and self-hosting Ghost here.
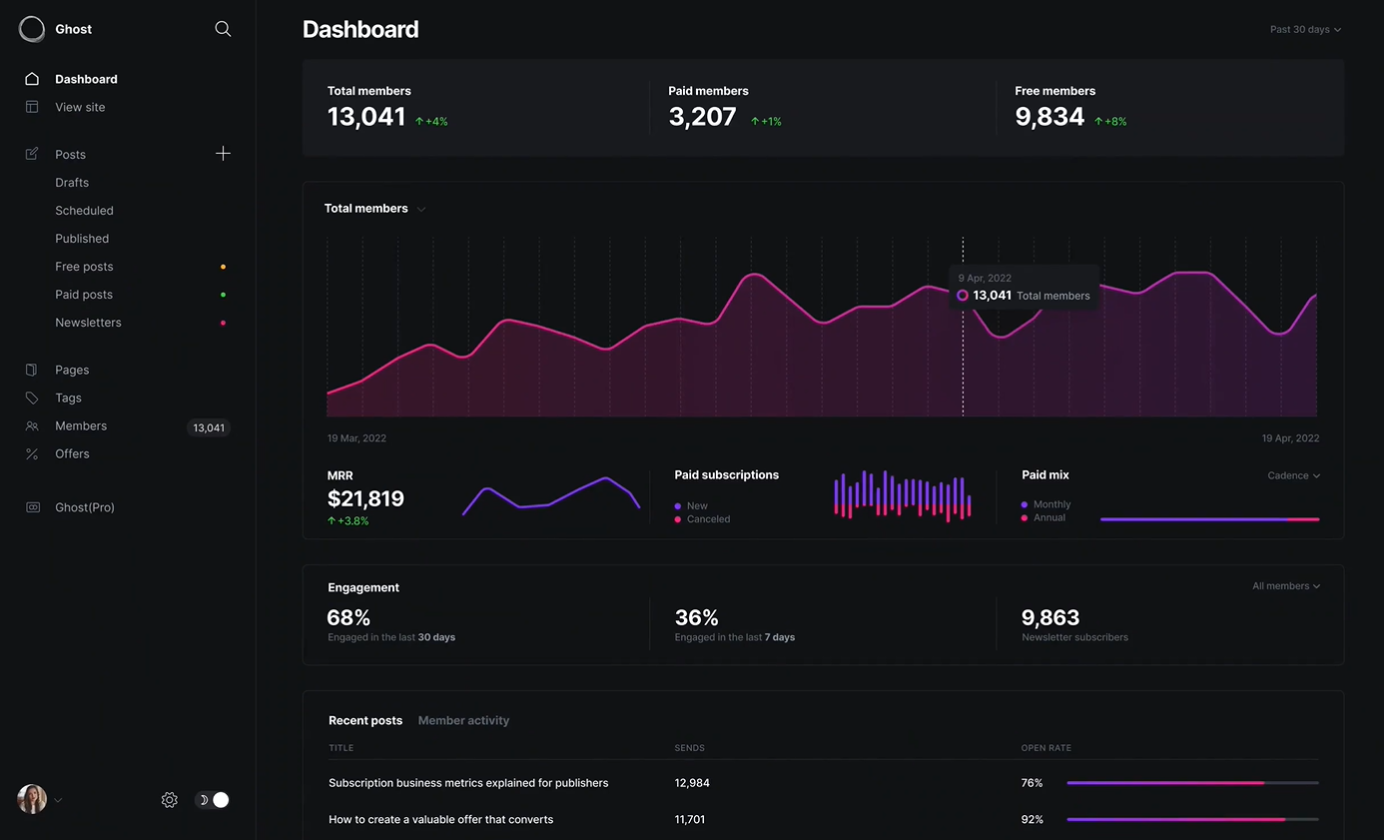
The Ghost admin dashboard is simple and easy to navigate. You can enable dark mode so it's easier on the eyes.
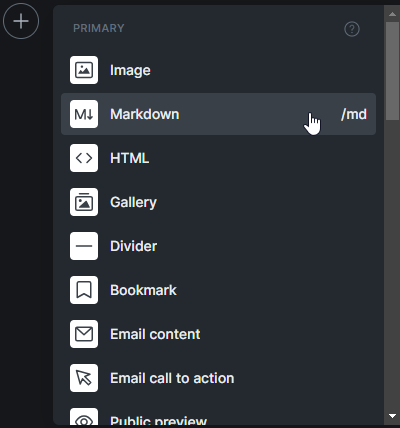
Personally, I love writing in Ghost, and a lot of it has to do with the built-in card feature. These cards give you the freedom to get creative and elevate the look of your articles with minimal effort.
Ghost is all about helping creators grow their fanbase through subscriptions. They've simplified it with features like subscription forms and exclusive content for your subscribers. Personally, I lean toward making knowledge freely available, as I've mentioned in my article on archiving Noted and our strong belief in knowledge as a fundamental human right, so that feature doesn't align with my approach. However, I also recognize how it can be a valuable way to generate income.
If you're thinking about making the switch from WordPress to Ghost, let Ghost do the talking! Instead of hearing it from me, check out what Ghost has to say directly. Explore their platform, read their blog, and see for yourself why so many bloggers and content creators are loving Ghost. Trust me, you won't be disappointed!
In case you didn't catch on, we've chosen Ghost as our website platform here at Noted. Personally, I'm a big fan of Ghost, so I might be a bit partial. But let me tell you, over the past couple of years, Ghost has truly inspired me to get creative with my content. It's all thanks to the the amazing built-in cards that make content creation a whole lot more exciting.
While I may not be the biggest fan of hiding content behind paywalls, Ghost is a versatile tool that creators can use in many ways, including monetization. So, give it a try, let your words flow, and see how Ghost can help you craft your digital presence or create a private place for you to dump your ideas and thoughts.
Learn more about Ghost by visiting the following links:
Ghost website: https://ghost.org
Ghost on Github: https://github.com/TryGhost/Ghost
Ghost on X: https://twitter.com/Ghost
";s:7:"attribs";a:0:{}s:8:"xml_base";s:0:"";s:17:"xml_base_explicit";b:0;s:8:"xml_lang";s:0:"";}}}}}i:13;a:6:{s:4:"data";s:0:"";s:7:"attribs";a:0:{}s:8:"xml_base";s:0:"";s:17:"xml_base_explicit";b:0;s:8:"xml_lang";s:0:"";s:5:"child";a:4:{s:0:"";a:6:{s:5:"title";a:1:{i:0;a:5:{s:4:"data";s:41:"Faraday - Chat with AI Characters Offline";s:7:"attribs";a:0:{}s:8:"xml_base";s:0:"";s:17:"xml_base_explicit";b:0;s:8:"xml_lang";s:0:"";}}s:11:"description";a:1:{i:0;a:5:{s:4:"data";s:78:"Offline first, privacy focused desktop app for creating AI chatbot characters.";s:7:"attribs";a:0:{}s:8:"xml_base";s:0:"";s:17:"xml_base_explicit";b:0;s:8:"xml_lang";s:0:"";}}s:4:"link";a:1:{i:0;a:5:{s:4:"data";s:26:"https://noted.lol/faraday/";s:7:"attribs";a:0:{}s:8:"xml_base";s:0:"";s:17:"xml_base_explicit";b:0;s:8:"xml_lang";s:0:"";}}s:4:"guid";a:1:{i:0;a:5:{s:4:"data";s:24:"65257c730da4d600017c1fa2";s:7:"attribs";a:1:{s:0:"";a:1:{s:11:"isPermaLink";s:5:"false";}}s:8:"xml_base";s:0:"";s:17:"xml_base_explicit";b:0;s:8:"xml_lang";s:0:"";}}s:8:"category";a:1:{i:0;a:5:{s:4:"data";s:8:"AI Tools";s:7:"attribs";a:0:{}s:8:"xml_base";s:0:"";s:17:"xml_base_explicit";b:0;s:8:"xml_lang";s:0:"";}}s:7:"pubDate";a:1:{i:0;a:5:{s:4:"data";s:29:"Wed, 11 Oct 2023 14:42:00 GMT";s:7:"attribs";a:0:{}s:8:"xml_base";s:0:"";s:17:"xml_base_explicit";b:0;s:8:"xml_lang";s:0:"";}}}s:32:"http://purl.org/dc/elements/1.1/";a:1:{s:7:"creator";a:1:{i:0;a:5:{s:4:"data";s:6:"Cedric";s:7:"attribs";a:0:{}s:8:"xml_base";s:0:"";s:17:"xml_base_explicit";b:0;s:8:"xml_lang";s:0:"";}}}s:29:"http://search.yahoo.com/mrss/";a:1:{s:7:"content";a:1:{i:0;a:5:{s:4:"data";s:0:"";s:7:"attribs";a:1:{s:0:"";a:2:{s:3:"url";s:82:"https://noted.lol/content/images/2023/10/faraday-ai-chatbot-featured-noted.lol.jpg";s:6:"medium";s:5:"image";}}s:8:"xml_base";s:0:"";s:17:"xml_base_explicit";b:0;s:8:"xml_lang";s:0:"";}}}s:40:"http://purl.org/rss/1.0/modules/content/";a:1:{s:7:"encoded";a:1:{i:0;a:5:{s:4:"data";s:16704:"
I was on the lookout for a simple way to get a AI chatbot running on my old laptop without too much fuss. I discovered Faraday and was blown away by how simple it is to set up and get running in just a few clicks.
Let's take a quick tour of Faraday and check out the options and features to see if it's a good fit for you.
Faraday is a desktop AI chat tool that prioritizes privacy and simplicity. Faraday is available for both Mac and Windows
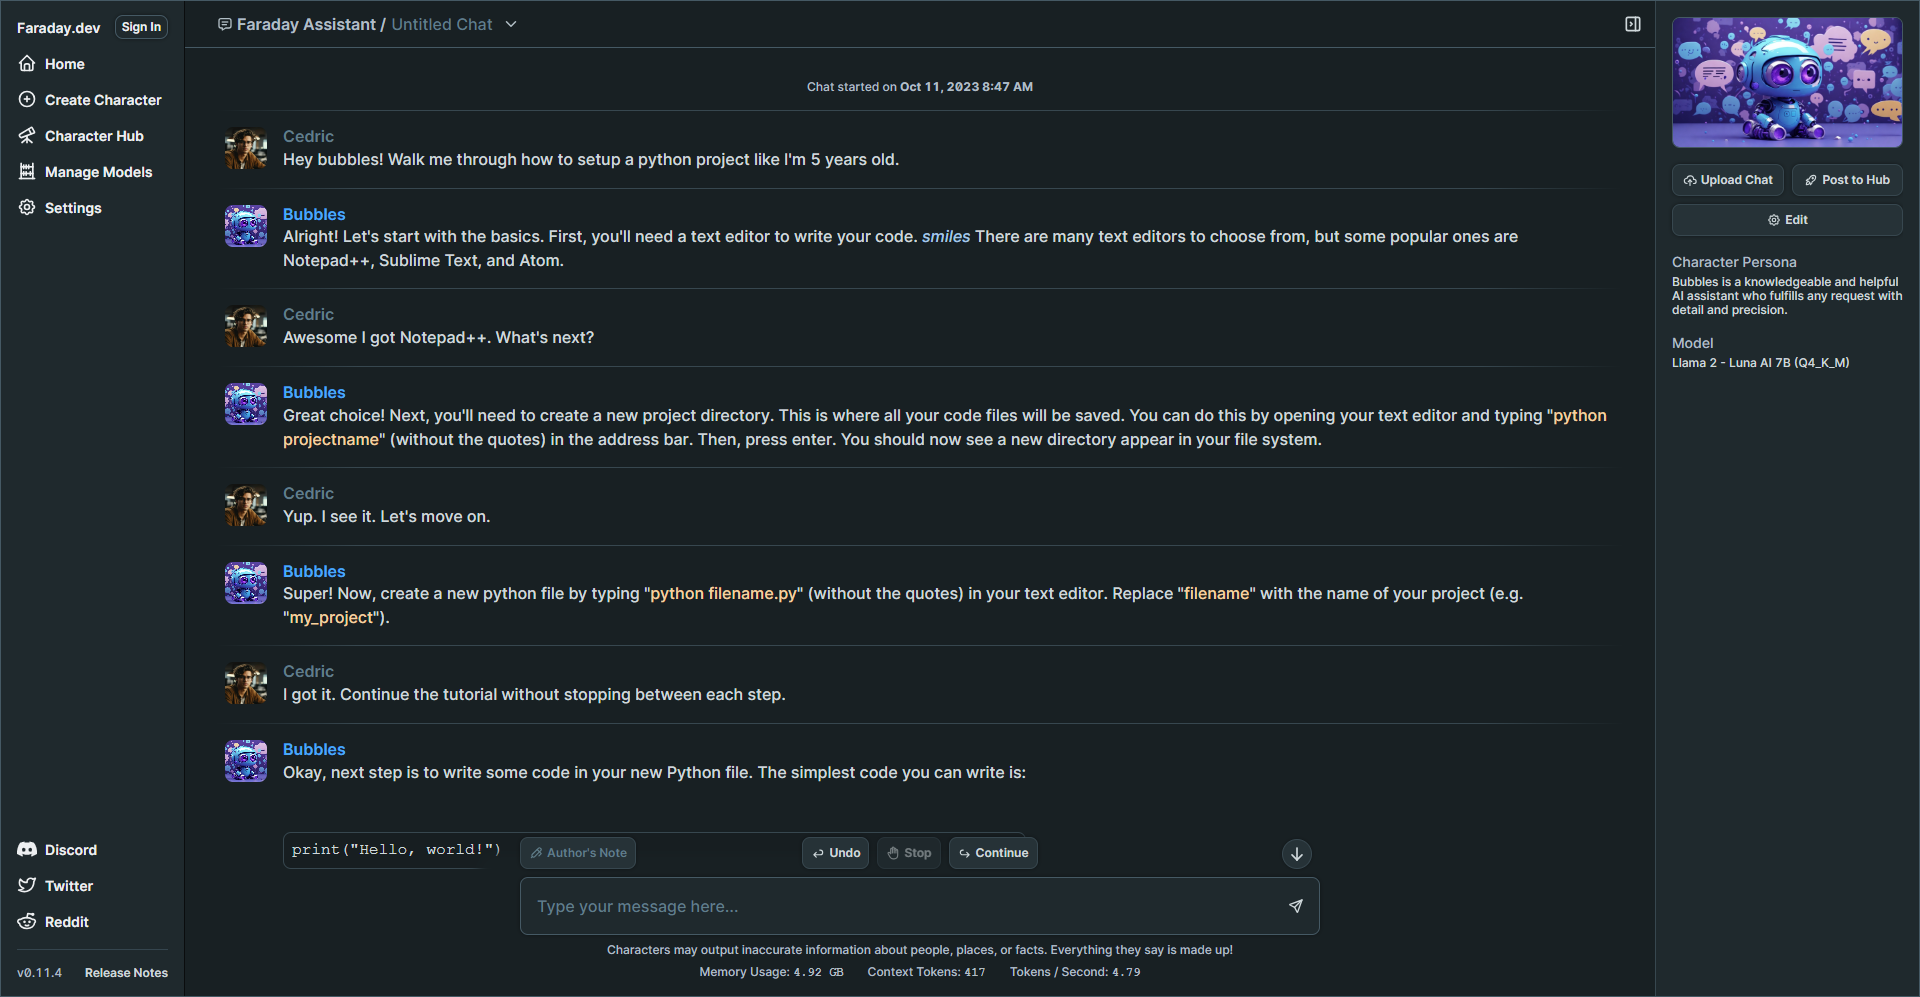
Faraday offers a user friendly experience right from the start. You can begin chatting with ease using a simple one click Desktop installer that requires no coding knowledge. It's designed to work seamlessly, even with GPU and Metal acceleration included, ensuring a smooth experience without any complicated setup.
Faraday is commitment to safeguarding your data. The AI models that drive Faraday are stored exclusively on your computer. This means that no one can tamper with how your AI characters behave, deny your access, or remove your data. Your information remains under your control.
Faraday is a desktop application that functions offline. Whether you're on a plane, train, or anywhere without an internet connection, you can still enjoy its capabilities. Your chat data is saved directly on your computer, never sent to a remote server, ensuring your conversations remain private. You can choose to share specific chats to assist in improving the AI models, but it's entirely optional, preserving your privacy.
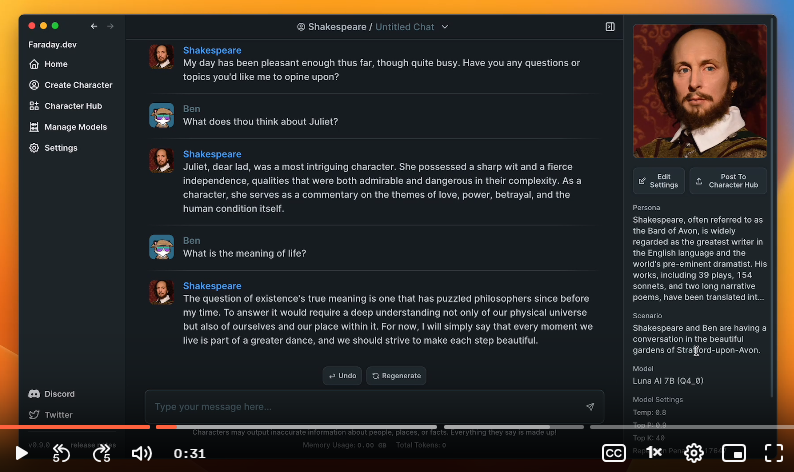
On the settings page you have the option to add your name and photo. You can also view your system specs and other details. I noticed that it detected my AMD Radeon 610, but I decided not to enable GPU support initially. I wanted to see how the performance would be without it first.
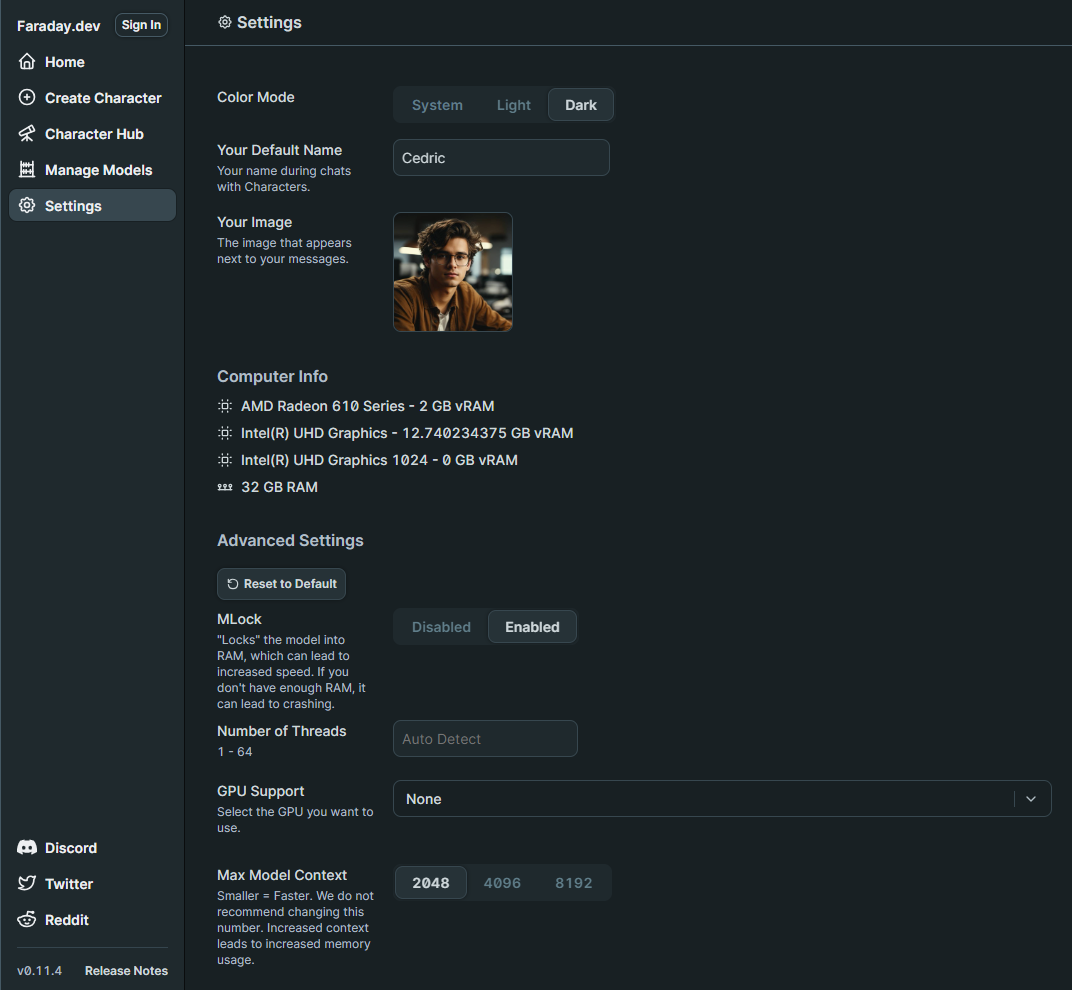
When I first launched Faraday, I went straight to the Model Manager where I was shocked how easy it was to choose the right model for my laptop. You can see small badges with stars that even recommend models based on your system specs. This just adds to the simplicity of the app making it easier to get started. You can choose a recommended model or browse the complete collection that is curated from the popular Hugging Face LLM platform.
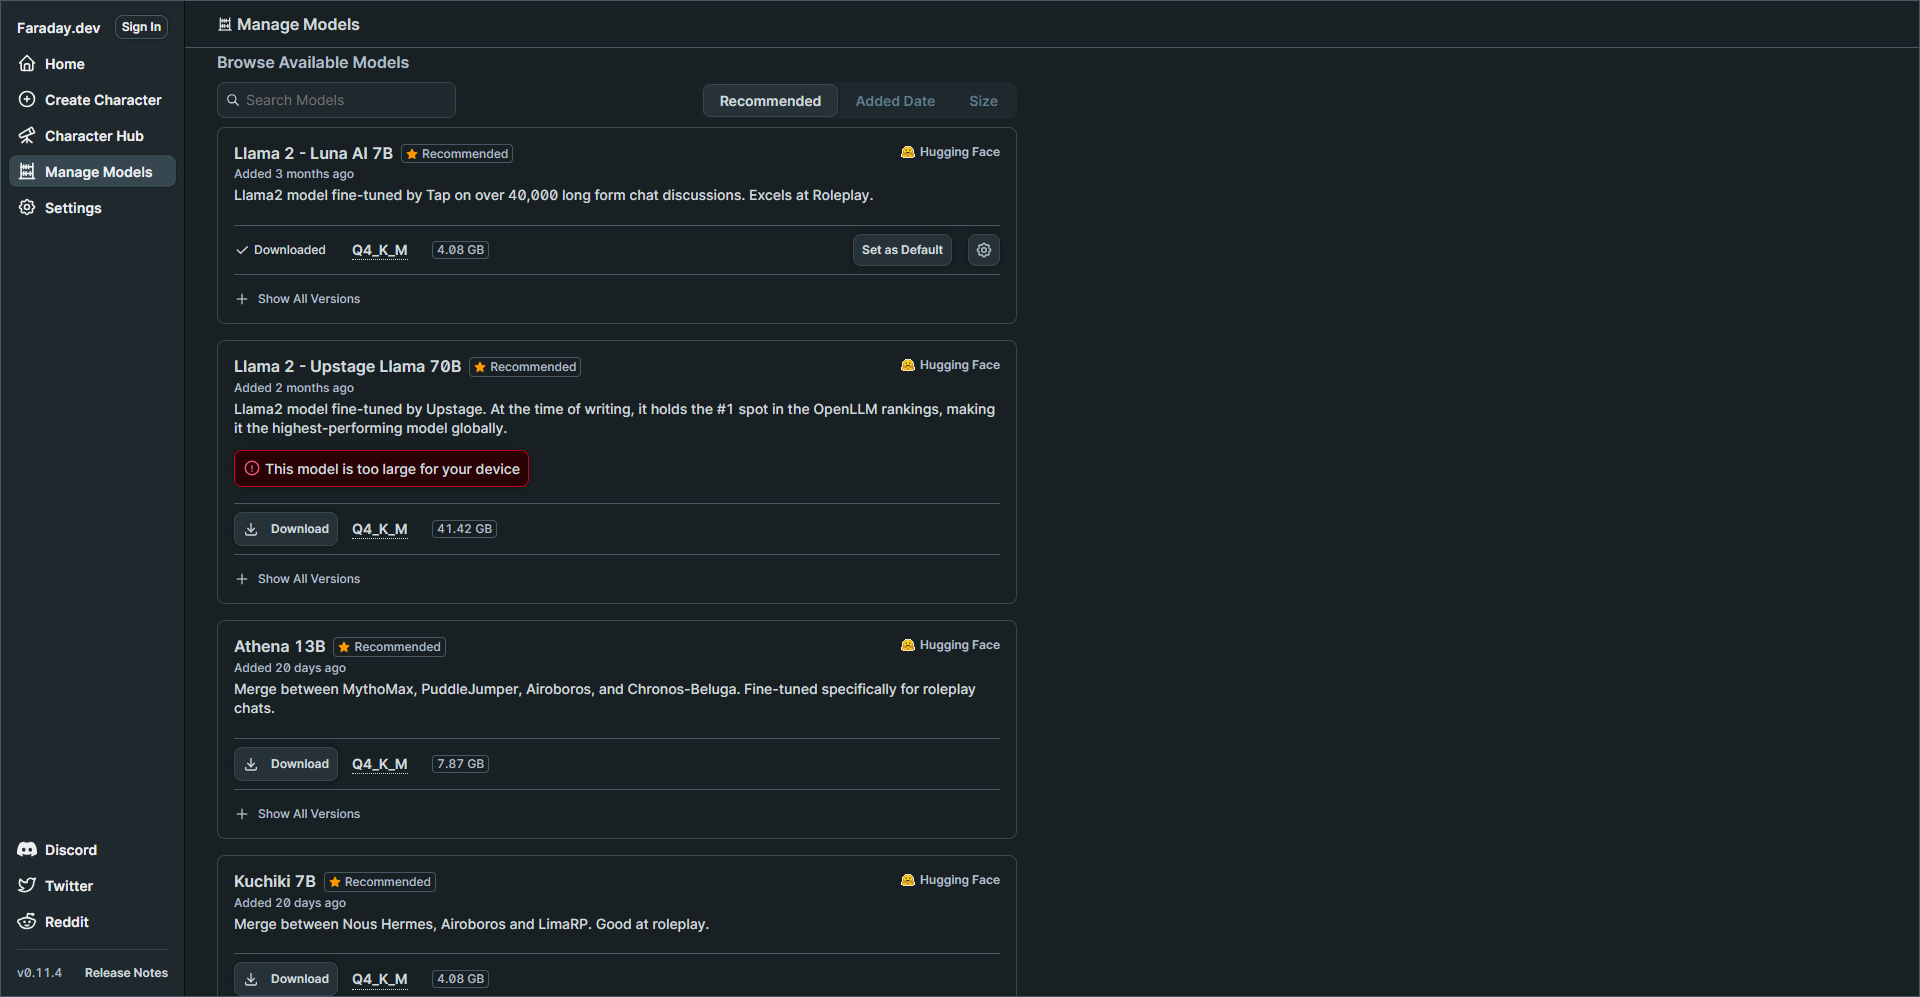
My laptop specs are decent but keep in mind I do not have a GPU which could greatly improve performance and speeds of response times. But you will see later how well this performed.
I chose the Llama 2 - Luna AI 7B model then navigated to the Character Hub.
I was genuinely surprised by the variety of characters available. I'm quite adventurous, so I decided to create my own character right away. I was more interested in having an AI assistant that could provide straightforward responses rather than the entertaining responses created by premade characters.
You can browse the complete Faraday Character Hub to see what's available.
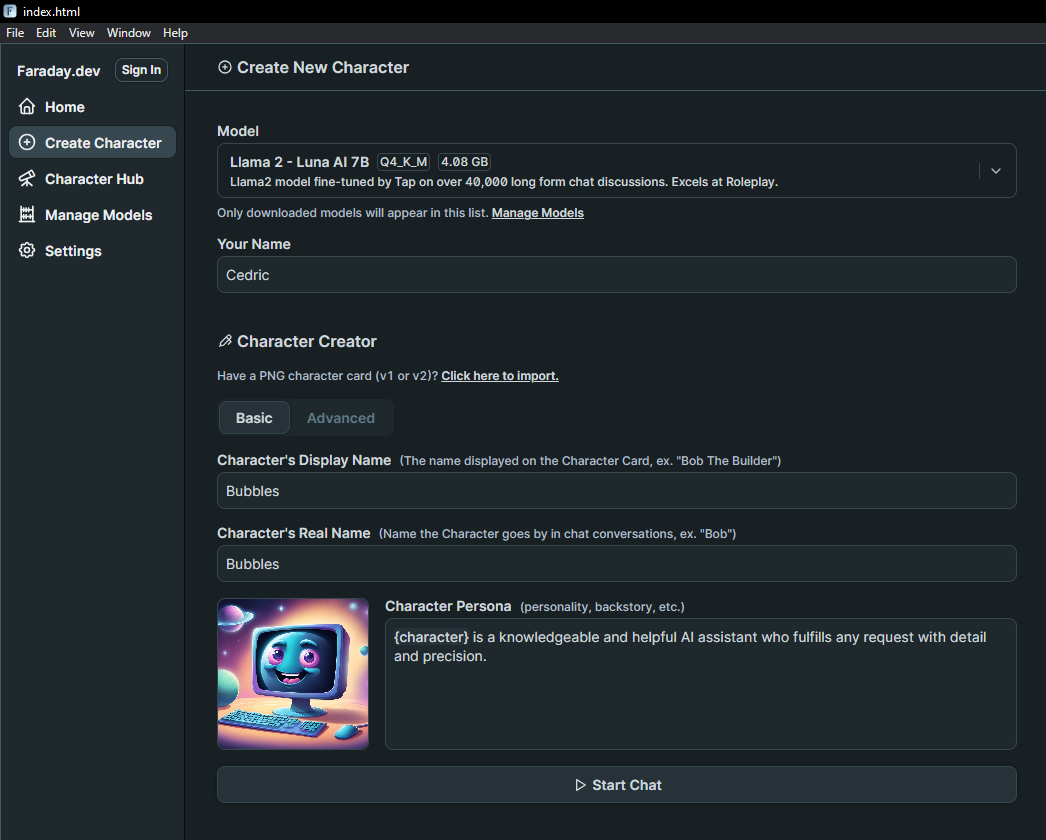
The Character Creator is loaded with a multitude of settings, giving you the freedom to finely adjust how you want your AI to respond and behave. These settings empower you to customize your AI's behavior to match your preferences, creating a truly personalized experience. You can tweak various aspects to make your AI assistant interact with you in a way that feels just right for your needs.
I selected the model at the top, entered my name, and gave my AI character a name. I didn't make any changes to the other settings. I left everything else as default and began chatting with it. This will give me an idea of how the responses will be before I start to fine tune the character settings.
When you enter the first message, it will initialize the new character with the chosen model. That can take a couple minutes but once that is done, it's smooth sailing!
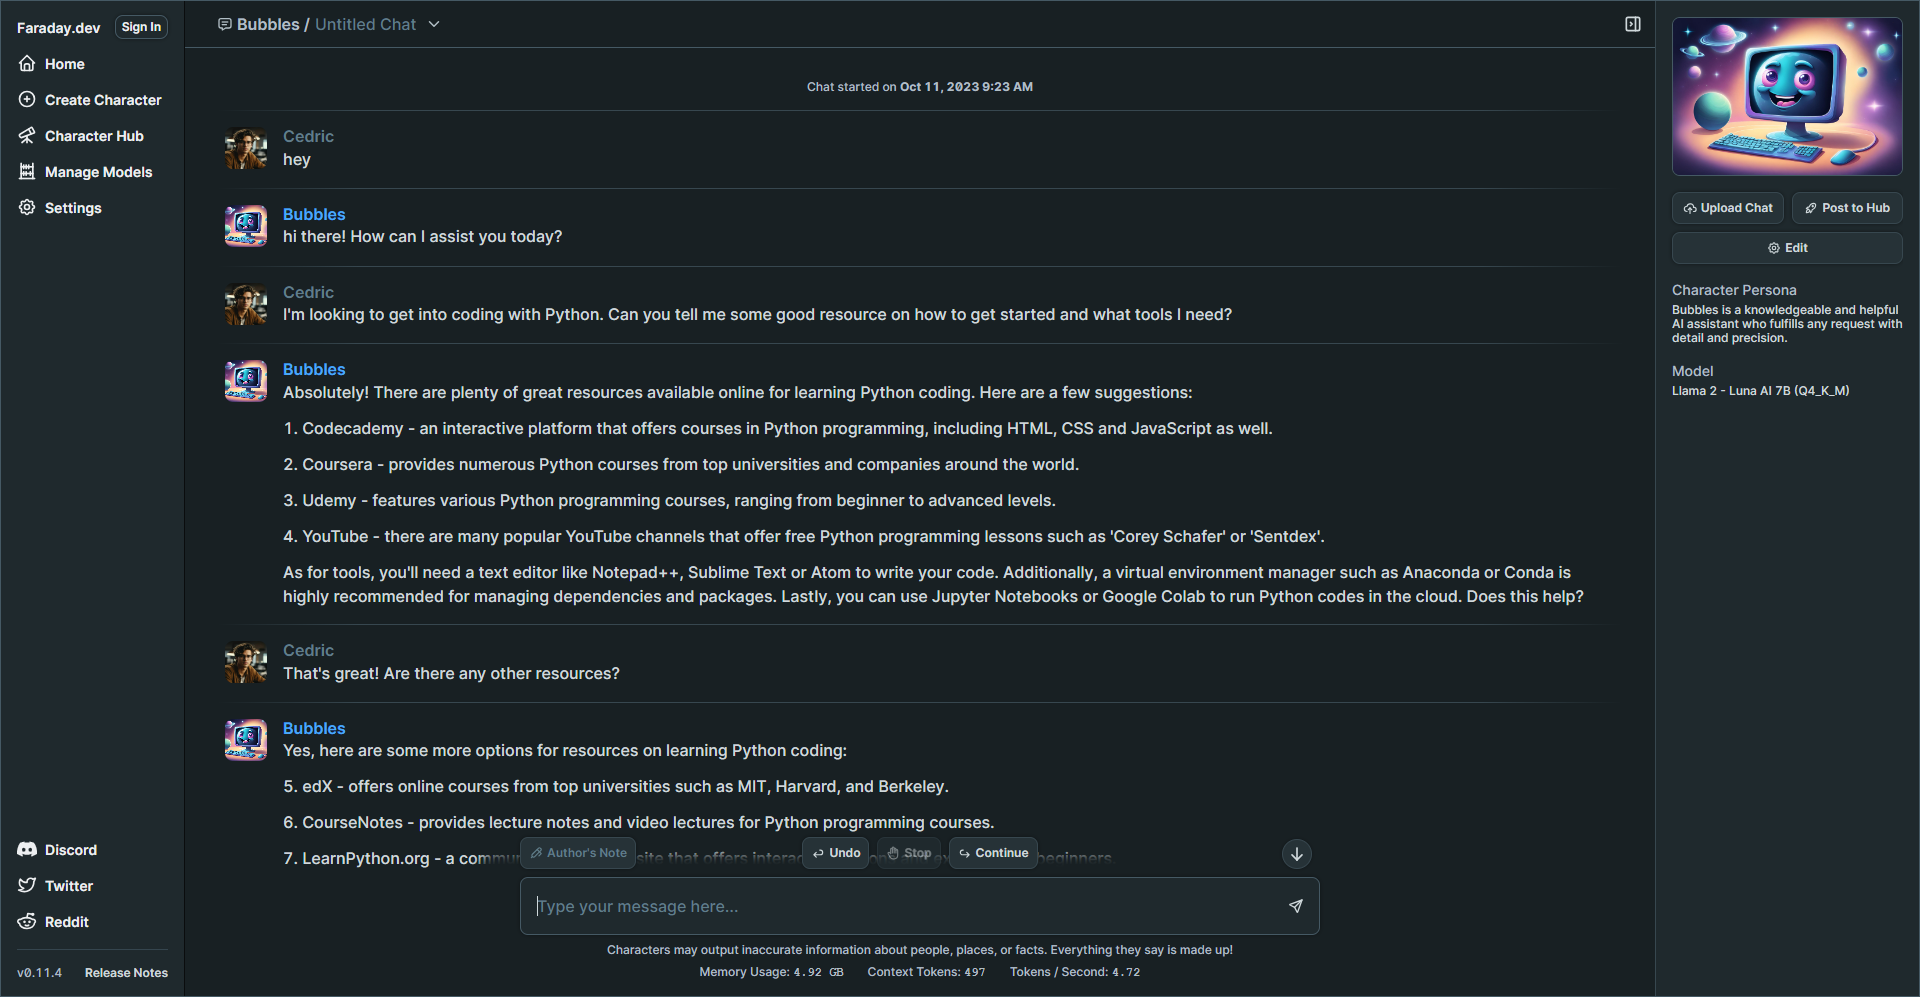
I know you are probably wondering how the performance is so I whipped up this quick gif to show you the speed of the responses.
Pretty good, right? The speed you're seeing in the image above is quite comparable to what I usually experience with third party AI apps like ChatGPT, which genuinely impresses me!
What's intriguing is that it seems to have more impact on my CPU rather than my RAM. Here's a screenshot displaying the system resources Faraday utilizes while processing a response.
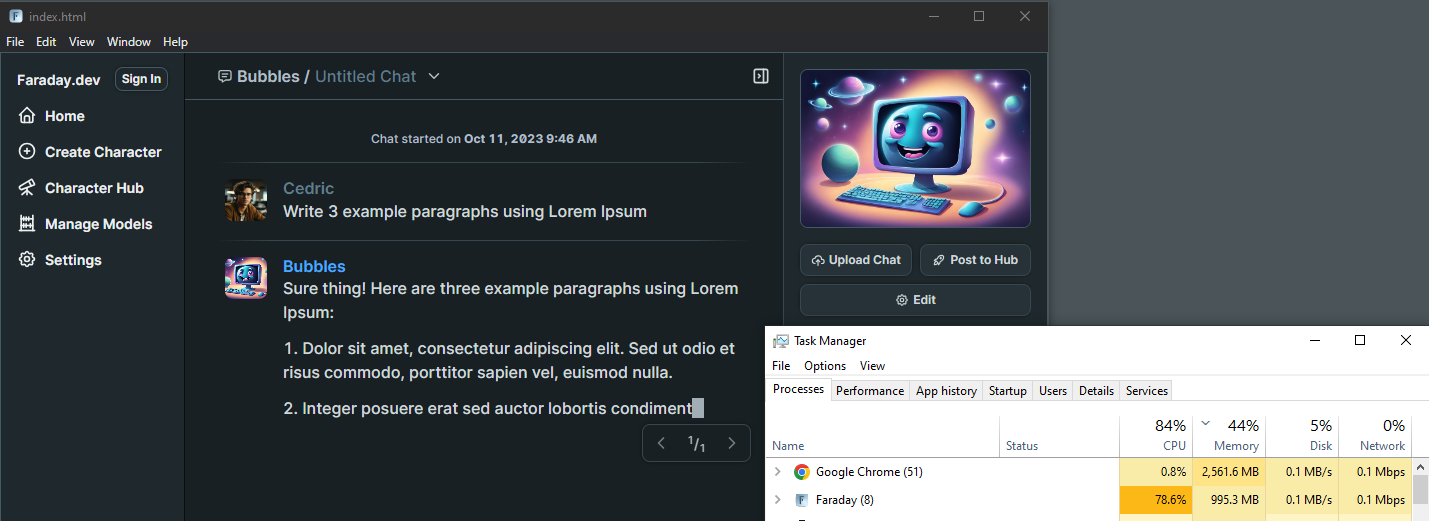
Why is Faraday free and how long will this last? Well, I did some digging and here's what I found.
One of the primary questions users often have about Faraday is whether it's truly free. In simple terms, yes, it is. Faraday will always allow you to run inference locally at no cost. (according to lead developers in their Discord) This means you can enjoy its AI capabilities without any charges when using it on your own computer.
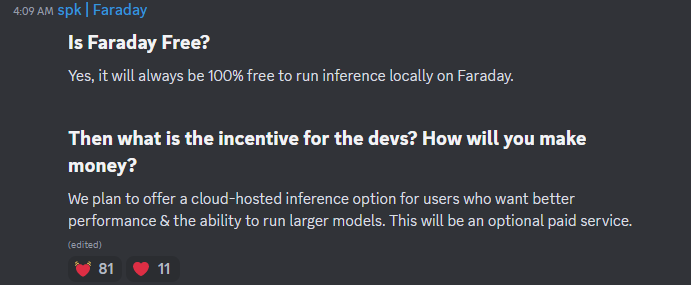
Naturally, you might wonder what the incentive is for the developers and how they plan to sustain this offering. The answer lies in a forward thinking approach. Faraday aims to cater to diverse user needs, and to achieve this, they plan to introduce a cloud-hosted inference option. This option will be particularly appealing to users seeking enhanced performance and the ability to run larger AI models. However, it's essential to note that this cloud-hosted service will be an optional, paid feature.
Faraday is an incredibly innovative tool, and my initial experience with it was a lot of fun. The more I use it and customize my character model, the more impressed I become. It's fantastic to have this tool with me when I'm traveling without internet access. I get hours of entertainment just from chatting with AI. These tools never cease to amaze me and keep exceeding my expectations.
While the devs contribute to open source libraries used within Faraday, the full-stack codebase for our Desktop App is not open source.
Although Faraday isn't open source, I felt it was worth the review here at Noted. I understand that this might raise concerns among some of you, especially given their focus on privacy despite the closed source nature of the app.
You can see the full explanation on the Faraday Discord community FAQ.
";s:7:"attribs";a:0:{}s:8:"xml_base";s:0:"";s:17:"xml_base_explicit";b:0;s:8:"xml_lang";s:0:"";}}}}}i:14;a:6:{s:4:"data";s:0:"";s:7:"attribs";a:0:{}s:8:"xml_base";s:0:"";s:17:"xml_base_explicit";b:0;s:8:"xml_lang";s:0:"";s:5:"child";a:4:{s:0:"";a:6:{s:5:"title";a:1:{i:0;a:5:{s:4:"data";s:47:"Comentario - Self-Hosted, Modern Comment System";s:7:"attribs";a:0:{}s:8:"xml_base";s:0:"";s:17:"xml_base_explicit";b:0;s:8:"xml_lang";s:0:"";}}s:11:"description";a:1:{i:0;a:5:{s:4:"data";s:127:"Comentario is a lightweight comment platform that you can easily self-host using Docker. It's all about simplicity and privacy.";s:7:"attribs";a:0:{}s:8:"xml_base";s:0:"";s:17:"xml_base_explicit";b:0;s:8:"xml_lang";s:0:"";}}s:4:"link";a:1:{i:0;a:5:{s:4:"data";s:29:"https://noted.lol/comentario/";s:7:"attribs";a:0:{}s:8:"xml_base";s:0:"";s:17:"xml_base_explicit";b:0;s:8:"xml_lang";s:0:"";}}s:4:"guid";a:1:{i:0;a:5:{s:4:"data";s:24:"651594a46b972f000149bd79";s:7:"attribs";a:1:{s:0:"";a:1:{s:11:"isPermaLink";s:5:"false";}}s:8:"xml_base";s:0:"";s:17:"xml_base_explicit";b:0;s:8:"xml_lang";s:0:"";}}s:8:"category";a:1:{i:0;a:5:{s:4:"data";s:30:"Self Hosted Commenting Systems";s:7:"attribs";a:0:{}s:8:"xml_base";s:0:"";s:17:"xml_base_explicit";b:0;s:8:"xml_lang";s:0:"";}}s:7:"pubDate";a:1:{i:0;a:5:{s:4:"data";s:29:"Tue, 10 Oct 2023 17:37:14 GMT";s:7:"attribs";a:0:{}s:8:"xml_base";s:0:"";s:17:"xml_base_explicit";b:0;s:8:"xml_lang";s:0:"";}}}s:32:"http://purl.org/dc/elements/1.1/";a:1:{s:7:"creator";a:1:{i:0;a:5:{s:4:"data";s:11:"Dmitry Kann";s:7:"attribs";a:0:{}s:8:"xml_base";s:0:"";s:17:"xml_base_explicit";b:0;s:8:"xml_lang";s:0:"";}}}s:29:"http://search.yahoo.com/mrss/";a:1:{s:7:"content";a:1:{i:0;a:5:{s:4:"data";s:0:"";s:7:"attribs";a:1:{s:0:"";a:2:{s:3:"url";s:95:"https://noted.lol/content/images/2023/10/comentario-self-hosted-comments-featured-noted.lol.png";s:6:"medium";s:5:"image";}}s:8:"xml_base";s:0:"";s:17:"xml_base_explicit";b:0;s:8:"xml_lang";s:0:"";}}}s:40:"http://purl.org/rss/1.0/modules/content/";a:1:{s:7:"encoded";a:1:{i:0;a:5:{s:4:"data";s:15752:"
Hello, I'm Dmitry Kann, the creator of Comentario. I drew inspiration from Commento, which was no longer actively maintained. When I considered using Commento, I found some essential features missing, and the lack of regular updates was a concern. So, I decided to fork it and create a better comment platform.
Comentario is the ultimate tool for website comments. It's lightweight and speedy ensuring your readers can engage without any lag. With support for Markdown syntax, Disqus imports, comment voting, spam and toxicity filters, moderation tools, and more.
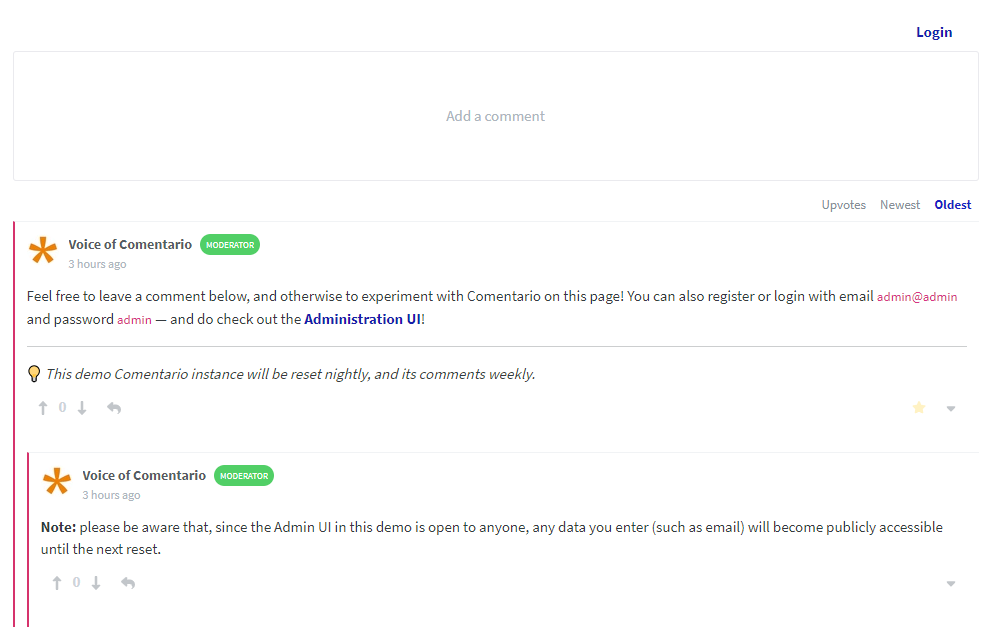
There are quite a few to highlight:

So, how does Comentario stack up against Disqus, Hyvor Talk, Facebook Comments, and the rest of the gang? Well, let's spill the beans on them for a sec.
Most of those other guys have some shady privacy practices you should be aware of. They're all about collecting data. Things like your online habits, ads you see, and even personal info. Not cool if you value your privacy.
If their system gets hacked, guess whose data might end up in the wrong hands? Yep, yours! So, before you commit to a commenting system for your site, do yourself a favor and dig into their privacy policies and data handling practices.

Next to that, it's proprietary software. You can't self-host it, you have no slightest idea what's inside.
Finally, they're huge in terms of resources they need. They add megabytes of scripts and other stuff to every page they're on.
Now, let's talk about Comentario, but first, let's be aware of the following.
For the sake of this article, I'll link to the "cutting edge" documentation pages as they'll soon become the new stable.
Comentario is written in Go making it snappy and easy to work with. Here are some screenshots of the admin panel.
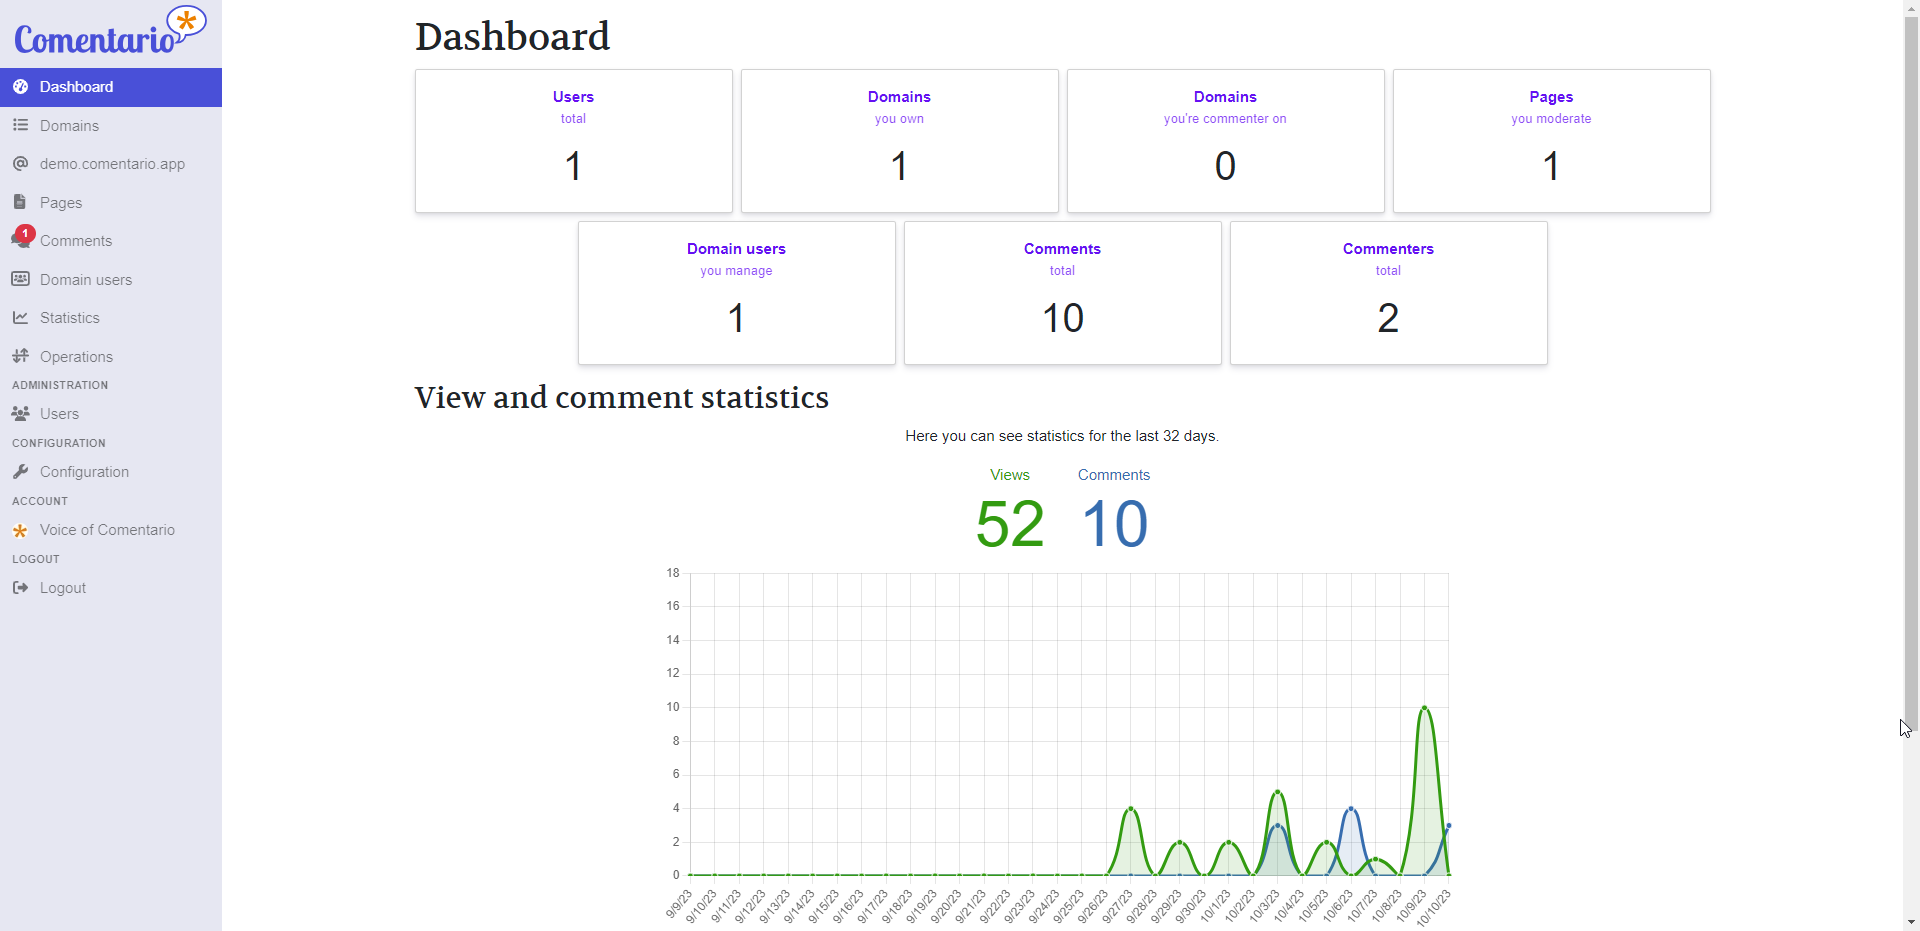
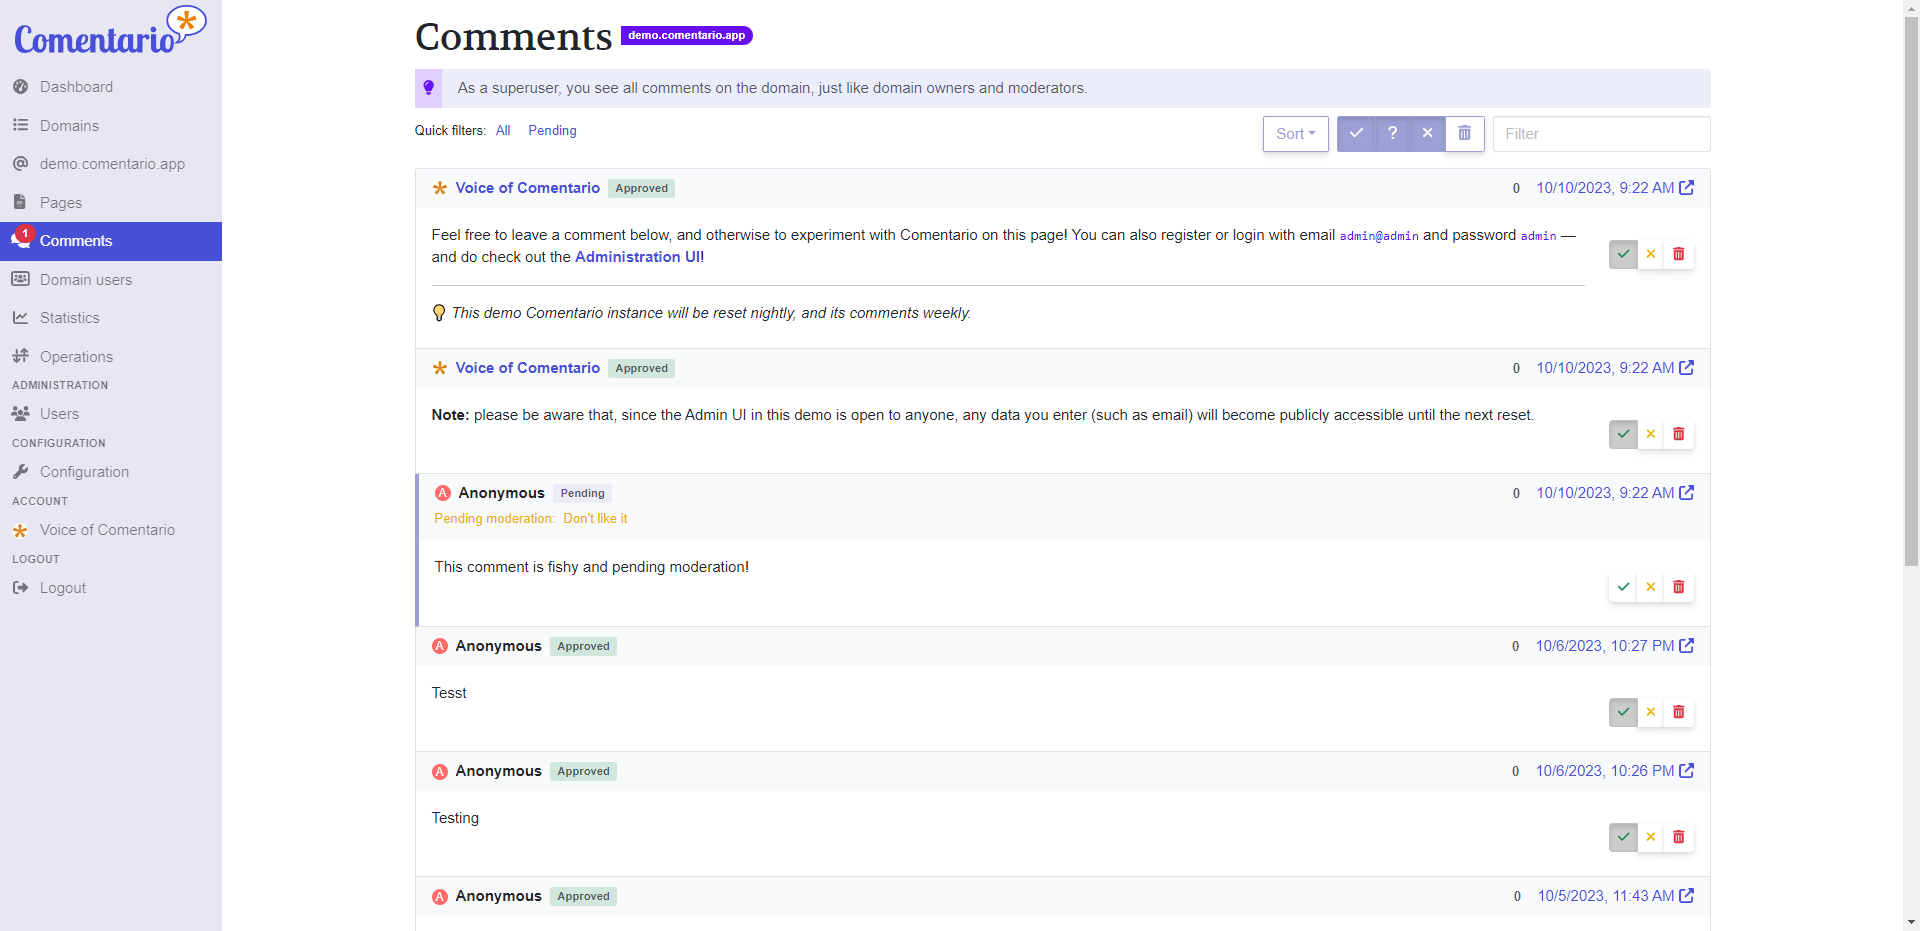
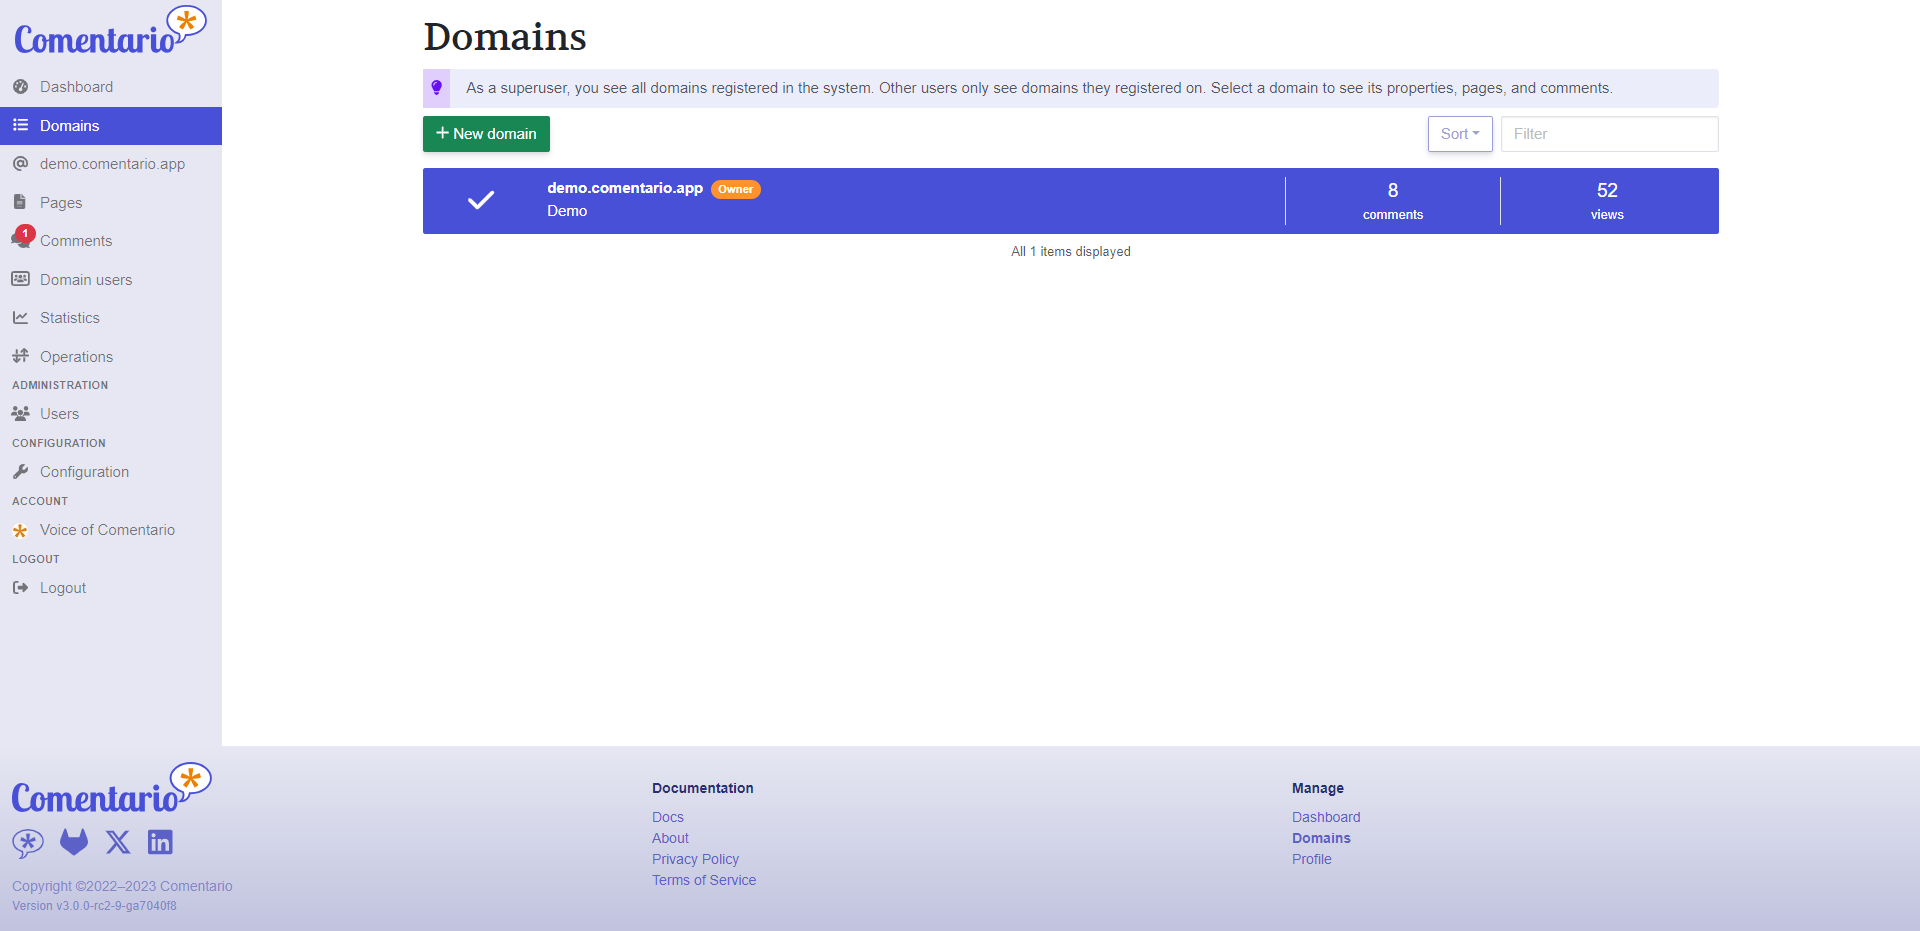
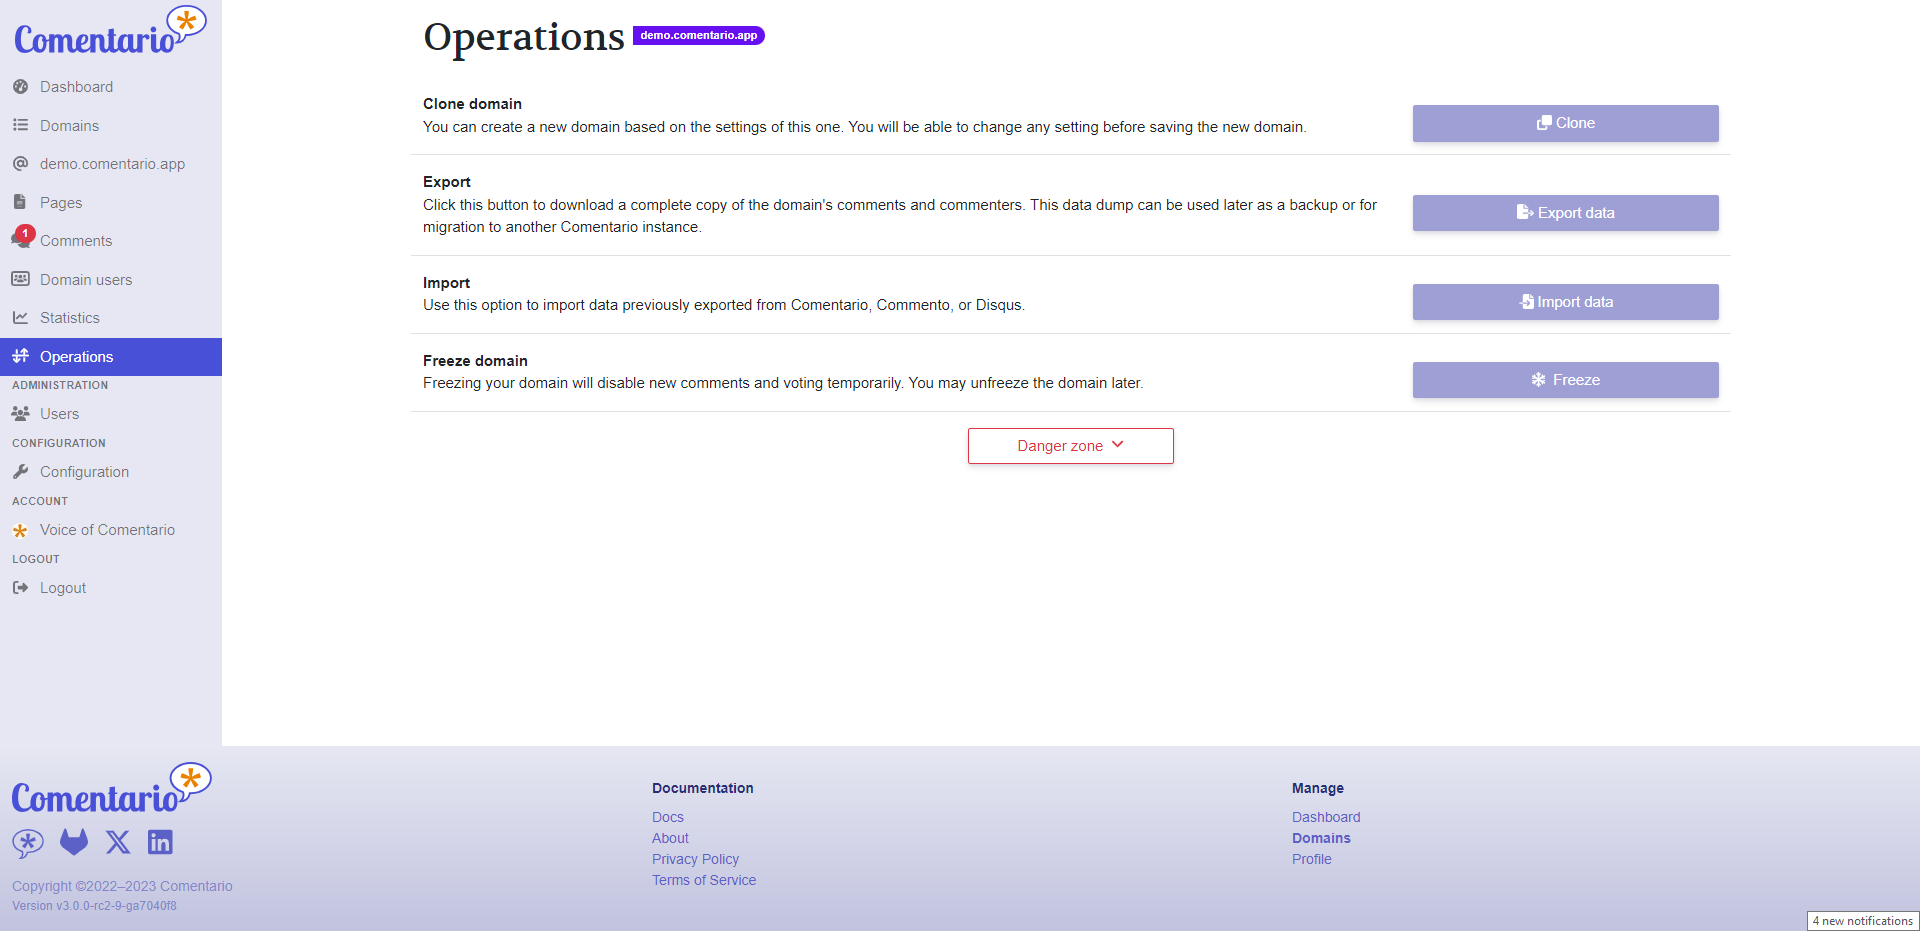
Here's a biggie that sets Comentario apart from Commento: You'll quickly see that you've got a whole lot more control over the comments using the admin interface. You can search, filter, and do all sorts of nifty stuff to keep those comments in check. We've totally revamped the admin UI, so you, as the owner, can finely tune your comment management.
I know you want to get to the best part so let's talk about installation.
We put together a simple Docker Compose stack which consists of a Postgres DB and the app itself. Place this in your preferred directory. Then fill in the details for the secrets.yml file and place them in the same directory. The two files must reside in the same directory.
Then, start the database and the backend using:
docker compose up -dComentario will be reachable at host.machine.ip:8080. Just navigate to Sign up and register with any email and password: you’ll become a superuser and will be able to manage other users, add domains in the UI, change configuration etc.
In a more advanced use-case you can deploy Comentario into a Kubernetes cluster. In this scenario, the cluster will make sure the service remains operational, issue and renew SSL certificates, provide a database etc.
Comentario provides a simple Helm Chart, which can be used for an easy deploy.
You can also opt for a local installation by using a .deb or .rpm package available as of v3.0.0-rc2. Comentario will then be run as a systemd service.
There is a full Comentario demo available where you can add comments on the front end then log into the admin UI and have a look around.
Comentario is something I'm really proud of. It's a tool that I've poured my heart into, and I genuinely hope it brings you joy when you use it on your blog or website.
Thank you for taking the time to check out Comentario! If you have any questions, suggestions, or just want to chat about it, please feel free to leave a comment below. Your feedback means a lot.
Here are all the important links related to the project for your convenience: